Imagine stepping into a kitchen that sparks your creativity every time you cook—that’s the magic of well-inspired kitchen design! Kitchen Inspiration Ideas have gained immense popularity because they turn everyday spaces into personal havens of style and functionality, making cooking and gathering more enjoyable.
In this article, you’ll find a diverse array of ideas that cater to different tastes and lifestyles. Whether you’re into sleek modern aesthetics, cozy rustic charm, or innovative storage solutions, these ideas will ignite your culinary passion and help you craft a space that feels uniquely yours.
1. Open Shelving with Stylish Dishware for a Modern Look
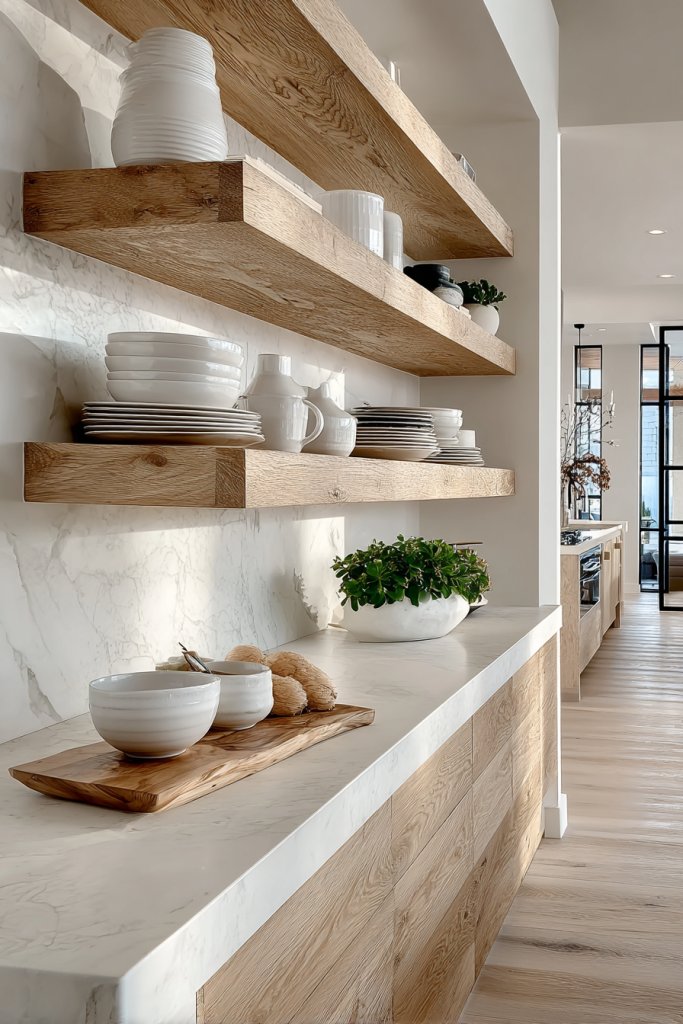
Ever feel overwhelmed by cluttered countertops and cabinets that hide your beautiful dishware? A modern kitchen needs a way to display essentials stylishly while keeping everything accessible. Open shelving offers a solution that combines practicality with visual appeal. It’s perfect for those who crave an organized yet trendy space.
Imagine sleek, floating wooden shelves mounted on a clean, neutral wall. Brightly colored plates and textured bowls are arranged thoughtfully, creating a vibrant mosaic of textures and hues. The open design allows light to flow freely, making the kitchen feel larger and more inviting. Every dish is within arm’s reach, inviting you to cook and entertain effortlessly.
You can choose minimalist metal brackets for an industrial vibe or rustic reclaimed wood for cozy charm. Adjust the height and depth of shelves based on your storage needs or style preferences. For a seasonal touch, swap out dishware with festive or themed pieces. Small kitchens benefit from narrow shelves, while larger spaces can handle more elaborate displays.
Start by selecting sturdy, wall-mounted brackets suited for your wall type. Use matching or contrasting dishware to create visual interest. Arrange your dishes by size, color, or function, balancing the display for aesthetic appeal. Secure the shelves tightly to avoid accidents, especially if you have kids or pets. Regularly dust and clean the open surfaces to maintain a fresh look.
Add decorative elements like vintage mugs, handcrafted bowls, or small potted herbs in decorative containers (no greenery, remember!). Incorporate lighting underneath or above the shelves for a warm glow that highlights your collection. Personal touches like framed recipe cards or unique spoon rests can make the space truly yours. Consider using open shelving to showcase special dinnerware for holidays or celebrations.
Open shelving turns your kitchen into a gallery of your personality and style. It encourages you to curate a collection that reflects your taste, making cooking more inspiring. Plus, it’s a simple upgrade that transforms the space without a major renovation. Your friends will wonder how you achieved such a chic yet functional look!
2. Bold Backsplash Tiles as a Focal Point
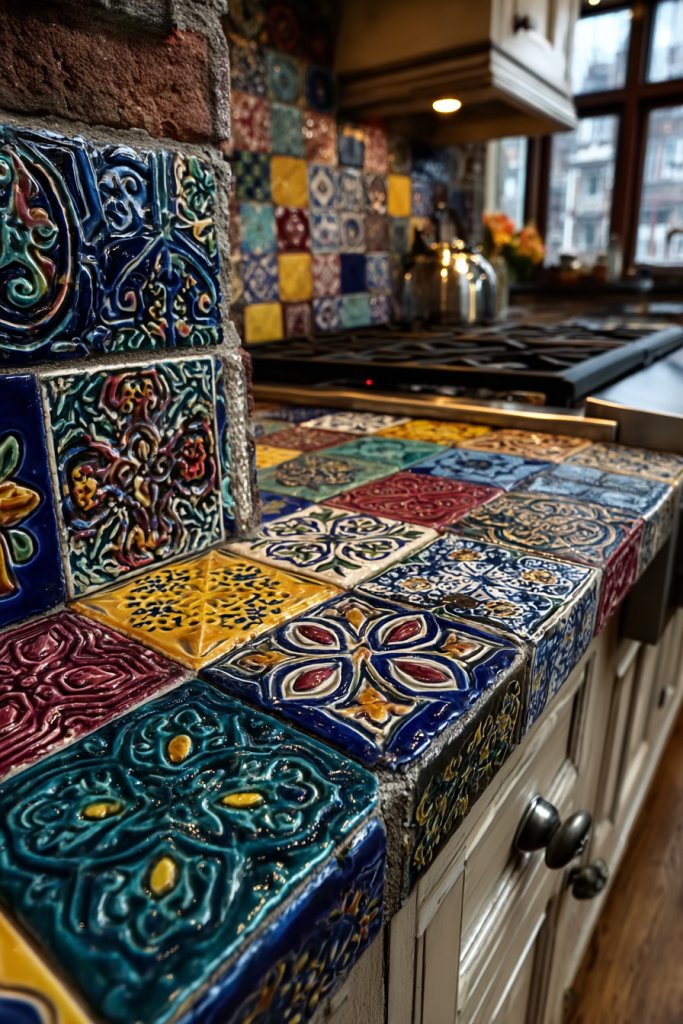
Tired of bland, generic walls behind your stove? A bold backsplash can instantly elevate your kitchen’s style and make a statement. It’s an easy way to inject personality and color without overhauling your entire space. Who said kitchen design has to be boring?
Picture vibrant geometric tiles or intricate patterned ceramics lining the wall behind your cooking area. The tiles catch the eye with their vivid hues and detailed designs, creating a rich focal point. The reflective surface of glossy tiles adds depth, bouncing light around and making the space appear brighter. It transforms a plain wall into a work of art.
Choose from a variety of patterns—modern abstracts, vintage motifs, or textured 3D tiles—to match your style. For small kitchens, light-colored tiles with subtle patterns can provide visual interest without overwhelming. Larger kitchens can handle bolder designs or contrasting grout colors for extra pop. Seasonal updates or removable decals can keep the look fresh over time.
Start by selecting durable, water-resistant tiles suitable for kitchen environments. Prepare your wall by cleaning and smoothing the surface. Use spacers for even grout lines and apply adhesive evenly with a notched trowel. Carefully place each tile, ensuring pattern alignment. Seal the grout once dried to prevent stains and moisture damage. For DIYers, online tutorials can help with pattern planning and installation tips.
Incorporate metallic or matte grout for a customized finish. Mix and match tile styles for a unique, eclectic look. Consider adding a thin strip of LED lighting beneath cabinets to highlight the backsplash. You can also frame a section of tiles with decorative molding for a gallery feel. Personal touches like initials or symbols can be embedded into the design.
A striking backsplash acts as the centerpiece of your kitchen, boosting your confidence in DIY projects. It proves that a splash of color and pattern can dramatically change the vibe of your space. Plus, it’s a cost-effective way to achieve high-impact style with minimal structural work. Your kitchen will feel fresh, vibrant, and undeniably yours!
3. Multi-Functional Kitchen Island with Seating
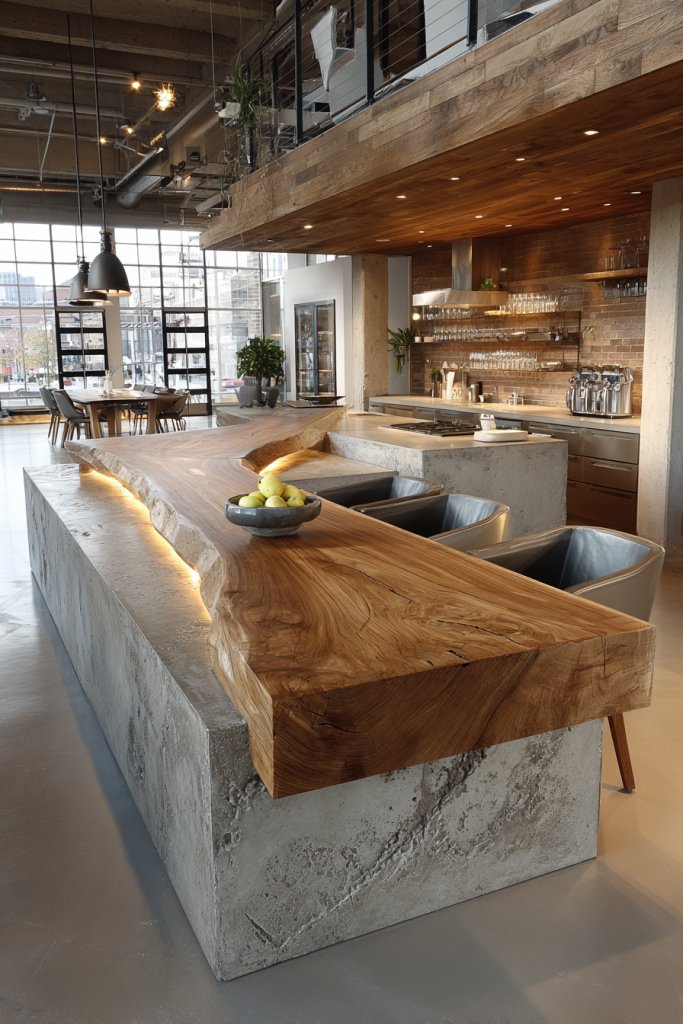
Does your kitchen lack a central hub for cooking and socializing? A multi-functional island can turn your space into the heart of your home. It combines prep work, dining, and storage in one sleek package. No more fighting over counter space or squeezing onto tiny stools.
Visualize a large, sturdy island with a smooth marble or butcher block surface. Surround it with comfortable, stylish stools that invite friends to gather around. Built-in shelves or cabinets underneath provide extra storage for pots, pans, or cookbooks. Pendant or task lighting hangs overhead, illuminating the space while adding a decorative touch. It’s a perfect blend of form and function.
Opt for a compact version for smaller kitchens or an oversized one for open-plan layouts. Use contrasting materials—like a wooden base with a stone top—to add visual interest. For a family-friendly space, include a breakfast bar or extend the surface for larger groups. In seasonal decor, swap out cushions or add decorative bowls for fruit or bread.
Start by measuring your available space and deciding on essential features such as seating and storage. Select durable materials that match your kitchen’s style—wood, metal, or composite surfaces work well. Construct or purchase a pre-made island that fits your dimensions. Install sturdy legs or a base frame, and add built-in shelves or drawers for organized storage. Position lighting fixtures overhead for ample illumination.
Add decorative elements like a colorful runner, patterned cushions, or a unique countertop material. Personalize with hooks or magnetic strips on the sides for utensils or tools. Incorporate a small built-in wine rack or mini-fridge for extra flair. Use removable accessories to adapt the look for holidays or special occasions, making your island a true centerpiece.
A versatile kitchen island elevates your cooking experience and social life. It encourages family gatherings and casual entertaining, making your kitchen more lively. With the right design, you’ll feel proud every time you cook or host. It’s a statement piece that combines practicality with stylish charm—your new favorite spot!
4. Under-Cabinet Lighting to Enhance Ambiance and Functionality
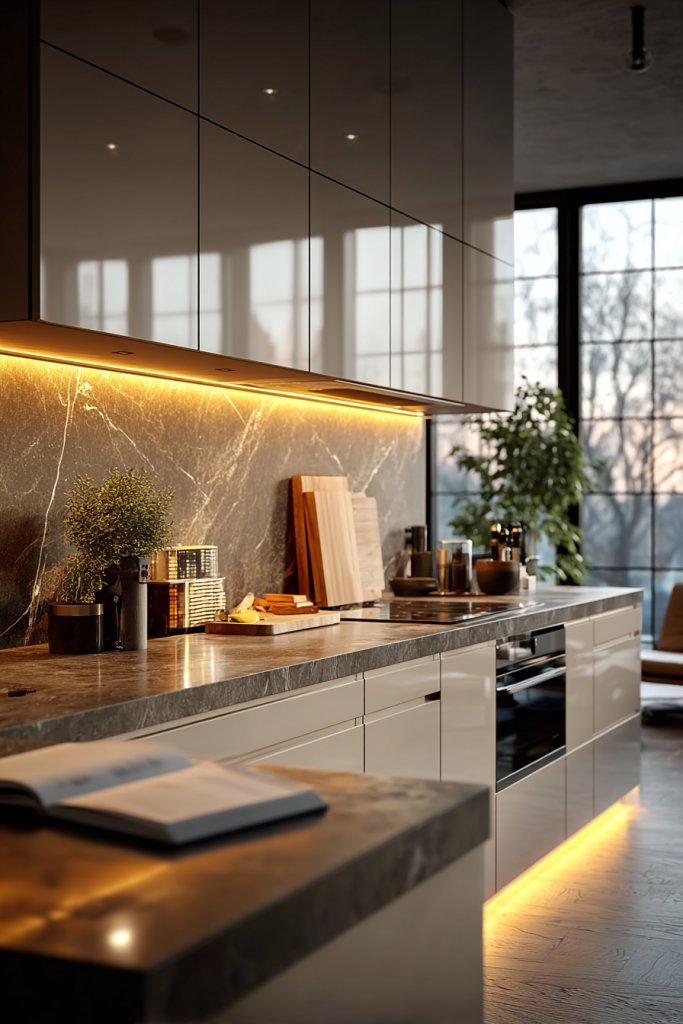
Ever struggled to see what you’re chopping or reading recipes in your poorly lit kitchen? Under-cabinet lighting fixes that by brightening up your workspace. Plus, it adds a cozy ambiance that makes cooking feel less like a chore. Who knew a simple light strip could change the entire vibe?
Imagine warm, soft LED strips glowing beneath your upper cabinets, casting a gentle pool of light onto your countertops. The light highlights your prep area, making it easier to see ingredients and avoid accidents. The subtle glow creates a welcoming atmosphere, perfect for intimate dinners or late-night snacks. It’s like turning on a hidden spotlight that makes your kitchen look professional.
Choose from different color temperatures—warm white for coziness or daylight for task clarity. Flexible LED strips allow you to customize the length and placement for your specific cabinet layout. For a modern look, install sleek, minimal fixtures; for rustic charm, opt for vintage-style bulbs or filament LEDs. Seasonal accents like dimmers help adjust brightness for different moods.
Start by measuring under your cabinets to determine the length of LED strips needed. Choose waterproof or moisture-resistant options if your area is prone to splashes. Use a compatible power supply and dimmer switch if desired. Secure the strips with adhesive backing, making sure they sit flush against the underside of the cabinetry. Connect to a power source and test for even lighting. Consider professional installation for complex setups.
Sync your lighting with smart home systems to control brightness via app or voice commands. Add diffusers or dimmers to create different lighting layers for cooking, cleaning, or entertaining. For added style, install colored LED strips that can change hues for mood setting. Use the lighting as a subtle way to showcase your backsplash or decorative features.
Under-cabinet lighting makes your kitchen more functional and inviting, transforming the space into a cozy, practical hub. It’s a small upgrade with big visual and practical payoffs. Once installed, you’ll wonder how you ever cooked without it. Bright, beautiful, and easy to use, it’s a simple way to boost your kitchen’s overall vibe.
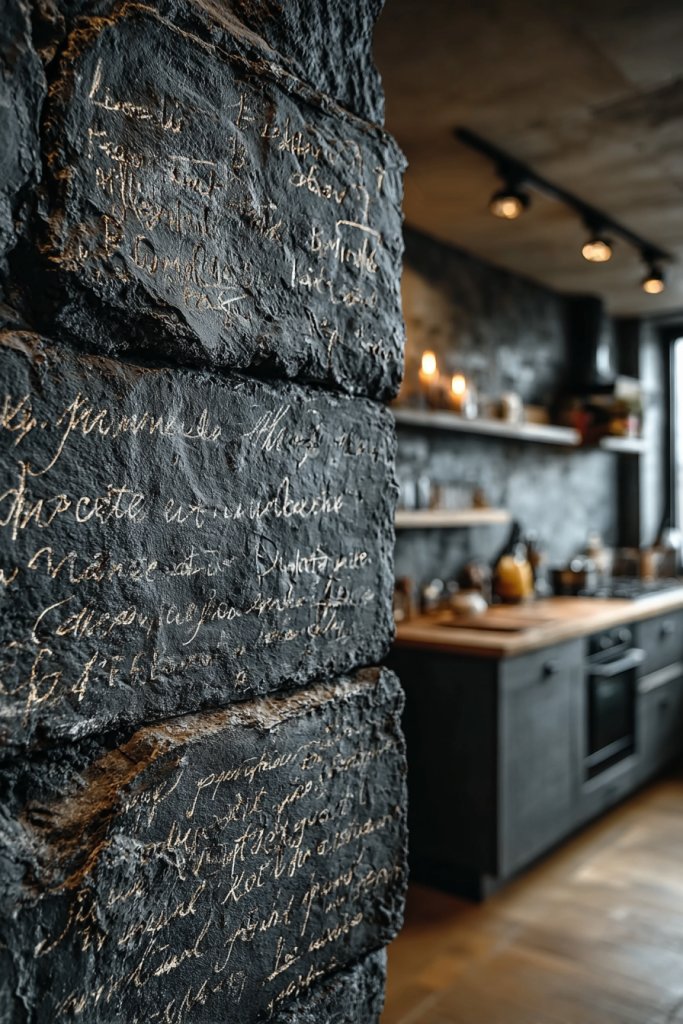
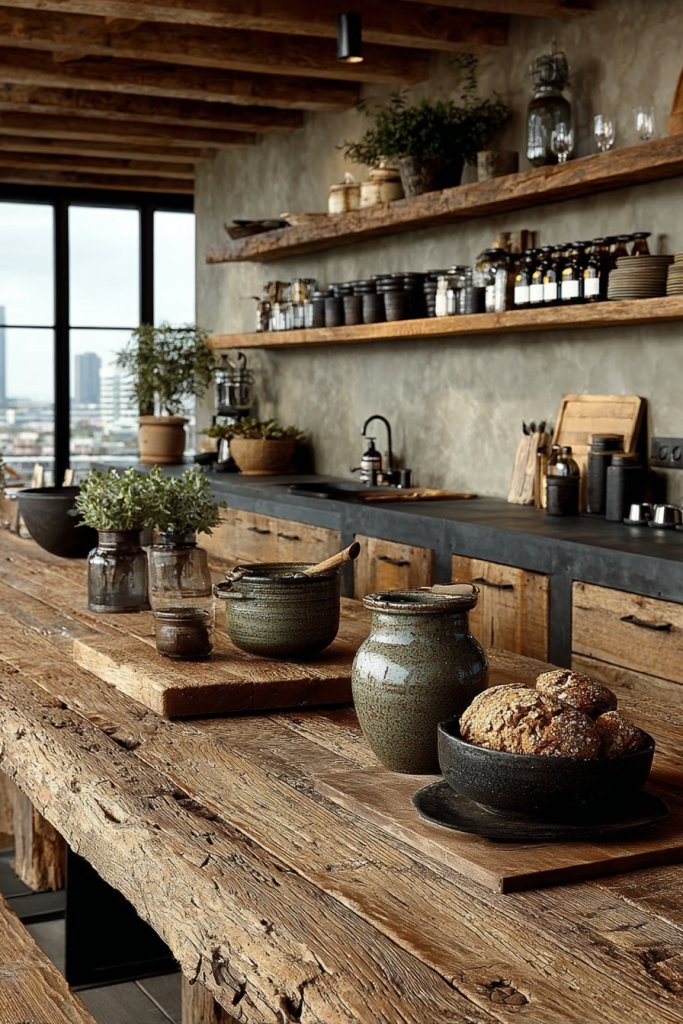
5. Rustic Wooden Accents for Warmth and Charm

Looking to add some cozy charm to your kitchen without going full farmhouse? Rustic wooden accents bring warmth and character, making your space feel inviting and lived-in. They’re perfect for those who love a natural, textured look that ages gracefully. It’s about creating a welcoming atmosphere with just a touch of nature.
Envision reclaimed wood shelves holding vintage jars or cutting boards, adding layers of texture and authenticity. Exposed wooden beams or a distressed wood backsplash create a sense of history and craftsmanship. The natural grain and imperfections of aged wood add depth and character to the overall design. Soft lighting accentuates the rich tones, making everything feel warm and cozy.
Mix different wood tones for a layered, eclectic look or keep it uniform for a more streamlined feel. Incorporate wood accents in open shelving, cabinet details, or even furniture pieces like stools and tables. Seasonal decor can include woven baskets or linen towels with rustic embroidery. These accents work well in both small country kitchens and large industrial lofts.
Source reclaimed or distressed wood from reputable suppliers or repurpose old furniture. Sand surfaces lightly to preserve character while smoothing rough edges. Attach shelves using sturdy brackets or hidden mounting hardware for a clean look. Protect the wood with natural oils or sealants to prevent damage from moisture. Incorporate these accents into existing cabinetry or as standalone focal points.
Decorate with handcrafted wooden signs, personalized cutting boards, or carved utensils. Use a mix of smooth and textured wood for visual interest. Add cozy textiles like woven placemats or burlap curtains to complement the rustic vibe. Regularly treat the wood with oils or waxes to keep it looking fresh and to enhance the patina over time.
Rustic accents create a timeless, warm environment that feels both stylish and approachable. They remind you of simpler days and add a personal touch that’s hard to replicate with synthetic materials. With a few well-placed pieces, your kitchen will radiate charm and character, making every meal preparation special. It’s about embracing natural beauty and craftsmanship.
6. Bright Color Palette for an Energetic Atmosphere
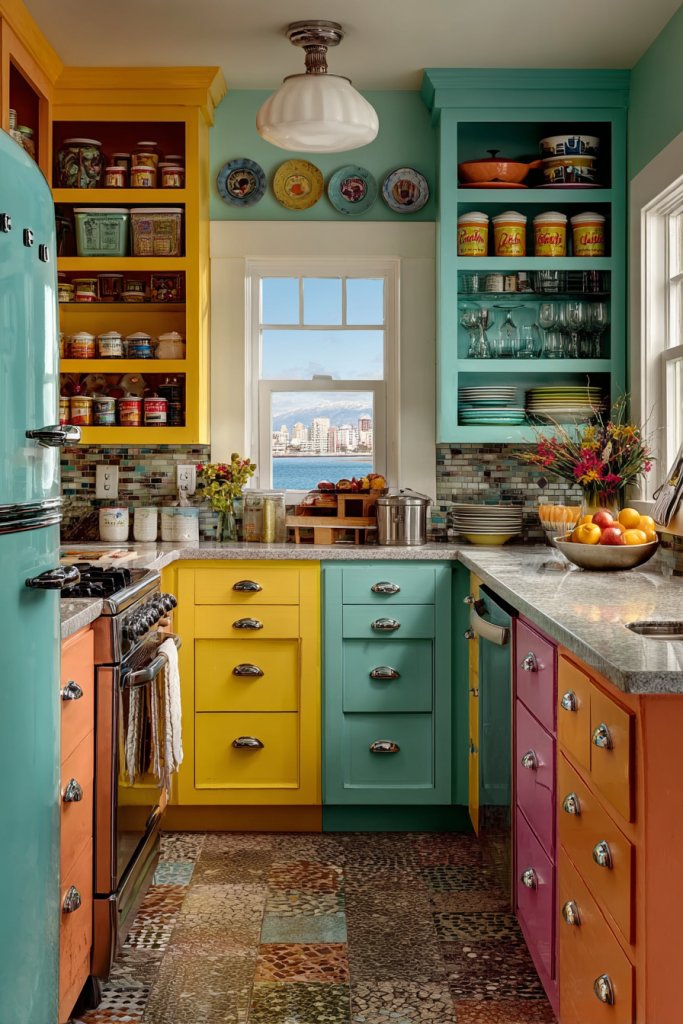
Is your kitchen feeling dull and uninspiring? Bright colors can energize the room and lift your mood instantly. They turn a mundane space into a lively, cheerful environment perfect for cooking and gathering. Who says kitchens have to be all neutrals?
Picture vibrant turquoise cabinets paired with sunny yellow accessories. Walls painted in bold coral or lively lime green instantly grab attention. Contrasting colors on storage containers, utensils, or even small appliances add playful pops of personality. The overall effect is a dynamic, upbeat space that feels welcoming and fun.
Opt for a monochrome approach in a single hue, or mix complementary shades for more impact. Use colorful tiles or paint half the wall to create an accent area. Seasonal updates can include swapping out accessories or adding colorful textiles. For small kitchens, light-colored walls with bold accents work best; larger spaces can handle more daring color combinations.
Start with choosing a dominant color that suits your personality and style. Use high-quality, washable paint for easy cleaning. Incorporate colorful storage jars, utensils, or small appliances to reinforce the palette. Be strategic—balance bright shades with neutral tones to avoid overwhelming the senses. Use painter’s tape for clean lines and precision when creating color blocks or stripes. Finishing with a clear sealant prolongs the vibrancy.
Add colorful textiles like patterned curtains, rugs, or chair cushions. Incorporate artwork or decals in matching hues for a cohesive look. Personalize with custom-painted signs or chalkboard walls for notes and recipes. Mix textures—smooth ceramics with soft fabrics—to add depth and interest. The goal is a lively, harmonious space that sparks joy.
A bright color palette transforms your kitchen into an energetic hub that fuels your creativity. It’s a visual boost that makes cooking more exciting and inviting. Don’t be afraid to experiment with daring shades—your space will thank you for the vibrant personality. Bright colors are a simple yet powerful way to refresh your entire home.
7. Minimalist Design with Hidden Storage Solutions
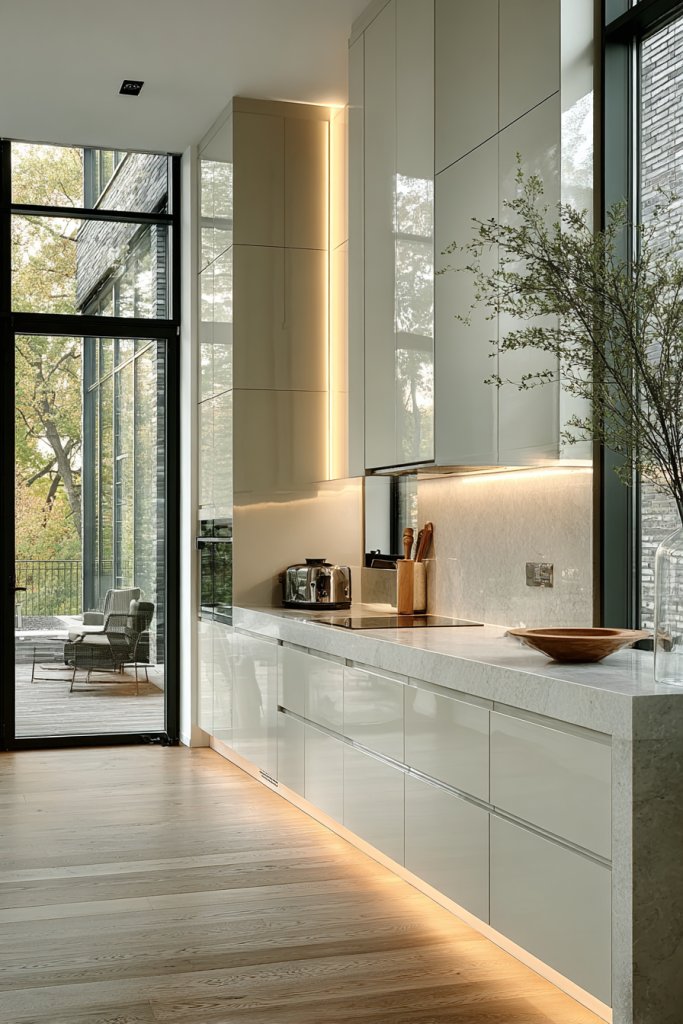
Does clutter take over your countertops and drawers? A minimalist kitchen keeps things simple and serene, but it’s hard to find enough storage. Hidden storage solutions help you maintain clean surfaces without sacrificing function. It’s about creating a sleek space that’s both organized and stylish.
Imagine a kitchen with handleless cabinets, seamless surfaces, and drawers that blend into the walls. Out of sight, you hide your appliances, utensils, and pantry items behind sliding or push-to-open doors. The overall look is uncluttered, with only a few select decorative elements. Soft lighting and neutral tones emphasize the clean, calming aesthetic.
Choose high-gloss or matte finishes for a modern vibe, or matte for a softer look. Incorporate drawers with built-in organizers or pull-out shelves for easy access. In small spaces, use vertical cabinets with internal compartments to maximize storage. Seasonal decor can be integrated into hidden compartments for a clutter-free look year-round.
Start by decluttering and sorting your items. Opt for modular cabinetry with built-in dividers, trays, or baskets for organization. Install push-to-open mechanisms to eliminate handles and create a uniform surface. Use interior organizers for pots, lids, or utensils to keep everything accessible yet hidden. Regularly review stored items to prevent overstuffing.
Add custom touches like labeled pull-out drawers or color-coded compartments for different categories. Use decorative panels or textured finishes to add subtle visual interest. Incorporate under-cabinet magnetic strips or retractable racks for frequently used tools, keeping countertops clear. Personalize with your preferred organization system that suits your lifestyle.
Minimalist design with hidden storage creates a peaceful, clutter-free environment that’s easy to maintain. It’s a perfect balance of form and function, making everyday cooking less stressful. With a little planning, your kitchen will look effortlessly chic and highly functional—proof that less truly is more.
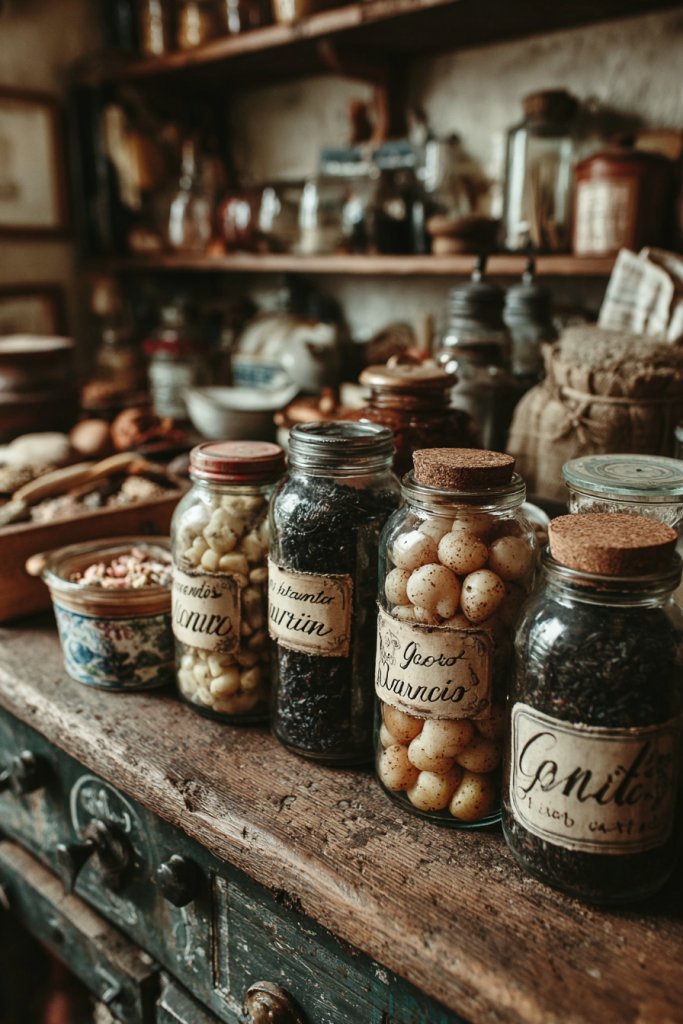
8. Vintage Finds for Unique Character
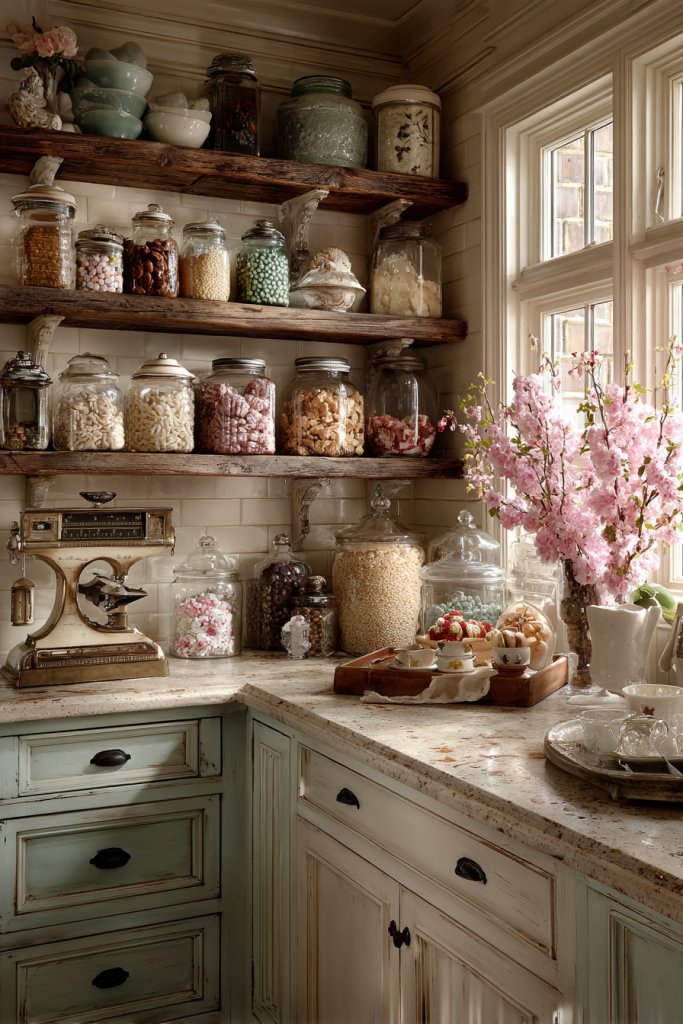
Are your current kitchen accessories feeling a bit too generic? Vintage finds introduce character and charm, giving your space a one-of-a-kind personality. They’re perfect for adding a nostalgic touch that’s both stylish and meaningful. Who doesn’t love a piece with a story?
Visualize a collection of antique jars, vintage scale, or retro signage displayed on open shelves or countertops. Each piece shows signs of age—patina, wear, or quirky imperfections—that add depth and authenticity. Mixing these with modern elements creates a balanced, eclectic look that feels warm and inviting. The overall vibe is a curated treasure trove.
Combine vintage items with sleek, contemporary furniture for a balanced contrast. Use them as focal points on open shelving or as accents on a neutral backdrop. Seasonal swaps, like vintage holiday decor, keep the look fresh. Incorporate vintage tools or baked goods tins for a practical yet decorative touch.
Scout flea markets, thrift stores, or online vintage shops for authentic pieces. Clean and restore items as needed, respecting their age and character. Mix different styles and eras for an authentic, layered look. Use open shelving or display cabinets to showcase your finds. Regularly rotate or update your collection to keep things lively.
Create a dedicated vintage corner or wall with a collage of old photos, labels, and keepsakes. Personalize with DIY projects like decoupage or painted signs. Add vintage-inspired textiles or small furniture pieces to complement the theme. Incorporate meaningful items from family history for a truly personal touch.
Vintage finds bring soul to your kitchen, making it more than just a cooking space—they turn it into a storybook of memories. They inspire you to mix old and new creatively, showcasing your unique style. The charm of vintage pieces adds warmth and authenticity that’s hard to replicate. Embrace the nostalgia and create a space that feels like home.
9. Creative Use of Open Storage Baskets and Crates
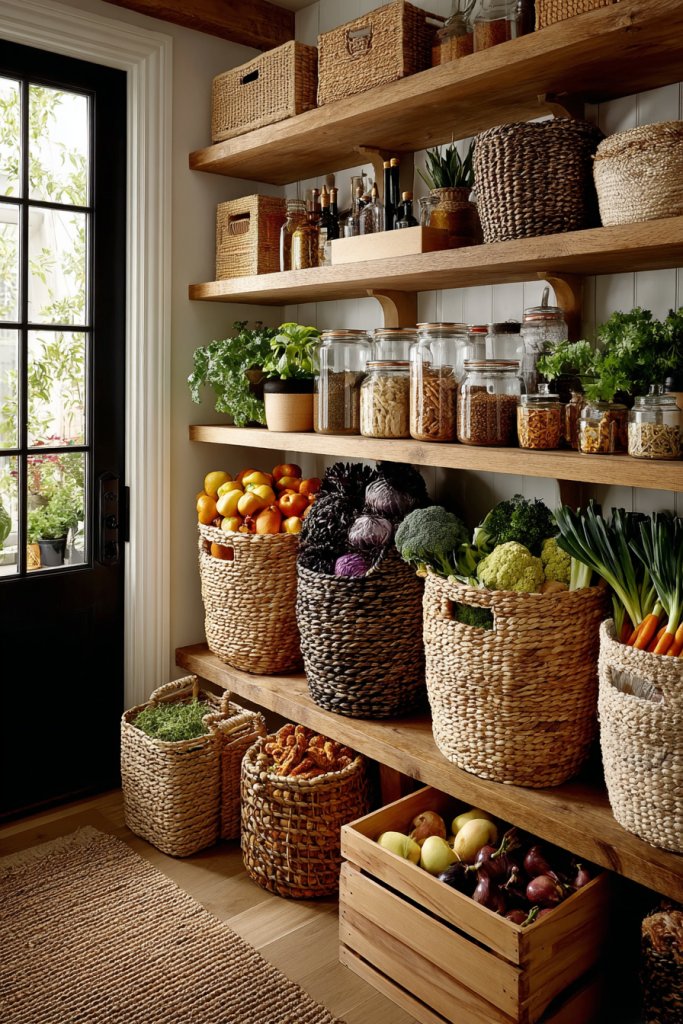
Cluttered pantries and countertops can make cooking feel chaotic. Open storage baskets and crates offer a stylish way to organize and display your essentials. They make everything visible and accessible, reducing the time spent hunting for that elusive spatula. Who says storage can’t be attractive?
Picture woven baskets filled with fresh produce, utensils, or bread lined up on open shelves or under countertops. Crates with vintage labels hold canned goods or snacks, adding a rustic charm. The natural textures and neutral tones create a warm, inviting ambiance. Grouped neatly, they turn everyday items into decorative accents.
Use different sizes and shapes to create visual interest or focus on a specific function. Incorporate colorful liners or paints to match your decor. Seasonal themes can be achieved by swapping out contents or adding decorative elements inside the baskets. They’re practical for both small and large spaces, easily movable for cleaning or reorganization.
Select baskets and crates made of durable, easy-to-clean materials like wicker, wire, or wood. Label each for quick identification—chalkboard paint or adhesive labels work well. Arrange them by category or frequency of use for maximum efficiency. Place them strategically where you need quick access, like near the stove or fridge. Regularly review and tidy to keep the system effective.
Add colorful fabric liners or decorative tags to personalize each basket. Use them to display themed collections, like baking supplies or coffee station essentials. Incorporate small hooks or clips for hanging utensils or keys. Change contents seasonally or for special occasions to keep things fresh and engaging.
Open baskets and crates turn storage into an art form, making your kitchen look curated and cozy. They encourage practical organization while adding texture and visual interest. With a little creativity, you can transform clutter into charm. It’s a simple, affordable way to boost both function and style—your kitchen will thank you!
10. Statement Pendant Lights as a Decorative Focal Point
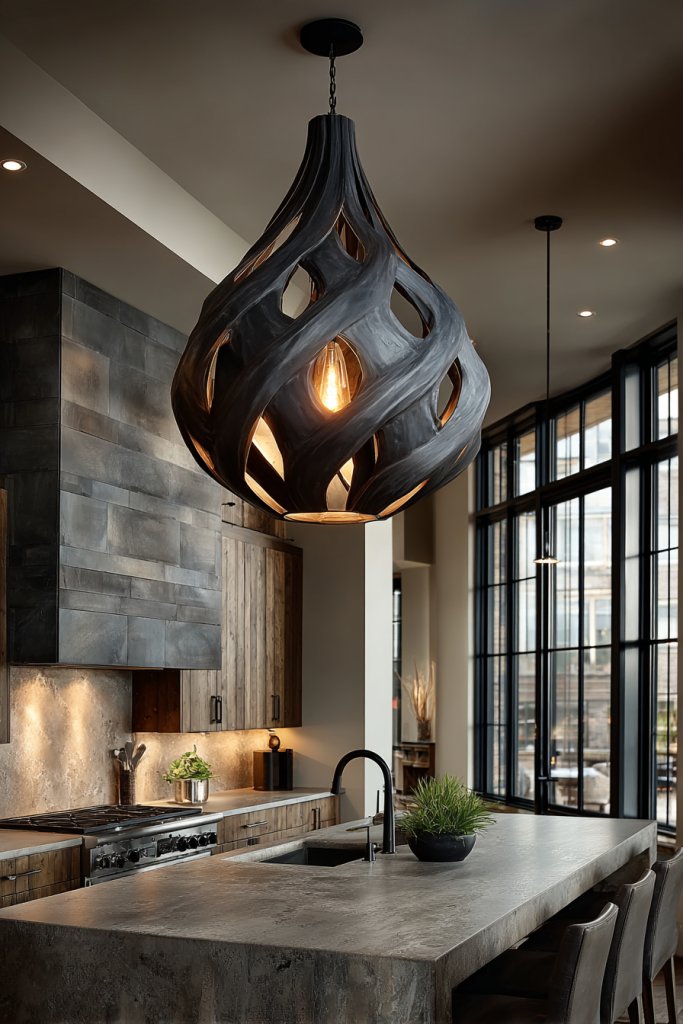
Is your kitchen missing that wow factor? A statement pendant light can instantly transform the space and draw the eye. It’s a simple upgrade that adds personality and style without a major renovation. Plus, good lighting makes everything better—cooking, chatting, and relaxing.
Visualize a bold, sculptural fixture hanging above your island or dining table. The fixture’s shape, material, and color become a focal point, contrasting or complementing your decor. Warm, ambient light spills downward, highlighting the surface below. The overall effect is dramatic yet inviting, setting the mood perfectly.
Choose from industrial metal, glass globes, or colorful shades to reflect your style. For a modern look, opt for sleek, minimalist fixtures; for eclectic spaces, mix different styles and sizes. Hanging multiple smaller pendants adds visual rhythm, while a single oversized fixture makes a bold statement. Adjust height to ensure proper lighting and aesthetic impact.
Start by selecting a fixture that matches your ceiling height and room scale. Use a sturdy, well-supported mounting bracket. Install with proper wiring, or hire a professional electrician for safety. Ensure the fixture’s wattage and bulb type suit your needs—dimmable LED options are popular for ambiance control. Align the fixture centrally over your focal point for maximum effect. Regular cleaning keeps it looking pristine.
Coordinate the fixture’s finish with hardware or other metallic accents in your kitchen. Use dimmers to control light levels and set different moods. Incorporate decorative bulbs or colored shades for a customized look. Hang a small decorative element, like a tassel or beaded chain, for added personality if the fixture allows.
Statement pendant lights elevate your kitchen’s style and make a lasting impression. They show off your eye for design and can be a conversation starter. With endless styles available, you’re sure to find one that perfectly captures your taste. It’s a simple change with a big impact—lighting that speaks volumes!
11. Monochrome Color Scheme for a Cohesive Look
Does your kitchen feel disjointed or chaotic? A monochrome color scheme ties everything together, creating a sleek, cohesive look. It simplifies decision-making and makes decorating easier, especially for those who love a minimalist aesthetic. Plus, it’s timeless and versatile.
Picture cabinets, walls, and accessories all in varying shades of a single color—say, soft gray or deep navy. Textures and finishes, like matte or glossy surfaces, add depth without introducing new colors. Small details like handles, lighting, or dishware subtly reinforce the palette. The result is a harmonious, calming environment that feels intentional and polished.
Choose a dominant hue and incorporate lighter and darker shades within it. Use different materials—wood, metal, glass—to add visual interest. Seasonal updates can involve swapping out textiles or accessories in the same color family. For a dramatic effect, contrast matte and shiny finishes within the same tone.
Start by selecting a core color you love and that suits your space. Use it on cabinets, walls, or large accessories. Incorporate coordinating smaller items like dishware or storage containers to reinforce the theme. Maintain balance by mixing textures and finishes, avoiding monotony. Keep the overall look clean and uncluttered for maximum impact.
Add subtle accents in metallic or black to break up the monotony. Use monochrome artwork or decals to enhance the theme without introducing new colors. Incorporate textured textiles or patterned tiles within the same palette for added visual richness. Personalize with items that reflect your unique style while staying within the color scheme.
A monochrome palette creates a unified, sophisticated atmosphere that never goes out of style. It shows that simplicity can be stunning when executed thoughtfully. Your space will feel more expansive and serene, encouraging you to spend more time cooking and relaxing. It’s a fail-safe way to elevate your entire kitchen design.
12. Incorporate Metal Accents for an Industrial Edge
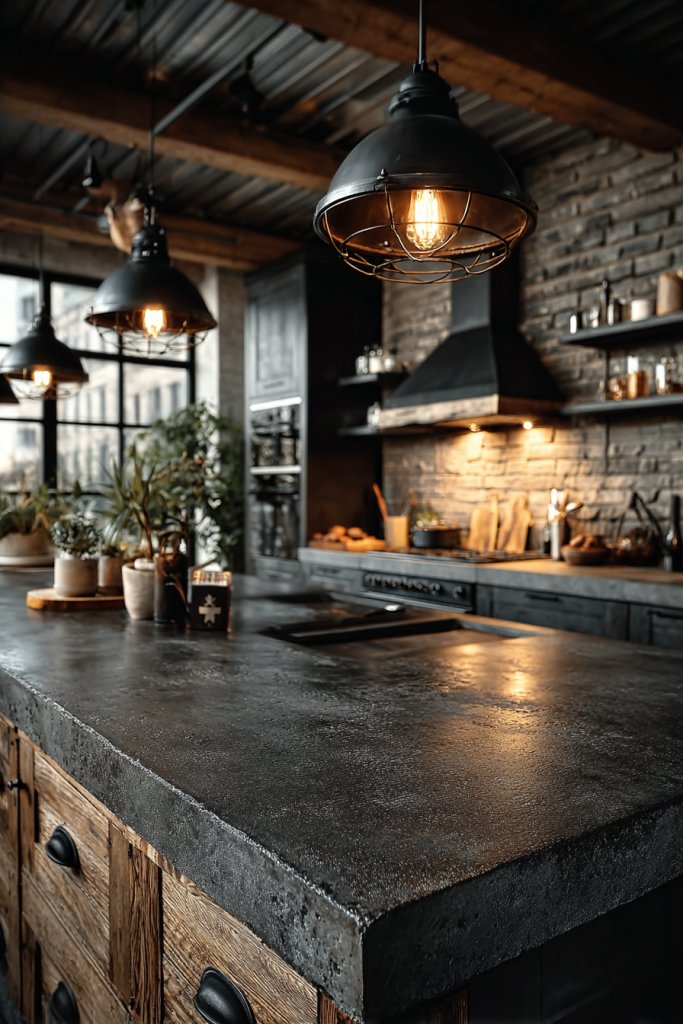
Looking to add a bit of edge and modernity to your kitchen? Metal accents bring a sleek, industrial vibe that’s both trendy and durable. They add a touch of sophistication while standing up to everyday wear. Who says style can’t be tough?
Imagine stainless steel or matte black fixtures—like bar stools, cabinet handles, or shelving brackets—contrasting with warm wood or painted surfaces. Metal finishes reflect light and add a contemporary feel, especially when paired with exposed piping or structural elements. The combination of textures creates visual interest and a layered, edgy look.
Use metal in small doses—think faucet fixtures, cabinet pulls, or lighting— or go bold with metal shelving or a metal-clad backsplash. Mix different metal tones—brushed nickel, matte black, or copper—for an eclectic, personalized style. Incorporate industrial-style pendant lights or pipe shelving for a more raw, unfinished look.
Select high-quality metal fixtures that resist corrosion and wear. Install wall-mounted shelving with industrial brackets for a sturdy, functional display. Use screw or rivet details to enhance the raw aesthetic. Combine with wood or painted surfaces to balance warmth and coolness. Regularly clean and polish metal surfaces to maintain their sleek appearance.
Add decorative metal accents like vintage signs, metal trays, or sculptural pieces. Layer different finishes and textures for depth. Incorporate reclaimed metal or repurposed hardware for an eco-friendly twist. Use lighting strategically to highlight metallic features, creating reflections and visual drama.
Metal accents give your kitchen a modern, industrial edge that’s both stylish and functional. They demonstrate confidence in mixing materials and textures, creating a space that feels curated and current. With the right touches, your kitchen will radiate a sleek, edgy vibe that’s uniquely yours.
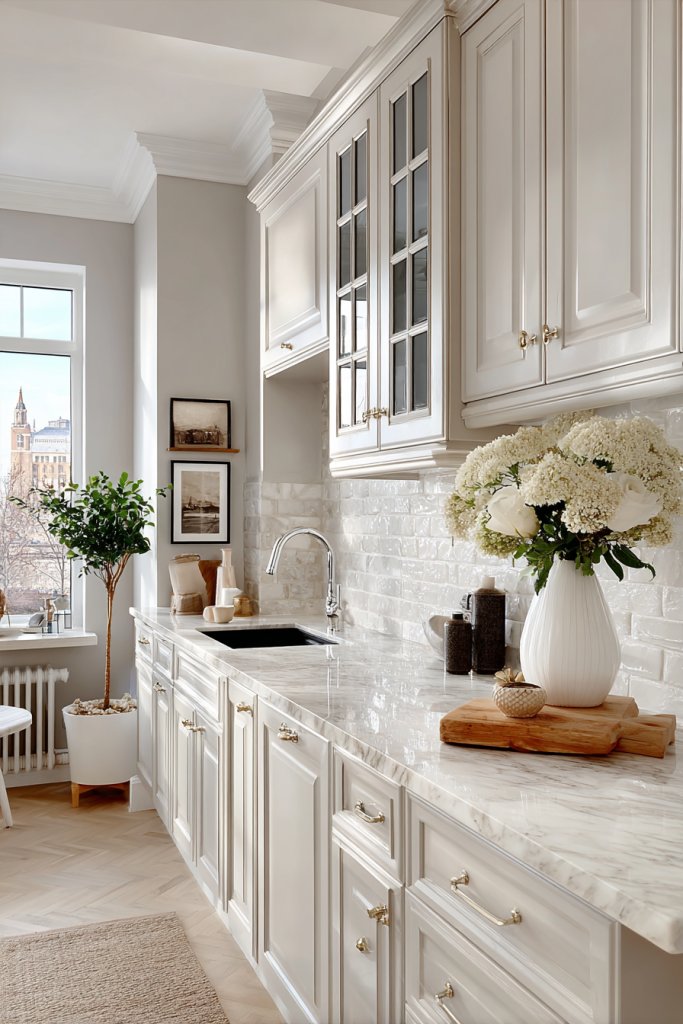
13. Bright White Cabinets Paired with Warm Wooden Countertops
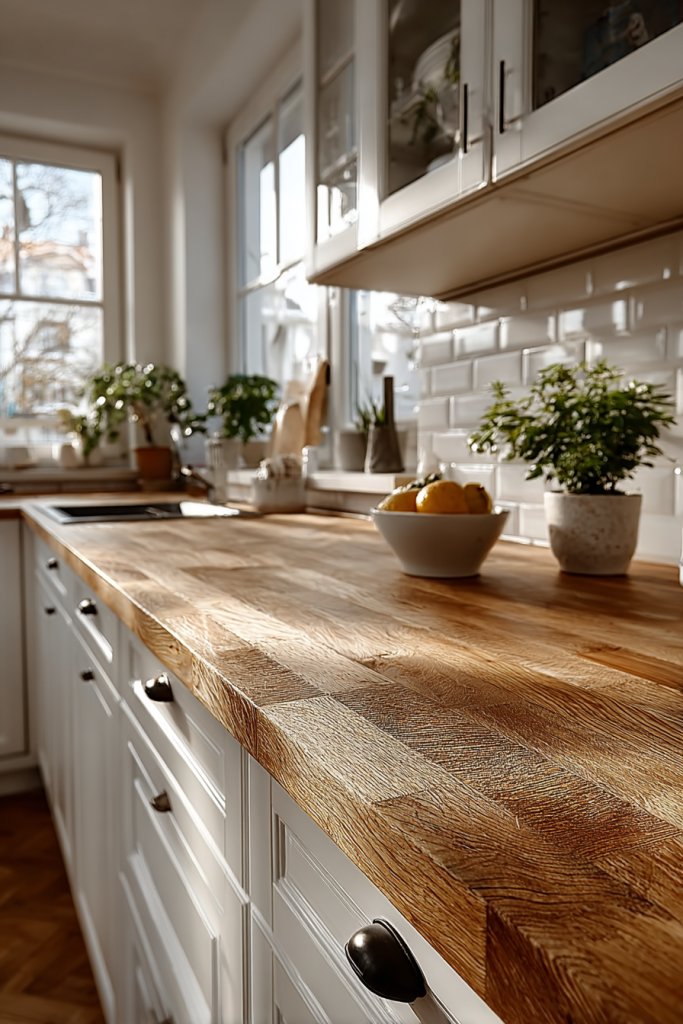
Tired of dull, outdated kitchens? Bright white cabinets combined with warm wooden countertops create a fresh, inviting look that’s both modern and cozy. It’s like a clean slate that provides endless styling options. Plus, it makes the space feel larger and more open.
Visualize crisp, white cabinets with sleek, minimalist hardware paired with rich, honey-toned wood counters. The contrast highlights both elements, adding warmth and brightness simultaneously. Natural light reflects off the white surfaces, while the wood adds texture and depth. The overall effect is a balanced blend of cool and warm tones that feels fresh yet welcoming.
Choose different wood finishes—blonde, walnut, or burnt oak—to match your style. Incorporate open shelving or glass-front cabinets to showcase your favorite dishes or glassware. Seasonal accents like colorful kitchen towels or fruit bowls add pops of color without overwhelming the scheme. The look adapts well to both contemporary and farmhouse styles.
Start by selecting high-quality, moisture-resistant wood for your countertops. Use a durable, bright white paint or veneer for cabinets, ensuring easy cleaning and longevity. Install the countertops first, then mount the cabinets securely, balancing aesthetics with function. Seal the wood to prevent stains and water damage. Incorporate soft-close hinges and handles for a seamless look. Keep the surfaces clutter-free for maximum visual impact.
Add decorative touches like a colorful backsplash or patterned rugs to complement the neutral palette. Personalize with unique hardware—brass, matte black, or antique finishes—for a custom look. Use open shelving or hooks to display your favorite tools or utensils. Regularly clean and maintain the wood to preserve its warmth and beauty.
This classic combination never goes out of style, offering a versatile backdrop for any decor. It reflects a clean, sophisticated lifestyle that’s easy to live with. Once in place, it’s simple to update with colorful accessories or new hardware. Your kitchen will feel brighter, warmer, and more inviting—your new favorite room!
14. Chalkboard Wall for Menus and Creative Notes
Ever wish you could jot down recipes, grocery lists, or inspirational quotes without cluttering your counters? A chalkboard wall offers a fun, functional way to stay organized and add personality. It’s perfect for the creative cook who loves to experiment and share ideas. Plus, it’s easy to update and customize.
Imagine a large section of wall painted with chalkboard paint, filled with handwritten menus, doodles, or motivational messages. You can use colorful chalks to create vibrant drawings or write in beautiful scripts. The black backdrop provides a striking contrast to bright white or colored chalk, making everything pop. It’s a playful yet practical feature that invites interaction.
Choose a single wall or a smaller section to keep it subtle. Frame the chalkboard with decorative trim or paint a geometric border for added style. Seasonal themes can be easily incorporated by changing the drawings or messages. Use different chalk styles or add magnetic strips for notes and photos—just keep it fun and personal.
Prepare the wall surface by cleaning and smoothing it thoroughly. Apply multiple coats of chalkboard paint, allowing each to dry completely. Use painter’s tape for clean edges or framing. Once dry, season the surface with chalk to prevent ghosting. Keep chalk nearby for spontaneous notes or artwork. Regularly clean with a damp cloth to maintain clarity.
Create a dedicated space for family messages or motivational quotes. Incorporate colorful chalks or chalk markers for a dynamic look. Add small ledges or holders for chalk and erasers for convenience. Personalize with themed drawings or seasonal messages to keep it lively. It becomes a central spot for daily inspiration.
A chalkboard wall makes your kitchen more interactive and lively, encouraging creativity and communication. It’s a simple way to add a personal touch that evolves over time. You’ll love how it sparks joy and organization every day. It’s a fun, functional feature that makes your kitchen uniquely yours.
15. Glass-Front Cabinets to Showcase Beautiful Dishware
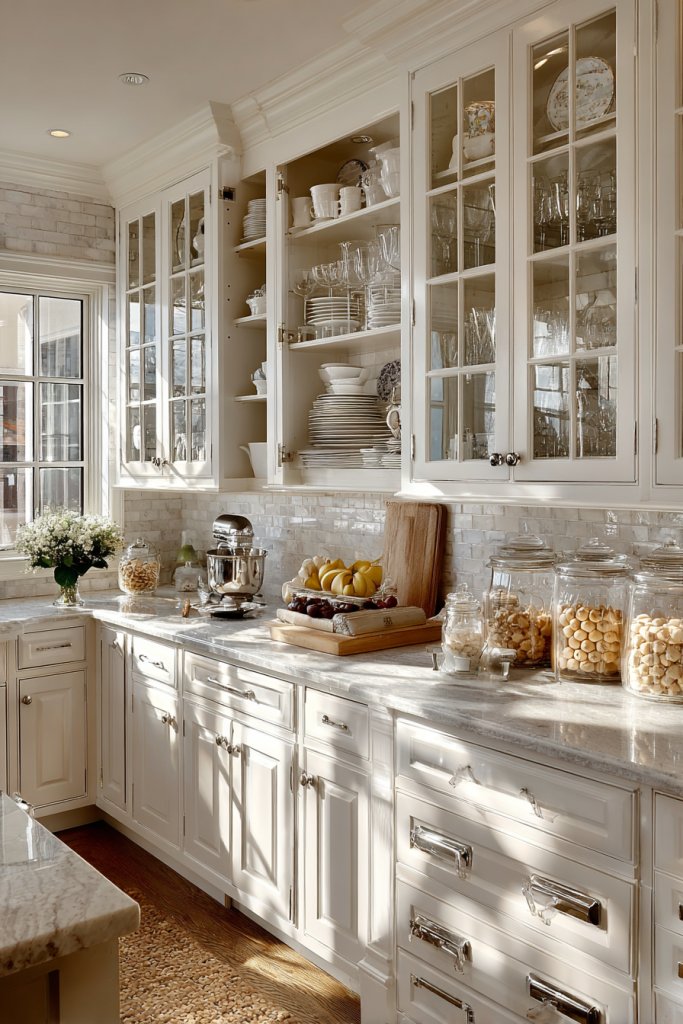
Want to make your kitchen feel more open and elegant? Glass-front cabinets offer a perfect way to display your prettiest dishware while keeping everything protected. It’s a subtle way to add a touch of sophistication and transparency to your space. Who says storage has to be dull?
Imagine delicate porcelain plates and colorful glassware arranged neatly behind transparent doors. The light passing through highlights the beauty of each piece, creating a bright, airy atmosphere. The display invites curiosity and admiration, turning everyday items into decorative art. The contrast of glass and cabinetry adds depth and dimension.
Mix open glass-front cabinets with closed storage for balance. Use uniform dishware for a clean, streamlined look, or mix patterns and colors for an eclectic style. Incorporate lighting inside the cabinets for extra sparkle and focus. Seasonal or themed displays keep the look fresh and engaging.
Choose high-quality glass doors with sturdy hinges and seals. Arrange dishes by size, color, or style for maximum visual appeal. Use uniform shelf heights to create a cohesive look. Regularly clean the glass to prevent smudges and fingerprints. Install lighting inside or underneath for added drama. Keep the inside organized for easy access and aesthetics.
Rotate your display items seasonally or for special occasions. Incorporate decorative trays or stands inside the cabinets for variety. Use dishware with personal significance or vintage pieces to tell your story. Add subtle lighting effects to highlight your collection at night.
Glass-front cabinets turn your dishware into art, elevating your entire kitchen aesthetic. They highlight your personality and collection, making the space more inviting. With a little organization, you create a gallery that’s both functional and beautiful. Your kitchen becomes a showcase of your style and taste.
16. Incorporate a Drink Station or Coffee Bar
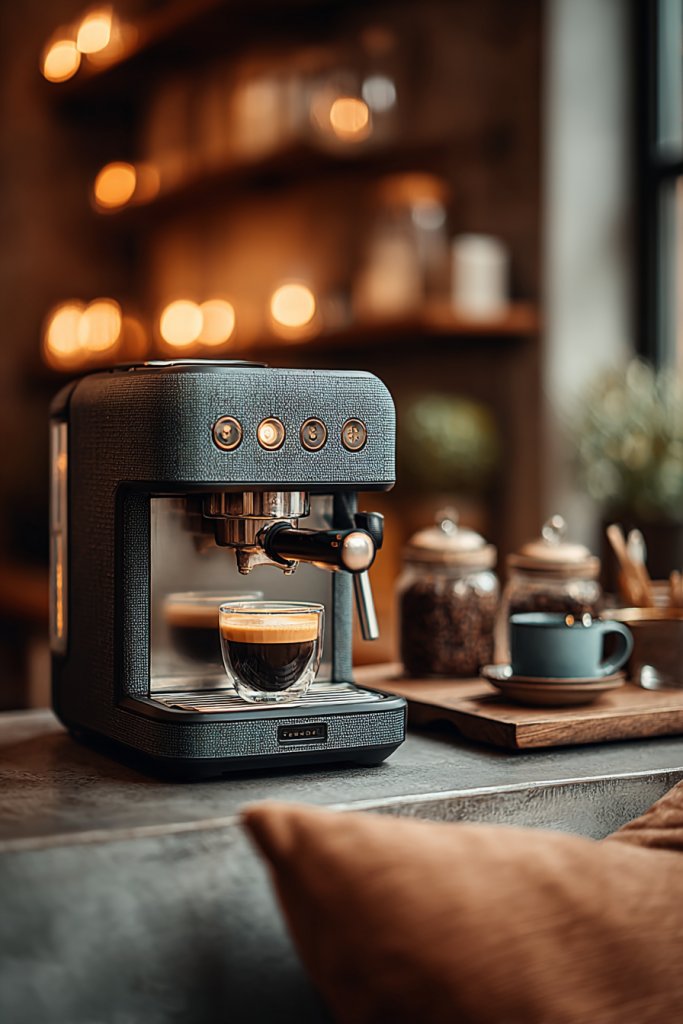
Are your mornings chaotic or your evenings dull? A dedicated drink station or coffee bar turns everyday routines into enjoyable rituals. It’s a stylish, functional way to keep your favorite beverages accessible and organized. Plus, it adds a cozy, personalized touch to your kitchen.
Picture a compact nook with a sleek coffee maker, stylish mugs, and a few jars of beans or tea. Open shelves or a small cart hold accessories like spoons, sugar, or syrups. Ambient lighting or a small decorative sign personalizes the space. Everything is within arm’s reach, making your daily coffee or cocktail effortless and enjoyable.
Design a minimal setup with just essentials or go full boutique with vintage accessories and decorative containers. Use a small island, cart, or dedicated counter space to host your drinks. Seasonal decor, like a mini wreath or themed mugs, keeps it fresh. Adapt the size and style to fit your kitchen’s layout and your personal taste.
Choose a spot close to water and power sources for convenience. Select a stylish coffee machine or beverage station setup. Organize accessories in labeled containers or racks for quick access. Add decorative elements like a chalkboard sign or small plants—just avoid greenery, remember! Keep essentials stocked and tidy for daily use. Regularly clean appliances and refresh supplies.
Personalize with custom mugs, themed signs, or labels. Incorporate a variety of drink options—hot, cold, alcohol-infused—to suit your mood. Use decorative trays or baskets for accessories, and change seasonal decor to keep the space lively. Make it a reflection of your personality and lifestyle.
A dedicated drink station makes your kitchen more functional and fun, encouraging you to enjoy your favorite beverages every day. It’s a small upgrade with a big payoff—more convenience, more style. Your mornings and evenings will be more enjoyable, and your space more inviting!
17. Use of Patterned Rugs to Add Color and Comfort
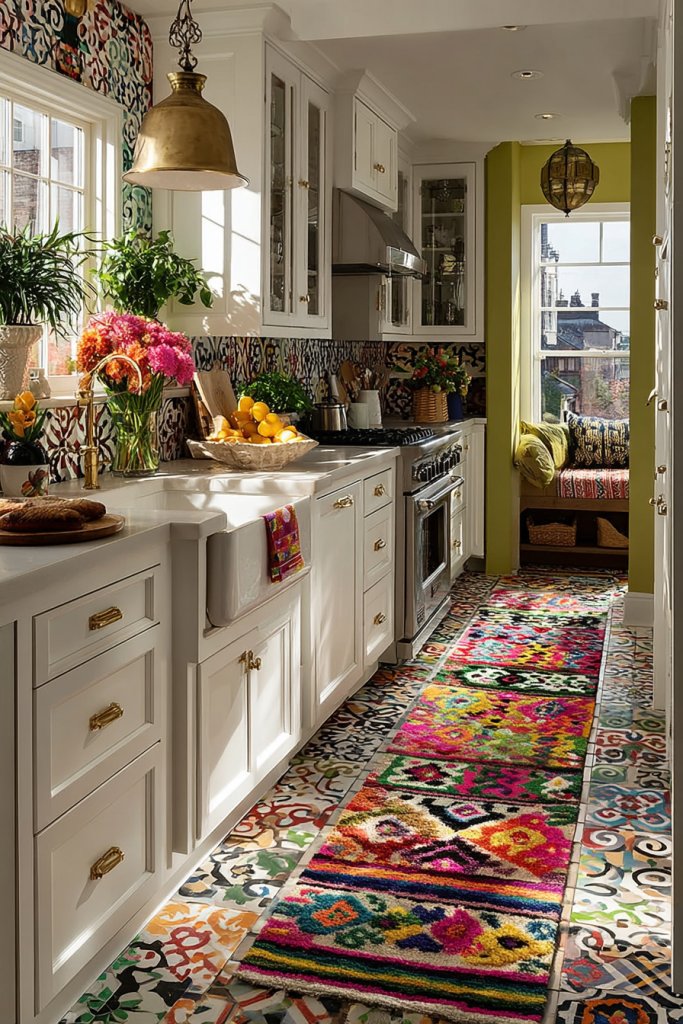
Feeling the hard floors and boring decor in your kitchen? Patterned rugs and runners add softness and personality, making the space more inviting. They’re an easy way to introduce color, texture, and warmth without a full remodel. Who knew a simple floor covering could make such a difference?
Visualize a bold, geometric-patterned rug under your dining table or a colorful runner along the cooking zone. Textured fabrics like woven or tufted styles add tactile interest. Bright patterns contrast with neutral cabinetry, creating focal points and visual flow. The colors and textures make your kitchen feel cozy and lively.
Choose washable, durable materials suited for high traffic and spills. Mix and match patterns or keep it monochrome for a more subdued look. Seasonal updates can include new rugs or layered mats for variety. Use rugs to define different zones within open-plan kitchens, adding structure and style.
Select a rug size that fits your space without overcrowding. Use non-slip pads underneath for safety and to prevent shifting. Regularly vacuum and spot clean to maintain freshness. Consider color schemes that complement your cabinetry and backsplash. Layer with smaller mats or runners if needed for added texture.
Coordinate your rug with other textiles like curtains or seat cushions. Add decorative fringes or tassels for extra flair. Swap out rugs seasonally or for special occasions. Incorporate personal patterns or favorite colors to reflect your style and mood. They’re a simple way to refresh the look regularly.
Patterned rugs and runners transform plain floors into statement features, boosting your confidence in decorating. They make your kitchen feel more comfortable and lively, encouraging you to spend more time there. A small investment that delivers big comfort and style gains!
18. Creative Wall Hooks for Utensils and Pots
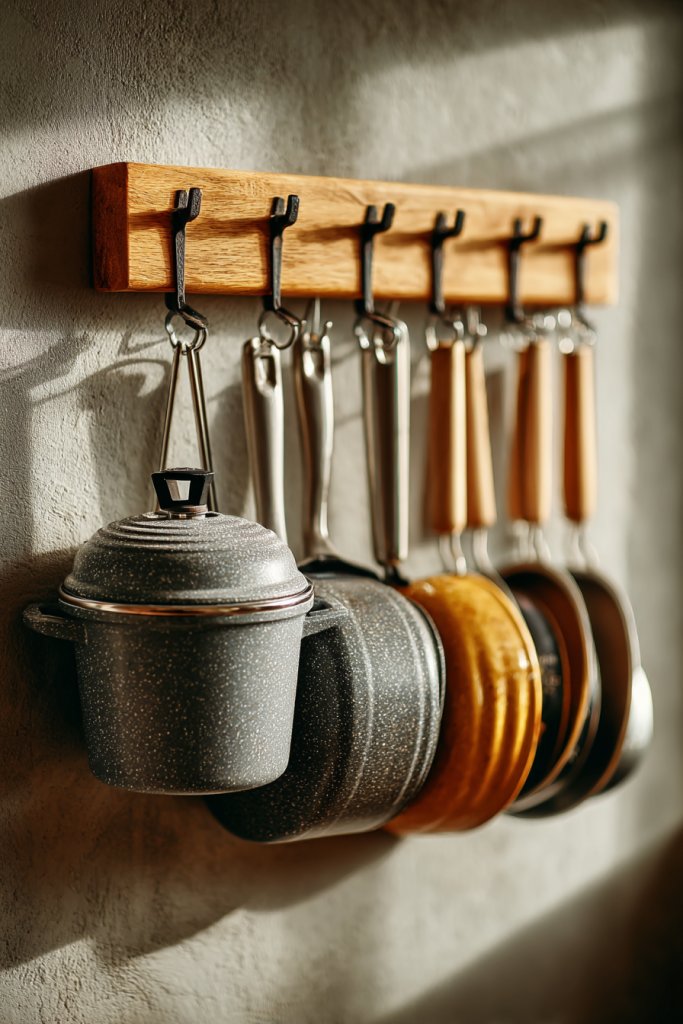
Tired of digging through drawers to find your favorite spatula or pot lid? Creative wall hooks solve clutter problems while adding a decorative element. They keep essentials within easy reach and turn functional items into design features. Who says organization can’t be stylish?
Imagine a row of sleek metal or wooden hooks mounted on a backsplash or open wall. Utensils, pots, and pans hang in a visually appealing pattern, creating a curated, intentional look. The hooks can be arranged in a straight line or a playful zigzag for added interest. The open display adds character and utility.
Use decorative hooks with unique shapes or finishes—antique brass, matte black, or colorful enameled designs. Mix in hooks of different sizes for variety. For a rustic vibe, opt for wrought iron; for a modern look, choose sleek steel. Incorporate hooks into open shelving or behind cabinet doors for hidden storage.
Decide on the placement based on your workflow. Use sturdy anchors and screws to secure hooks into studs or drywall with toggles. Organize items by frequency of use or style to keep the display tidy. Regularly clean and rearrange to refresh the look. Keep a small container nearby for utensils that aren’t hung.
Customize with engraved or painted initials, or add decorative elements like beads or charms. Group matching utensils or mix different styles for eclectic charm. Use hooks to hang small decorative items or seasonal ornaments temporarily. They’re versatile and can be moved easily as your needs change.
Creative wall hooks turn everyday kitchen tools into art, making your space more inviting. They encourage organized, thoughtful displays that reflect your personality. With a few simple installations, your kitchen becomes a more functional and stylish hub for daily life.
19. Compact Vertical Storage for Small Spaces
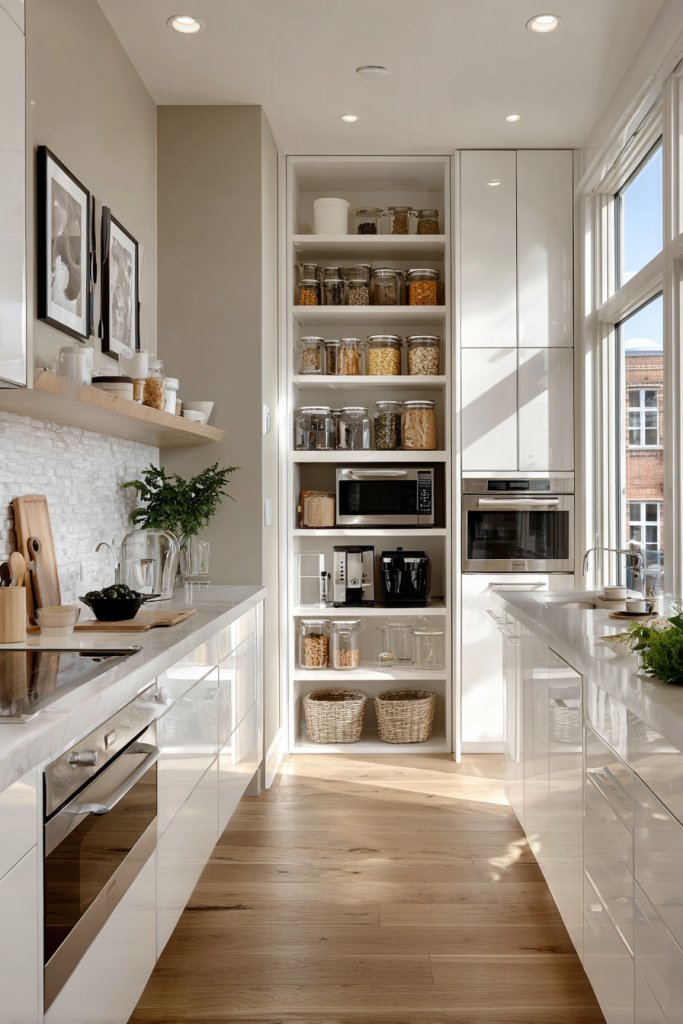
Limited space shouldn’t mean sacrificing storage or style. Vertical storage solutions help you maximize every inch, keeping your kitchen organized and open. They’re especially perfect for small apartments or tiny homes where every square foot counts. Ready to think up instead of out?
Imagine tall pantry cabinets or hanging racks reaching toward the ceiling, filled with neatly arranged jars and baskets. Use hooks and rails to hang pots, pans, or utensils vertically, freeing up counter space. Open shelving or slim pull-out units add storage without bulk. The result is a sleek, efficient, and clutter-free environment.
Choose adjustable shelving or modular units for flexibility. Incorporate magnetic strips or pegboards for tools and spice jars. In small kitchens, use narrow pull-out pantries or corner units to maximize every nook. Seasonal or decorative containers can be swapped easily to refresh the look. The key is smart, space-saving design.
Install tall, sturdy shelving units or cabinets that reach the ceiling. Use wall-mounted racks or pegboards for hanging utensils and pots. Organize items by frequency of use or category, labeling where possible. Make sure to anchor heavy units securely. Regularly declutter to keep the vertical space functional and tidy.
Add decorative labels or color-coded containers to keep everything organized. Incorporate a small step stool or ladder for easy access to higher shelves. Use attractive containers or baskets to add visual interest. Seasonal decorations or themed containers can be swapped to keep the look fresh.
Vertical storage solutions turn small spaces into efficient, stylish kitchens. They prove that clever design can make a big difference in usability. Once you master this, you’ll enjoy more space and less stress every time you cook. It’s a smart, simple upgrade with lasting benefits.
20. Incorporate Fresh Herbs in Stylish Containers
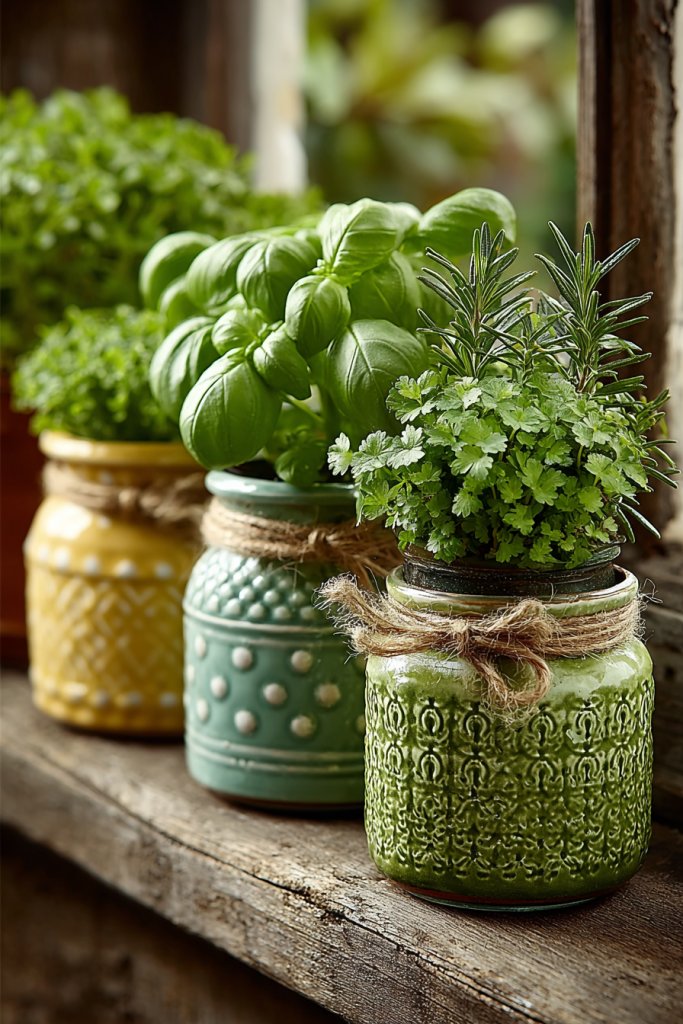
Craving fresh flavors and a touch of green but don’t have a garden? Growing herbs in stylish containers inside your kitchen offers both beauty and functionality. They brighten your space and make cooking more vibrant. It’s a win-win for flavor and aesthetics.
Visualize colorful pots or repurposed jars lining your windowsill or a dedicated shelf. Basil, mint, and parsley add lush greenery and fragrance. The containers can be decorative—terracotta, ceramic, or painted to match your decor. Fresh herbs bring life and color to even the simplest kitchen setup.
Use uniform pots for a clean look or mix and match for a boho vibe. Incorporate hanging planters for vertical interest or small window boxes for space efficiency. Rotate herbs seasonally or when ready to harvest. Incorporate decorative labels or markers to identify each herb easily.
Choose containers with good drainage and fill with quality potting soil. Place in a sunny spot—windows with good light work best. Water regularly but avoid overwatering. Use organic fertilizers for healthy growth. Harvest herbs frequently to encourage lush, bushy plants. Replant or replace as needed.
Decorate containers with painted patterns, stickers, or labels. Combine herbs with complementary kitchen decor—like rustic or modern styles. Use herbs in your recipes or as edible garnishes. Add small signs or tags with names or fun quotes for extra charm.
Growing herbs indoors connects you with nature and elevates your cooking. It’s an easy, rewarding way to add freshness and style to your kitchen. Plus, it’s a constant reminder that small, simple changes can make your space more enjoyable and personal. Happy herb gardening!
21. Functional and Decorative Spice Racks
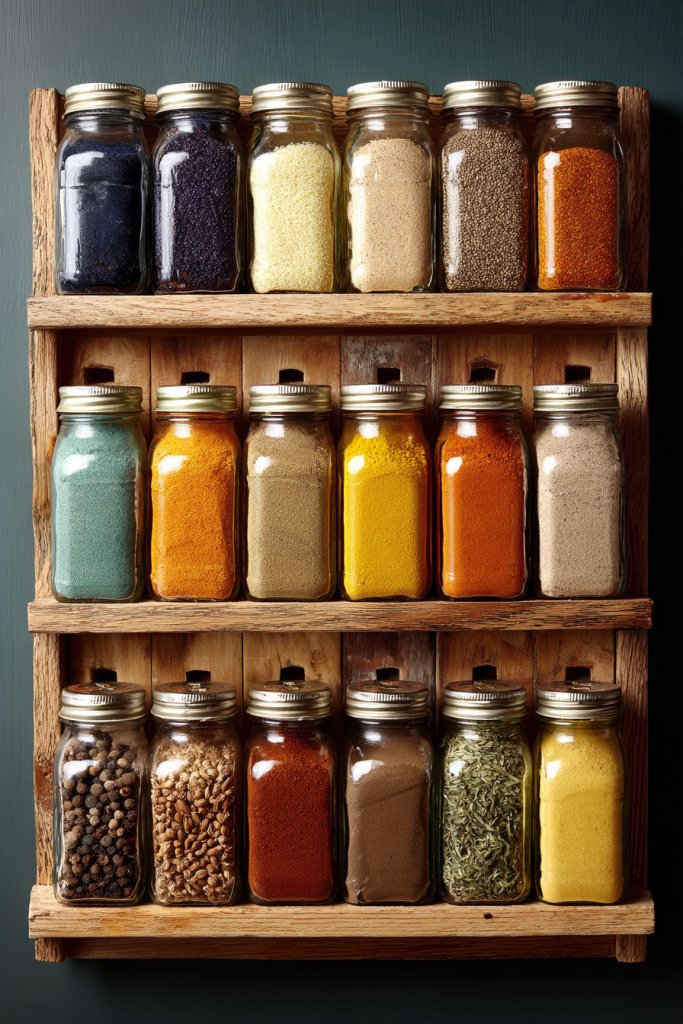
Spices scattered in drawers or cluttering countertops make cooking less efficient. A dedicated spice rack keeps everything organized and adds a decorative touch. It turns a necessary kitchen element into a visual feature. Who knew storing spices could look so good?
Imagine a sleek wall-mounted rack with glass jars neatly labeled and filled with colorful spices. The transparent containers showcase their vibrant hues, creating a rainbow effect. Mounted near your stove or prep area, it’s both practical and attractive. The organized display inspires confidence and creativity.
Choose open shelving, magnetic strips, or tiered racks for different aesthetics. Incorporate vintage spice tins or modern glass jars for a curated look. Customize labels with handwriting or printed designs. Seasonal spices or themed containers can be swapped in and out to keep things fresh.
Select airtight, uniform containers for freshness. Label each with clear, stylish tags or stickers. Mount the rack at a convenient height for easy access. Fill jars with your favorite spices, ensuring they are sealed tightly. Regularly check for freshness and replenish as needed. Keep the setup clean and organized.
Decorate containers with chalkboard labels or colorful wraps. Incorporate a small spoon or scoop for each jar for convenience. Personalize with your favorite spice blends or DIY seasonings. Arrange spices by frequency of use or color for visual harmony.
A well-organized spice rack makes cooking more enjoyable and efficient. It showcases your culinary personality and adds a touch of color and order. Once set up, you’ll love how it simplifies meal prep. It’s a small upgrade with a flavorful impact!
22. Use of Colorful Small Appliances as Decor
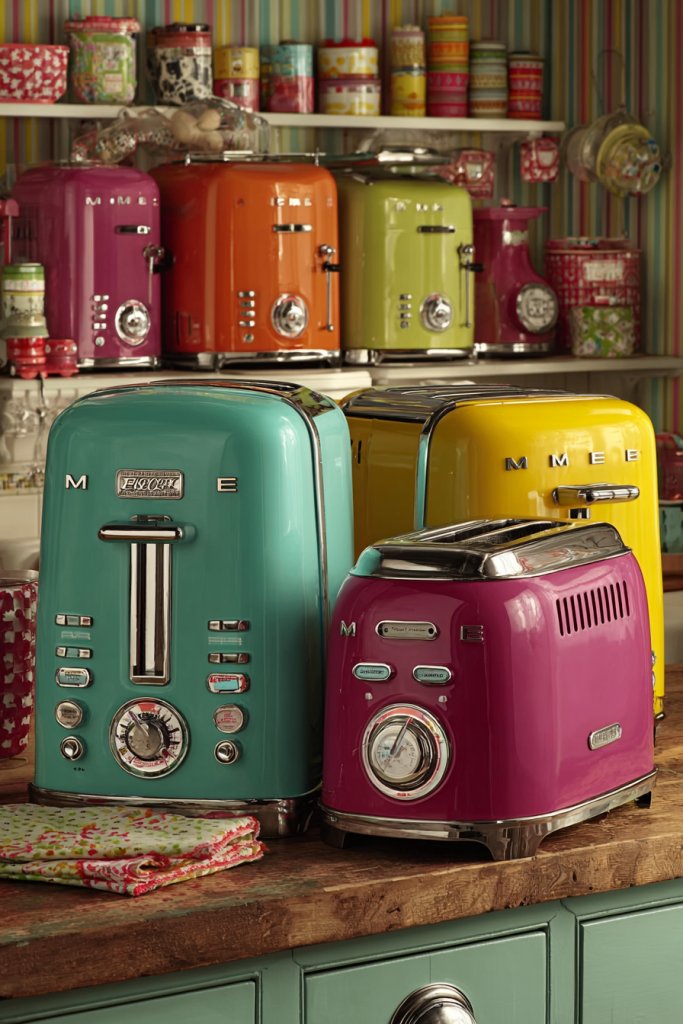
Bland, stainless steel appliances can make your kitchen look cold and impersonal. Bright, colorful small appliances inject fun and personality into the space. They’re practical tools that double as decor—who says functionality can’t be stylish?
Picture a cheerful red toaster, a pastel blue kettle, or a vibrant mixer sitting on your countertop. These pops of color create visual interest and set the tone for your kitchen’s style. They can complement or contrast with your cabinetry and accessories, making the space lively and inviting.
Choose appliances in bold colors or retro styles for a vintage vibe. Mix different hues for a playful look, or keep it monochrome for a sleek, modern aesthetic. Swap out accessories seasonally or for holidays—think pink for spring or emerald for Christmas. Use matching cords or containers to keep the look cohesive.
Select high-quality, durable appliances that match your daily needs and style. Position them strategically for easy access—near the sink, prep station, or breakfast nook. Keep cords organized and out of sight where possible. Regularly clean and maintain to keep their bright appearance. Consider stacking or grouping for a tidy, curated look.
Add decorative stickers or custom skins to personalize appliances further. Incorporate matching or contrasting accessories like dish towels, mats, or storage containers. Use these appliances to showcase your personality or favorite colors. Rotate or replace them to keep your kitchen feeling fresh.
Colorful appliances make your kitchen more lively and fun, encouraging you to cook and entertain more. They reflect your style and add a cheerful energy that’s contagious. With a few pops of color, your space instantly feels more inviting and personal—proof that small touches matter.
23. Creative Use of Magnetic Strips for Knives and Tools
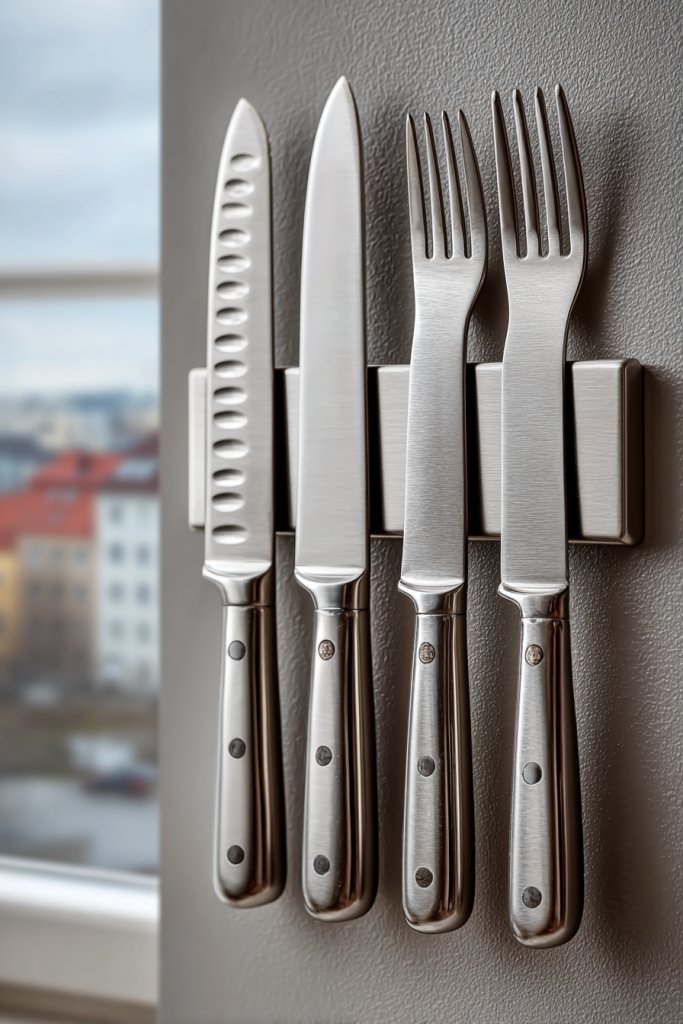
Cluttered drawers and counter spaces make cooking frustrating. Magnetic strips keep knives and metallic tools organized and within reach. They’re a sleek, space-saving solution that also adds a modern touch. Who knew metal could be so stylish?
Imagine a horizontal strip mounted on a backsplash or wall, holding knives with their blades safely suspended. Small metal tools like scissors or peelers also hang neatly, creating a tidy, organized display. The shiny blades and tool handles add a contemporary, minimalist aesthetic. It’s like a gallery for your kitchen tools.
Use colorful or metallic strips to match your decor. Add labels or small containers underneath for additional storage. Incorporate hooks of different sizes for various tools, or combine with open shelving for a layered look. Seasonal or themed hooks can be swapped out for holidays or special occasions.
Secure the strip into studs or wall anchors to support the weight. Arrange your tools by frequency of use or type for quick access. Keep blades sharp and handle grips clean for safety. Regularly check for stability and clean the strip to prevent dust build-up. Use child-proof measures if necessary.
Label tools or add decorative elements like charms or colored handles. Mix materials—wood, metal, or acrylic—to add texture. Use the strip as a display for your favorite vintage or modern tools. Incorporate small clipboards or holders for recipes or notes.
Magnetic strips turn everyday tools into a design feature, making your kitchen more efficient and stylish. They encourage organized habits and showcase your sense of design. Once installed, you’ll love how much easier cooking becomes—and how good your space looks doing it!
24. Incorporate Eco-Friendly and Recycled Materials
Concerned about sustainability but don’t want to compromise style? Eco-friendly and recycled materials offer a responsible way to update your kitchen. They help reduce waste and environmental impact while adding unique textures and finishes. It’s a win for your conscience and your decor.
Picture countertops made from reclaimed wood or recycled glass, with finishes that showcase natural imperfections. Flooring could be cork or bamboo, adding warmth and durability. Reused metal fixtures or salvaged tiles create a layered, textured aesthetic. These materials tell a story of sustainability and craftsmanship.
Mix sustainable materials with traditional ones for contrast. Use recycled glass or tiles as backsplashes or accent walls. Incorporate reclaimed wood for shelving or furniture. Choose eco-friendly paint and sealants to complete the look. Seasonal updates or DIY projects keep the space fresh and aligned with your values.
Source materials from reputable suppliers specializing in recycled or sustainable options. Prepare surfaces properly to ensure durability. Work with professionals if needed for precise installation. Maintain and clean natural surfaces with eco-friendly products. Reuse or repurpose existing furniture and decor for a truly eco-conscious approach.
Add personal touches like handcrafted recycled art or upcycled storage containers. Label recycled materials or create a dedicated eco corner. Incorporate natural textiles such as linen or jute for textiles and storage. Regularly update your eco-initiatives to reflect new ideas or products.
Using eco-friendly and recycled materials demonstrates a commitment to sustainability without sacrificing style. It inspires mindful living and shows that small changes can have a big impact. Your eco-conscious kitchen becomes a conversation starter and a proud reflection of your values—beautiful and responsible.
25. Personalized Kitchen Art and Labels
Bored with generic kitchen decor? Personalized art and labels make your space unique and functional. They add character, humor, or motivation, turning an ordinary kitchen into a reflection of your personality. Who says practical can’t be personal?
Imagine hand-painted signs, custom prints, or handwritten labels on jars and containers. They add a warm, inviting touch and help organize your ingredients visually. Incorporate fun quotes, family recipes, or initials for a truly custom look. Bright colors or chalkboard styles keep it lively and adaptable.
Use framed prints or canvas art that match your decor theme—modern, vintage, or eclectic. Label jars, baskets, or drawers with stylish stickers or handwritten tags. Seasonal or holiday-themed art keeps the space fresh. Mix and match different fonts, colors, or materials for a layered, personalized aesthetic.
Create or purchase artwork that complements your kitchen’s style. Use printable labels or DIY tags for jars and containers—consider permanent markers, stickers, or chalk labels. Mount art on walls with appropriate hardware, or lean framed pieces for a casual look. Keep labels clear and legible for easy identification. Refresh as needed.
Add personal touches like family recipes, favorite quotes, or new artwork to keep the space current. Incorporate DIY projects like painted tiles or hand-lettered signs. Use labels to organize pantry items by type or season. Make it a fun, ongoing project that evolves over time.
Personalized art and labels make your kitchen truly yours, adding warmth and personality. They inspire pride in your space and encourage organization. Every time you cook or clean, you’re surrounded by items that reflect your style and story. It’s all about making your kitchen a joyful, inspiring hub.
Conclusion
With this variety of Kitchen Inspiration Ideas, you have the tools to transform your cooking space into a vibrant, functional, and beautiful environment. Don’t hesitate to experiment and personalize these concepts to suit your style—your ideal kitchen is within reach. Embrace the creative process and cook up inspired spaces that will elevate your everyday culinary experiences!