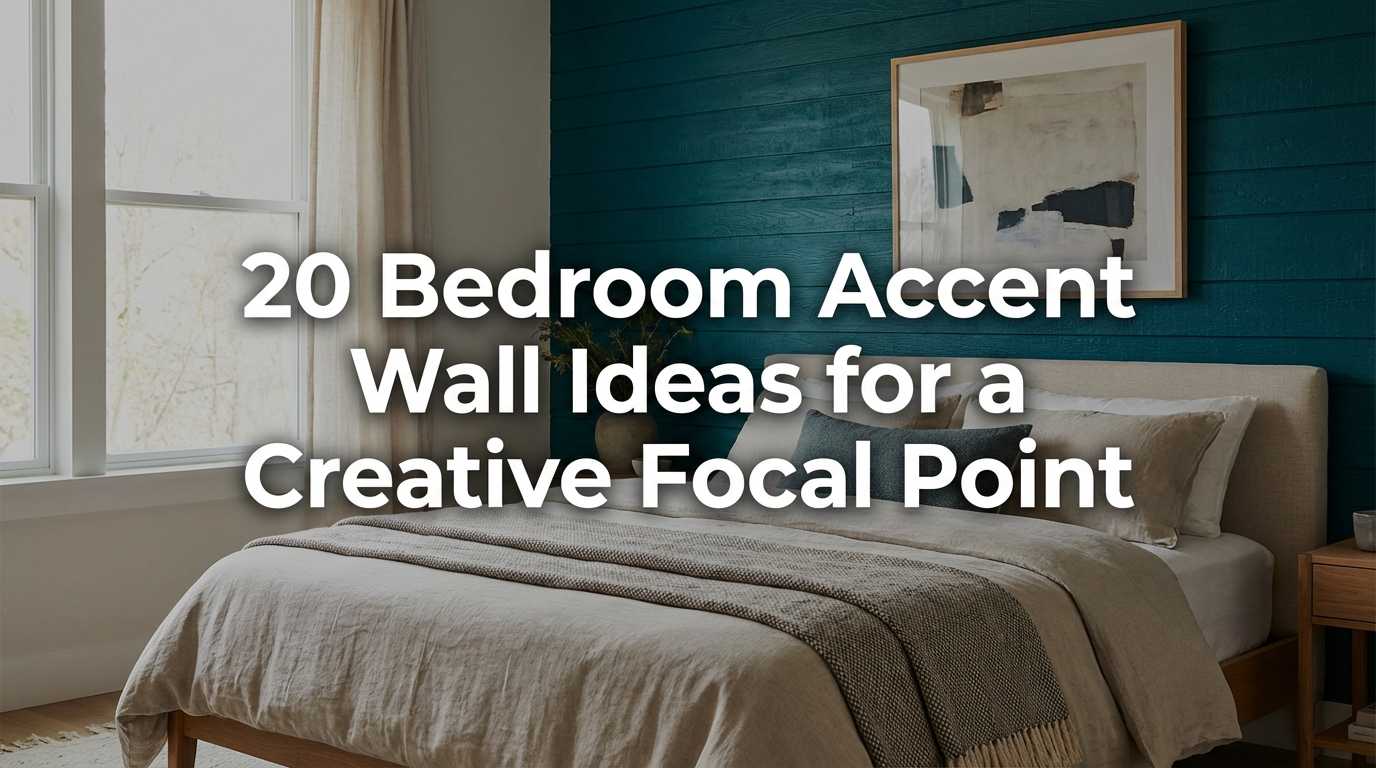
A breathtaking bedroom can start with a single, eye-catching feature: the accent wall. These walls have become a favorite among interior enthusiasts because they add personality, depth, and a touch of creativity to any space without overwhelming it.
In this article, you’ll find a variety of inspiring ideas to transform your bedroom into a stylish retreat. From bold paint choices and textured wallpapers to artistic murals and innovative materials, there’s a perfect focal point waiting for you to try. Get ready to discover how a simple wall can completely elevate your bedroom’s ambiance!
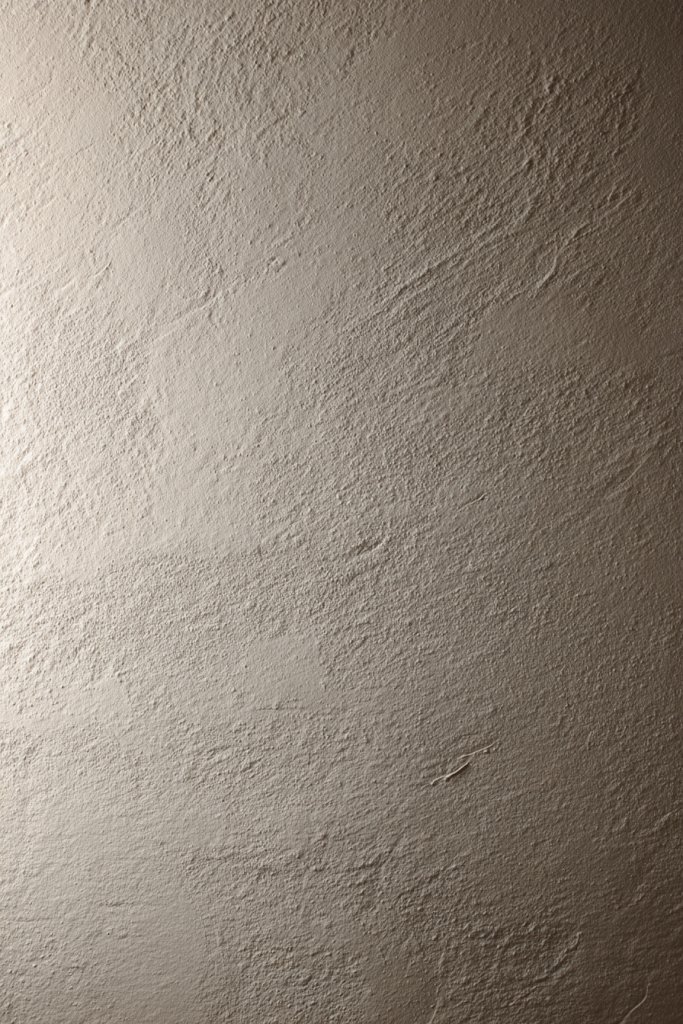
1. Bold Textured Paint Walls for Depth and Dimension

Ever felt your bedroom’s walls just seem flat and uninspiring? A dull wall can drain the energy from your entire space, making it feel small or lifeless. If you’re craving a statement that adds personality and depth without clutter, textured paint might be your new best friend. It’s an easy way to elevate your room’s style with just a brush and some creativity.
Imagine walking into a room where the wall beckons with rich, tactile textures. Think of a soft, sponge-like finish that catches the light differently throughout the day, creating shadows and highlights. Rag rolling or plaster effects can add layers of dimension, giving your space a handcrafted feel. The textures can range from subtle to bold, depending on your mood and style preferences.
You can tailor textured paint to match various decor styles—from rustic farmhouse to sleek modern. Seasonal variations, like warmer tones in winter or cool pastels in summer, can refresh the look. For small rooms, keep textures light to avoid overwhelming the space. Larger bedrooms allow for more dramatic, textured finishes that become focal points.
Start by selecting a textured paint or applying techniques like sponging, rag rolling, or plastering. Prep your wall with a smooth base coat, then choose your texture method. Use sponges, brushes, or trowels to create the desired effect. Apply in sections, working quickly for seamless blending. Finish with a matte or semi-gloss topcoat to protect and enhance the texture. Practice on a scrap piece if you’re new to ensure you love the effect.
Add personalized touches by choosing colors that resonate with your personality or mood. Incorporate metallic or iridescent glazes for a subtle shimmer. Layer different textures or create patterns for added interest. If you’re into DIY, experiment with layered textures or stenciled patterns for a custom look that truly reflects your style.
Textured walls can dramatically transform your bedroom into a cozy retreat or a modern sanctuary. They give your space a rich, layered feel without cluttering it with decor. Once finished, you’ll feel a boost of pride knowing you crafted a unique feature. Ready to make your walls the conversation starter?
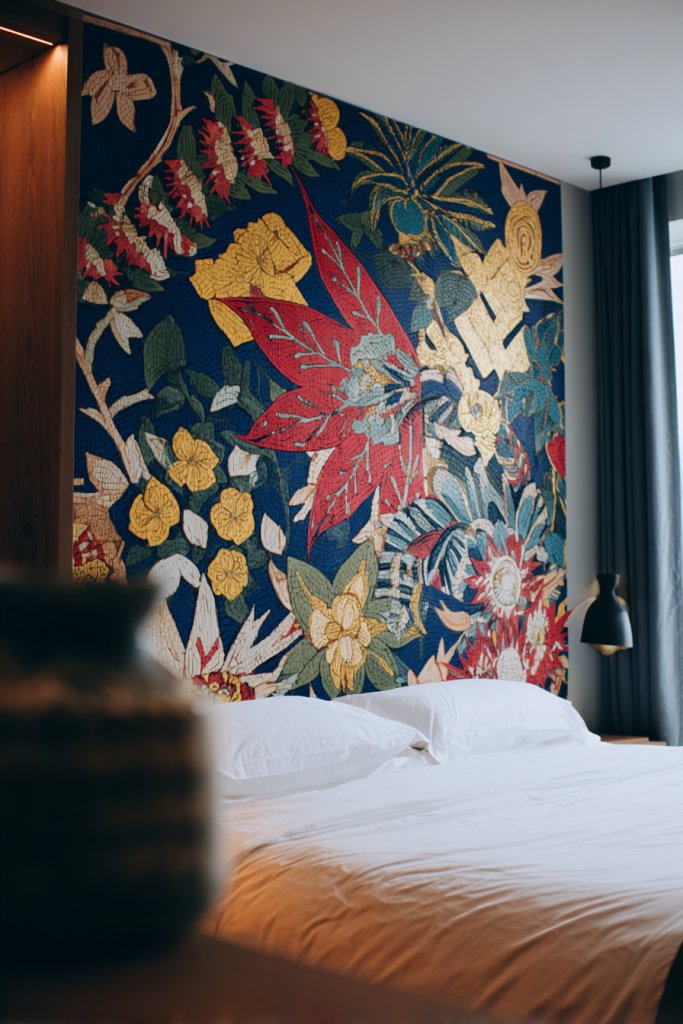
2. Statement Wallpaper with Patterned Designs
Tired of bland bedroom walls that fail to inspire? Wallpaper offers an instant upgrade, bringing in bold patterns and vibrant colors that can completely change the vibe. It’s a quick fix for dullness and a way to showcase your personality without a major renovation. But choosing the right design can feel overwhelming—where do you even start?
Visualize a feature wall adorned with a lively floral print or geometric shapes that pop against neutral furniture. The wallpaper’s pattern can add depth and movement, making the room feel more dynamic. Imagine textured patterns that catch the light differently, creating shadows and visual interest. The colors can range from subtle pastels to striking hues, depending on your mood.
Vibrant floral wallpapers suit boho or eclectic styles, while sleek geometric prints complement modern minimalism. If you prefer a softer look, opt for subtle textures or tone-on-tone patterns. For seasonal updates, swap out bold patterns for calmer, more subdued designs. Small bedrooms can benefit from vertical or narrow patterns to elongate the space, while larger rooms handle bigger, bolder prints.
Start by selecting a wallpaper that matches your style and room size. Prepare your wall by cleaning and smoothing the surface thoroughly. Use a high-quality adhesive and follow manufacturer instructions for application. Apply wallpaper in panels, smoothing out bubbles with a brush or roller. For a seamless look, match patterns carefully and use a sharp blade to trim edges. Consider adding a sealant for extra durability in high-traffic areas.
Personalize your wallpaper choice by blending it with other decor elements, like matching throw pillows or curtains. Frame sections of the wallpaper as artwork for a layered effect. Customize by adding metallic accents or textured finishes that complement the pattern. You can also create a mural effect by combining wallpaper with paint or additional decorative trims.
Bold wallpaper turns your bedroom into a personal sanctuary filled with character. It’s an easy way to express your style and set a mood, whether romantic, energetic, or calming. Once you see the transformation, you’ll feel empowered to experiment more in your decorating journey. Ready to wallpaper your way to a stunning bedroom?
3. Wooden Slat Wall for Warmth and Modern Style
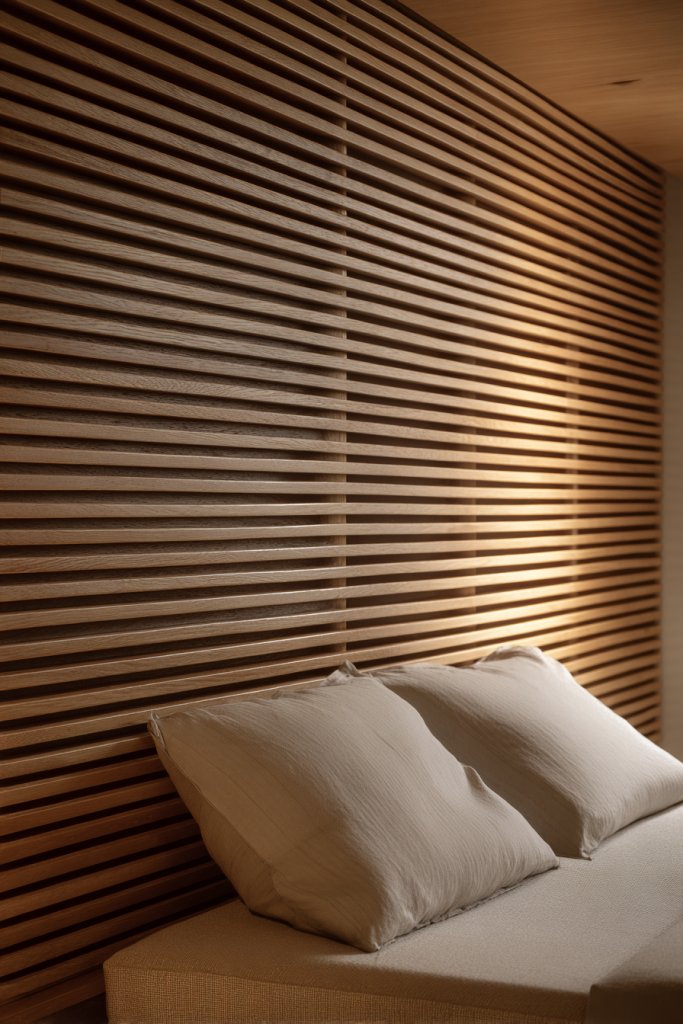
Ever wish your bedroom felt more inviting and cozy? A plain wall can sometimes lack the warmth that makes a space feel truly personal. Wooden slats are the perfect solution, adding a touch of nature and a modern edge simultaneously. They create a textured feature that elevates the entire room without overwhelming it.
Picture a wall covered in evenly spaced horizontal or vertical wooden slats. The natural grain and warm tones of the wood contrast beautifully with soft bedding and neutral decor. When light hits the slats, it highlights their texture, casting subtle shadows that add depth. The sleek lines can make a room appear taller or more spacious, depending on orientation.
Choose lighter woods like oak or maple for airy, Scandinavian-inspired spaces, or darker woods like walnut for a richer, more luxurious feel. Vertical slats can make ceilings look higher, while horizontal ones add warmth and widen the space. For a rustic vibe, opt for reclaimed or distressed wood; for a sleek modern look, smooth and polished slats work best. Seasonal accents can be added with textiles or decorative throws.
Start by measuring your wall and selecting the type of wood and slat size. Use a level and spacers to ensure even placement. Attach the slats securely with nails or adhesive, depending on your wall type. For a clean look, hide mounting hardware behind the slats. Finish with a clear sealant or stain to protect the wood, and consider adding LED strip lighting behind for a subtle glow.
Customize your slat wall with painted accents or contrasting stains for a unique look. Incorporate decorative elements like floating shelves or sculptural pieces between the slats. For extra texture, add fabric panels or soft lighting fixtures that complement the wood’s warmth. Personal touches like engraved initials or custom finishes can make it truly yours.
A wooden slat wall combines natural beauty with sleek design, creating a balanced and inviting environment. It’s a durable feature that ages beautifully and adds value to your space. This project empowers you to experiment with textures and finishes, making your bedroom uniquely yours. Ready to infuse your space with warmth and modern style?
4. Faux Brick or Stone Veneer for Rustic Charm
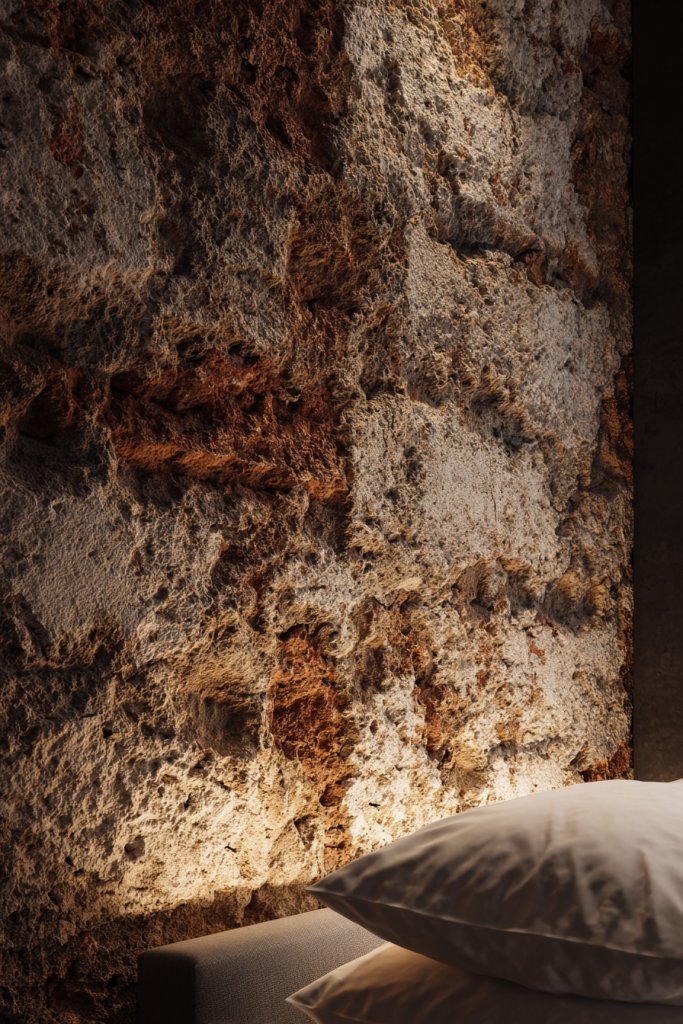
Does your bedroom need a dash of rugged charm or industrial edge? Real brick or stone can be heavy and costly, but faux veneers offer an affordable alternative. They instantly add texture and character, transforming a plain wall into a statement piece. If you love the idea of cozy, rustic vibes or urban loft style, this is your go-to option.
Imagine a wall clad in faux brick panels with a slightly weathered finish, giving an aged, authentic look. The textured surface adds tactile interest, inviting touch and curiosity. When illuminated with warm lighting, the brick’s earthy tones glow softly, creating an inviting atmosphere. The contrast between rough brick and soft bedding enhances the overall aesthetic.
Choose lighter, neutral tones for a modern industrial look or darker, richer shades for rustic coziness. For small rooms, vertical or narrow panels can avoid overwhelming the space. In larger bedrooms, full wall coverage creates a striking focal point. Mixing brick with other textures like wood or metal can add layers of visual interest.
Start by cleaning the wall and measuring the area. Apply adhesive designed for panels, ensuring full coverage for a secure fit. Carefully place each panel, aligning joints seamlessly. Use a level and spacers to maintain even lines. Finish with a waterproof sealant if needed, and consider adding LED strip lighting behind for a subtle glow.
Personalize by choosing different shades or textures, from smooth to heavily weathered. Incorporate decorative wall-mounted shelves or vintage-inspired fixtures to complement the rustic look. You can also paint the mortar joints in contrasting colors for a more artistic vibe. Add accessories like industrial-style lighting fixtures for extra appeal.
Faux brick or stone veneer adds instant character without the weight of real materials. It’s a durable, low-maintenance upgrade that boosts your room’s style quotient. Seeing your transformed wall will inspire confidence in your decorating skills. Ready to give your bedroom a cozy, rustic upgrade?
5. Oversized Canvas or Mural Art as a Focal Point
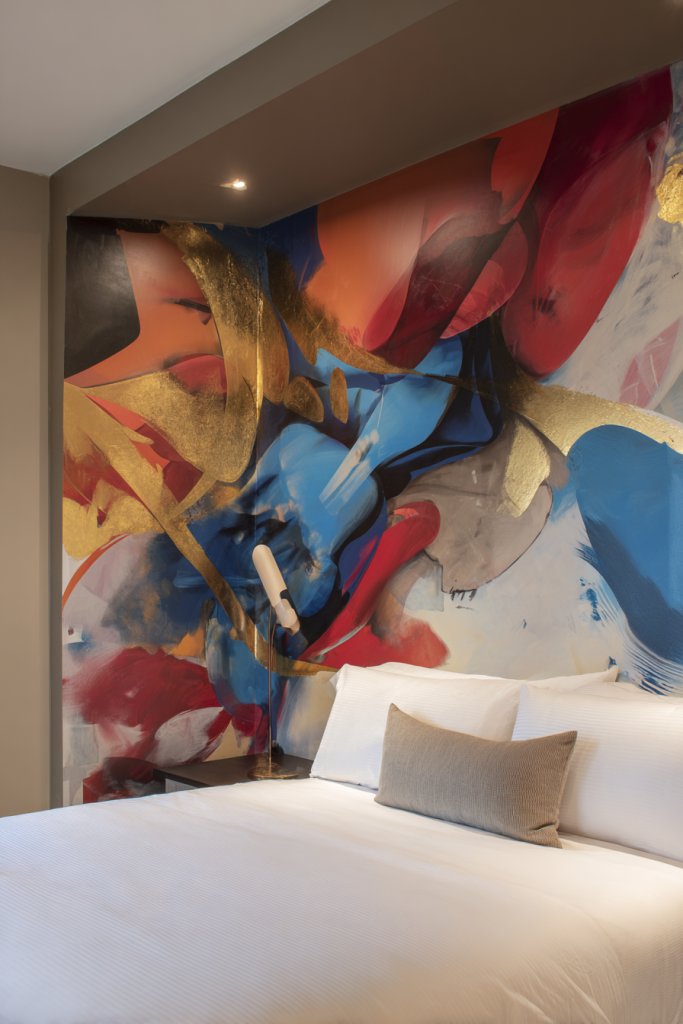
Looking for a bold way to make your bedroom stand out? An oversized canvas or mural can instantly become the room’s centerpiece, adding personality and drama. It’s perfect for those who want art but don’t want to deal with frames or tiny prints cluttering the space. Plus, it’s a chance to showcase your interests or favorite designs.
Picture a large, vibrant mural spanning the entire wall behind your bed, depicting a serene landscape or abstract masterpiece. The scale draws the eye and creates a sense of depth, making the room feel larger. Textures and bold colors in the artwork can complement your bedding and furniture, tying the whole room together.
Opt for murals with calming nature scenes for a relaxing vibe or energetic geometric patterns for a lively atmosphere. Custom murals allow you to incorporate personal images or themes, making it uniquely yours. For smaller rooms, choose a mural that covers only part of the wall to avoid overwhelming the space. Seasonal variations, like changing artwork, keep the room feeling fresh.
Start by selecting a mural or large canvas that fits your space and style. Murals can be painted directly on the wall or applied as wallpaper. If painting, sketch your design first, then paint in layers, allowing drying time. For wallpaper, carefully align panels and smooth out bubbles. Consider sealing the finished piece with a clear coat for protection. Hang or install the canvas securely, ensuring it’s level.
Personalize with custom illustrations, photographs, or digital art, printed on large canvases. Frame smaller sections of mural art for a varied, eclectic look. Incorporate lighting fixtures nearby to highlight the artwork and add ambiance. Mix textures by adding sculptural elements or 3D accents for an even more eye-catching focal point.
A large canvas or mural turns your bedroom into a personal gallery, full of character and style. It’s a simple project that offers big visual impact, boosting your confidence in DIY decor. Once complete, you’ll feel proud of creating a true statement piece that reflects your personality. Ready to turn your wall into art?
6. Geometric Paneling with Paint or Vinyl Wraps
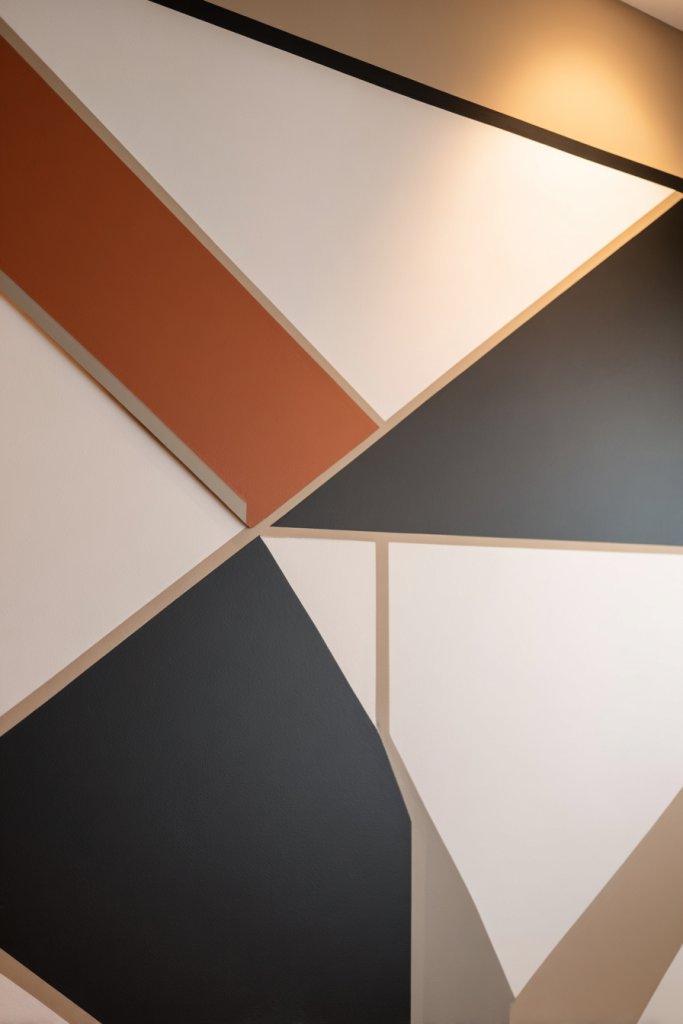
Do plain walls bore you? Geometric patterns can inject a modern, dynamic vibe into your bedroom with minimal effort. Whether painted or applied with vinyl, these shapes create visual interest and structure. It’s a clever way to add personality and a sense of order without cluttering the space.
Imagine a wall segmented into bold triangles, squares, or hexagons, each painted in contrasting or harmonious colors. The sharp lines and repetitive shapes draw attention and guide the eye across the room. When light hits these surfaces, subtle shadows emphasize the geometric design, making the wall appear textured and layered.
Use monochrome tones for a sleek, sophisticated look or mix vibrant colors for playful energy. Small rooms benefit from smaller, more intricate patterns, while larger bedrooms can handle bigger shapes with bolder contrasts. Vinyl wraps offer a clean, quick application that’s perfect for renters or those seeking a no-mess option. Seasonal colors or metallic accents can refresh the look.
Start by mapping out your pattern with painter’s tape or a stencil. Use painter’s tape to create crisp lines, then paint in sections with your chosen colors. For vinyl, measure and cut the decals carefully, then apply them smoothly to avoid bubbles. Use a level and ruler for precision. Seal painted designs with a clear topcoat for longevity, especially in high-moisture environments. Practice your technique on scrap before tackling the wall.
Customize by adding metallic or iridescent paints within the shapes for extra flair. Layer different finishes, like matte and gloss, for depth. Incorporate small lighting fixtures or decorative trims along the shapes to add subtle highlights. Personalize with initials or symbols within some shapes for a truly unique touch.
Geometric paneling gives your room a fresh, contemporary edge that’s easy to update with new colors or patterns. It’s a fun, creative project that instantly transforms your space. Once completed, you’ll feel a sense of achievement and pride in your stylish, structured wall. Ready to get geometric?
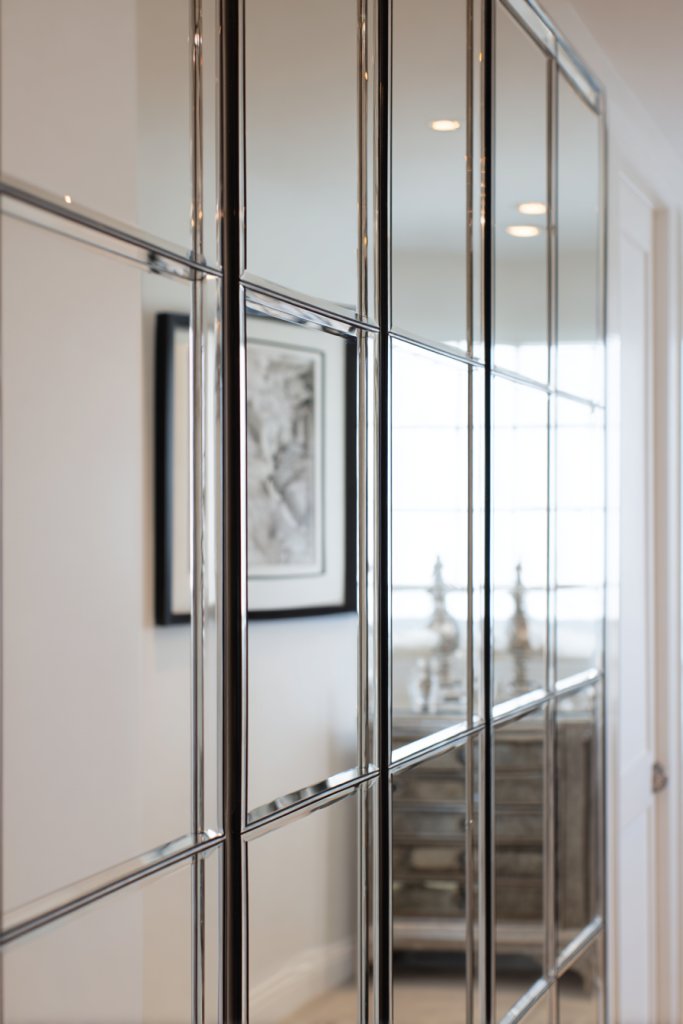
7. Mirror Wall to Add Light and Perception of Space
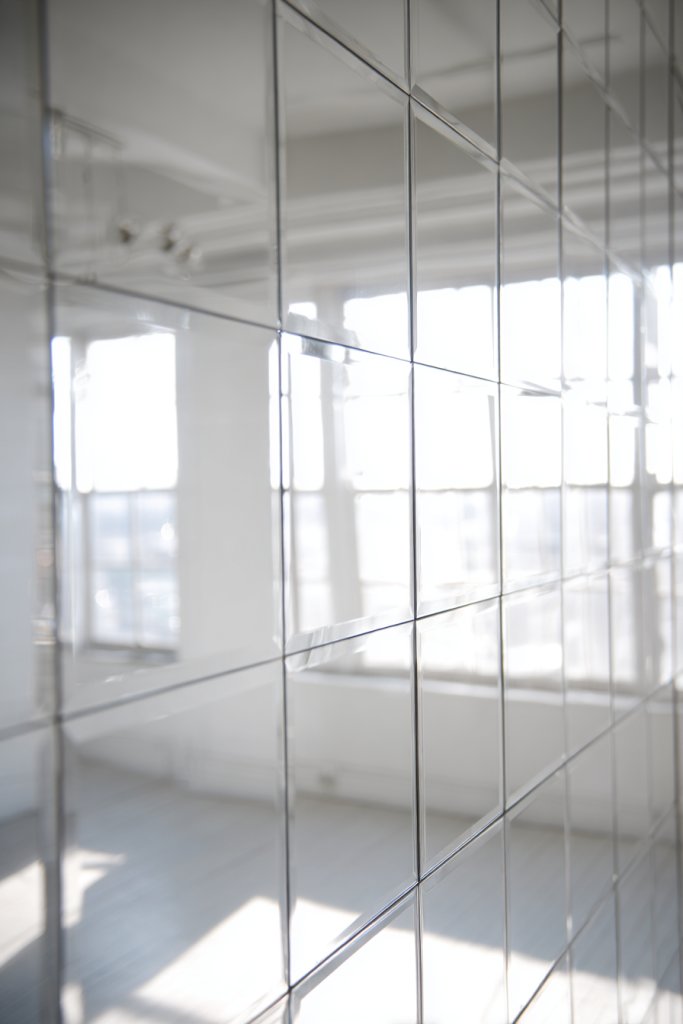
Does your bedroom feel dark or cramped? Mirrors are a classic trick to make any room feel brighter and larger without major renovations. A wall full of mirrors can reflect natural light or ambient lighting, instantly opening up the space. Plus, they add an element of elegance and function. Who doesn’t love a good mirror selfie spot?
Visualize a wall covered with decorative mirrors in various shapes and sizes—rounds, squares, or abstract forms—arranged artfully. The reflections bounce light around, creating a luminous, airy atmosphere. The different frames and styles add visual interest and can complement your decor theme, from vintage to modern chic. The mirror wall also acts as a statement piece that commands attention.
Choose frameless mirrors for a sleek, minimalist look or ornate, vintage frames for traditional charm. For small spaces, a large wall mirror can double the perceived size instantly. In larger rooms, create a gallery wall with mixed mirror shapes and sizes for visual diversity. Consider adding a decorative border or arrangement that emphasizes symmetry or asymmetry based on your taste.
Start by measuring your wall and selecting mirrors that fit your style. Securely mount each mirror using appropriate hardware, ensuring they are level and evenly spaced. For a cohesive look, use matching frames or colors. Consider adding backlighting or LED strips behind the mirrors for a glow that enhances the effect. Keep safety in mind, especially with larger mirrors—use anchors or professional installation if needed.
Personalize by choosing mirrors with unique frames—metal, wood, or decorative designs—that match your decor. Incorporate small shelf sections within the mirror wall for decorative or functional items. Use lighting to highlight certain areas or create a dramatic effect. Play with symmetry and asymmetry to craft your ideal visual arrangement.
A mirror wall not only brightens your room but also boosts your confidence with all those perfect reflections. It’s a versatile feature that can be both functional and decorative, adding a touch of glamour. Once installed, it’s a stunning focal point that elevates your entire bedroom aesthetic. Ready to reflect your style?
8. Fabric Wall Coverings for Softness and Texture
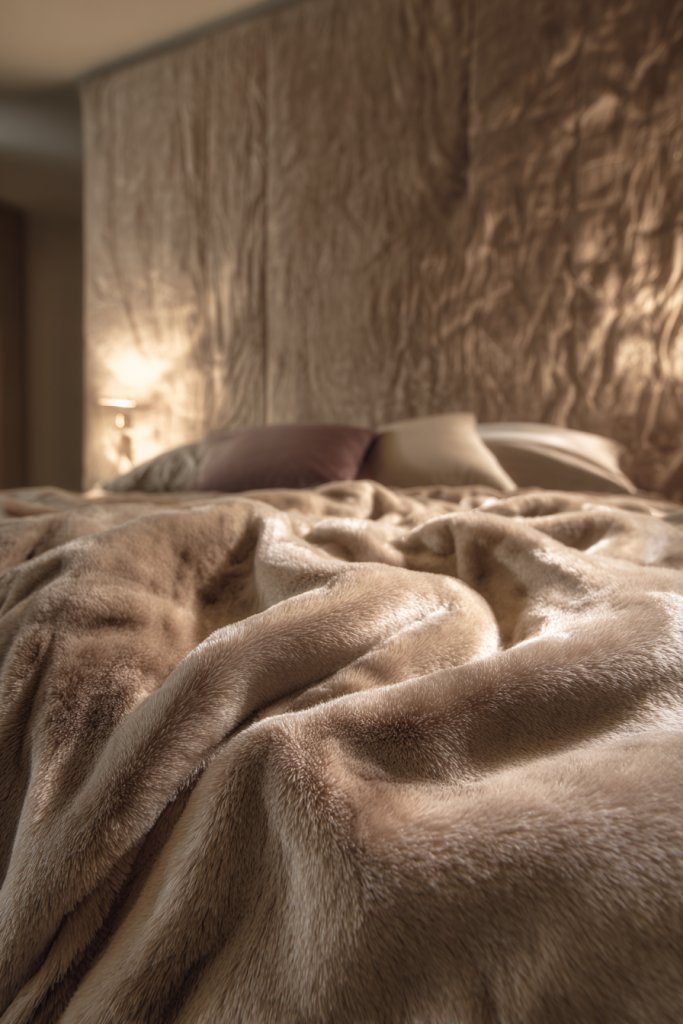
Feeling like your bedroom walls are too hard or cold? Fabric wall coverings can soften the space instantly and add a cozy, inviting feel. They’re an easy way to introduce texture and warmth without a full remodel. Plus, fabric can absorb sound, making your bedroom quieter and more peaceful. Who knew wall decor could double as a comfort feature?
Imagine a wall draped in a luxurious velvet or linen fabric, with gentle folds creating a plush visual effect. Light plays softly off the fabric, highlighting its texture and adding depth. The fabric’s color and pattern can complement your bedding or act as a neutral backdrop, setting the mood for relaxation. For added elegance, add decorative trim or tassels for a finished look.
Choose natural fabrics like linen or cotton for a casual vibe, or go for silk or velvet for luxury. Patterned fabrics can add visual interest, while solid colors keep things understated. For seasonal updates, switch fabrics or add decorative accents like fringe or piping. Large fabric panels work well in bigger rooms, while smaller sections or framed fabric pieces suit compact spaces.
Start by selecting a durable fabric and measuring your wall. Use adhesive strips, fabric glue, or staple gun to attach the fabric securely, making sure it’s smooth and wrinkle-free. For a more polished look, stretch the fabric tightly and trim excess. Consider adding a backing board or frame for a tailored appearance. Protect the fabric with a fabric spray or sealant for longevity.
Personalize your fabric wall by choosing colors and patterns that match your decor. Incorporate decorative trims, embroidery, or appliqués for a custom touch. Layer different textures or fabrics for a curated, eclectic look. Use lighting effects like uplights or side sconces to enhance the tactile quality of the fabric.
Fabric wall coverings add a layer of softness that makes your bedroom feel like a retreat. They’re a versatile option for renters and DIY enthusiasts, offering a quick upgrade with big impact. Once done, you’ll feel proud of creating a warm, tactile environment. Ready to wrap your walls in comfort?
9. Color Blocked Wall with Bold Contrasts

Are your walls feeling a bit dull and uninspired? Color blocking can bring energy and modern flair to your bedroom effortlessly. It’s a playful way to define spaces or create visual zones without adding furniture or decor. Plus, it’s simple enough for beginners but impactful enough to impress.
Visualize a wall divided into sections with contrasting colors—perhaps deep navy paired with crisp white, or vibrant coral with muted gray. The clean lines and bold color choices immediately draw attention and set the tone for the room. When illuminated, the contrasting sections create visual depth and dynamism, making the space feel lively and intentional.
Use high-contrast combinations for a dramatic effect or softer shades for a more subtle, sophisticated look. Horizontal blocks can widen the room, while vertical or diagonal sections add height. For seasonal updates, swap out colors to match your mood or trends. Smaller bedrooms benefit from narrower blocks, while larger rooms can handle broader, more graphic designs.
Start by sketching your design and marking sections with painter’s tape. Choose high-quality, washable paint in your selected colors. Carefully tape along your lines and paint within each section, removing tape before the paint fully dries for sharp edges. Consider using a roller for large areas and brushes for edges. Seal with a clear topcoat if desired for durability.
Personalize with metallic or glitter accents within the contrasting sections for extra sparkle. Incorporate textured paints or finishes for added dimension. Add decorative trims or decals along the edges of color blocks for a layered look. Use accessories like cushions and throws to pick up the colors and unify the design.
Bold color blocking transforms bland walls into a vibrant art piece that energizes your entire space. It’s a fun project that allows for creative expression and bold experimentation. Once complete, your bedroom will feel more curated and confident in your design choices. Ready to block out the dullness?
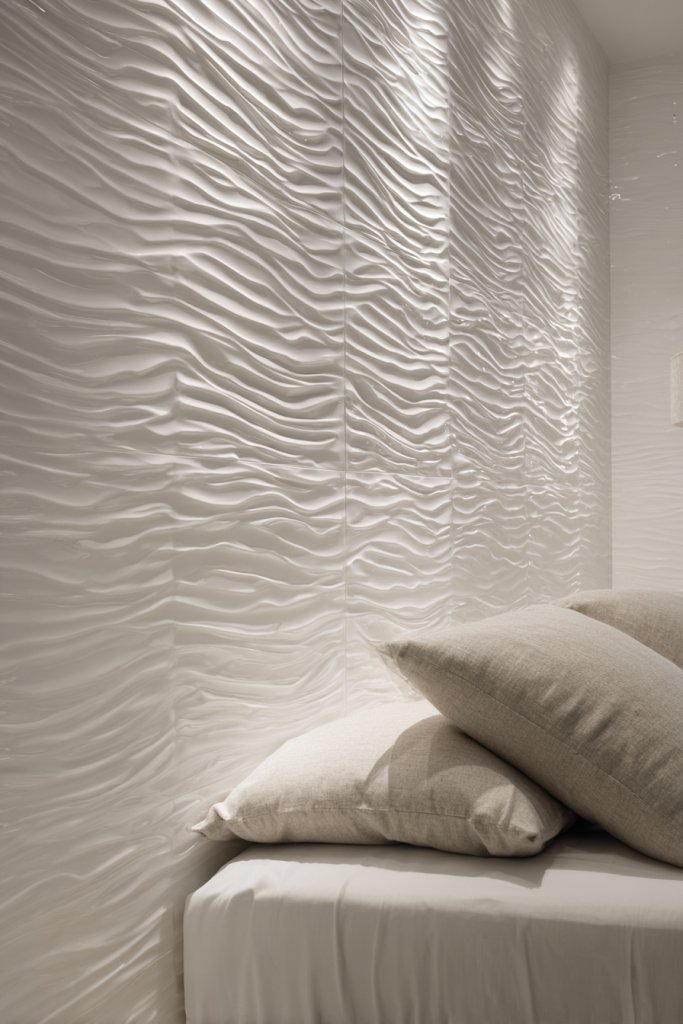
10. Artistic Wall Panels with 3D Textures
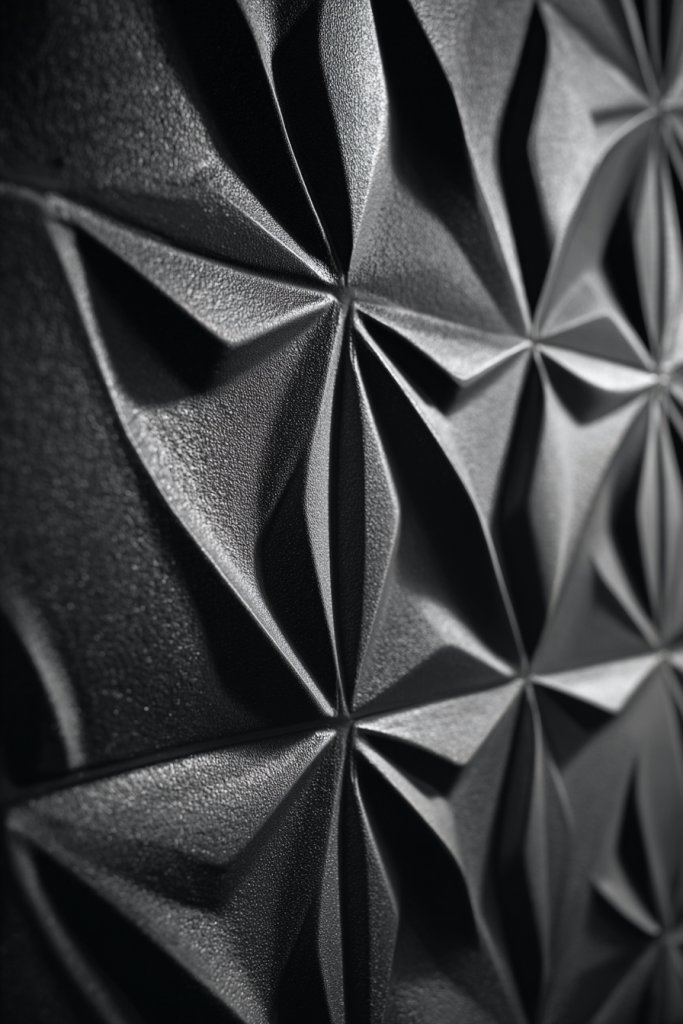
Looking to add a wow factor that combines art and architecture? 3D wall panels bring tactile dimension and a modern edge to any bedroom. They’re perfect for creating focal points that feel dynamic and sophisticated. Plus, they hide imperfections and add a custom, high-end vibe.
Imagine panels with geometric shapes, ripple effects, or abstract textures that protrude from the wall surface. The play of light and shadow across these surfaces enhances depth and visual interest. These panels can be finished in metallic, matte, or glossy paints, further customizing the look. It’s like having a piece of modern art that also serves as a statement feature.
Select panels that match your decor—sleek and minimalist for contemporary spaces or textured and layered for eclectic styles. You can install a single large panel or arrange multiple smaller ones in patterns. Color options range from neutral tones to bold hues, depending on your style. Seasonal accents can be added with accessories or lighting.
Start by choosing the panel design and measuring your wall. Attach panels using heavy-duty adhesive or mounting hardware, ensuring they are level and flush. For larger installations, consider professional help for precise alignment. Finish with paint or sealant to protect surfaces and enhance textures. Add lighting fixtures to emphasize textures and create shadows.
Customize panels with paint, metallic finishes, or LED backlighting for extra flair. Incorporate metallic or colored accents within the textures for contrast. Mix materials like wood, resin, or foam for varied tactile effects. Frame or border the panels with trim to give a polished, gallery-like appearance.
Artistic wall panels with 3D textures elevate your bedroom into a modern sanctuary. They showcase your taste for design and innovation, making a lasting impression. Once installed, you’ll be proud of your creative upgrade that blends art and architecture seamlessly. Ready to add some dimensional drama?
11. Vertical Garden Wall Using Faux Greenery Panels
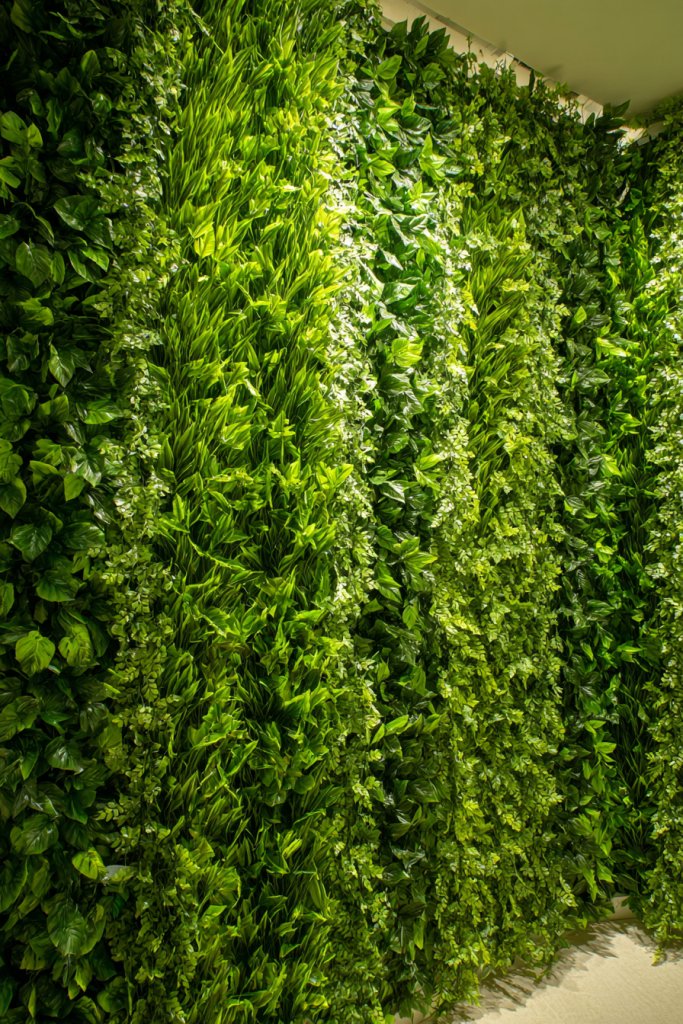
Ever wish your bedroom felt more alive and fresh without the maintenance of real plants? Faux greenery panels offer a lush, vibrant look that stays beautiful year-round. They add a natural touch and calming vibe, perfect for boosting your mood and creating a serene retreat. Plus, no watering or sunlight needed!
Picture a wall covered with lush, green faux foliage arranged in a dense, vertical pattern. The texture mimics real leaves, adding tactile interest and depth. When illuminated with soft lighting, the greenery creates a calming, nature-inspired environment. It’s a simple way to bring the outdoors inside with zero upkeep.
Choose from various leaf styles—large tropical leaves, delicate ferns, or mossy textures—to match your aesthetic. For a modern look, go for uniform panels; for a wild, jungle vibe, mix different types. Adjust the density and height of the panels based on your space and style. Seasonal variations can be achieved by swapping or layering different designs.
Measure your wall and select the appropriate faux greenery panels. Securely attach with adhesive, hooks, or mounting strips, ensuring they are evenly spaced. Mix and match panels for a layered, natural effect. For larger walls, consider framing the panels for a clean finish. Enhance with subtle lighting to highlight the textures and colors.
Add decorative elements like wood or metal frames around the panels for a structured look. Incorporate small shelves or ledges for decorative objects, avoiding plant-related items. Use LED strips behind the panels to create a glow that mimics dappled sunlight. Personalize with different shades of green or layer with other textures.
A faux greenery wall offers a lush escape that’s easy to maintain and endlessly customizable. It’s an instant upgrade that makes your space feel fresh and inviting. Once installed, you’ll love how it transforms your bedroom into a calming oasis. Ready to green your space effortlessly?
12. Framed Mirror or Statement Frame Wall
Want to add elegance and functionality in one go? A wall of framed mirrors or a large statement frame can do just that. It creates a focal point that brightens the room and offers practical use for dressing or checking your look. Plus, it adds a touch of sophistication and personality to your space.
Envision a gallery of variously shaped mirrors—rounds, rectangles, or ornate vintage styles—arranged symmetrically or asymmetrically. The reflective surfaces bounce light around, making the room feel more spacious and lively. Decorative frames in metals, woods, or painted finishes add texture and style, tying your decor theme together.
Mix and match different frame styles for an eclectic vibe or choose uniform frames for a minimalist, modern look. Large, single statement mirrors work well in spacious bedrooms, while smaller groups of mirrors suit more compact spaces. Seasonal updates can be achieved by swapping out frames or adding decorative elements around the mirrors.
Measure your wall and select mirrors that fit your design vision. Secure each mirror with appropriate hardware—anchors for heavy frames, or adhesive for lighter ones. Arrange the mirrors on the floor first for the perfect layout before hanging. Ensure all are level and spaced evenly. Consider adding lighting fixtures or sconces to highlight the reflective surfaces.
Personalize with custom frames, painted finishes, or decorative motifs. Incorporate small shelves or hooks around the mirrors for accessories or small decor items. Use lighting to create a glow that emphasizes the frames and enhances their decorative appeal. Add your favorite quotes or decals on the wall around the mirrors for extra personality.
A framed mirror wall elevates your bedroom’s style while adding practicality. It’s a statement of elegance and taste, perfect for those wanting a versatile, beautiful feature. Once complete, you’ll feel inspired by your own design skills and the transformed space. Ready to reflect your style?
13. Metallic Accents with Gold or Copper Foil
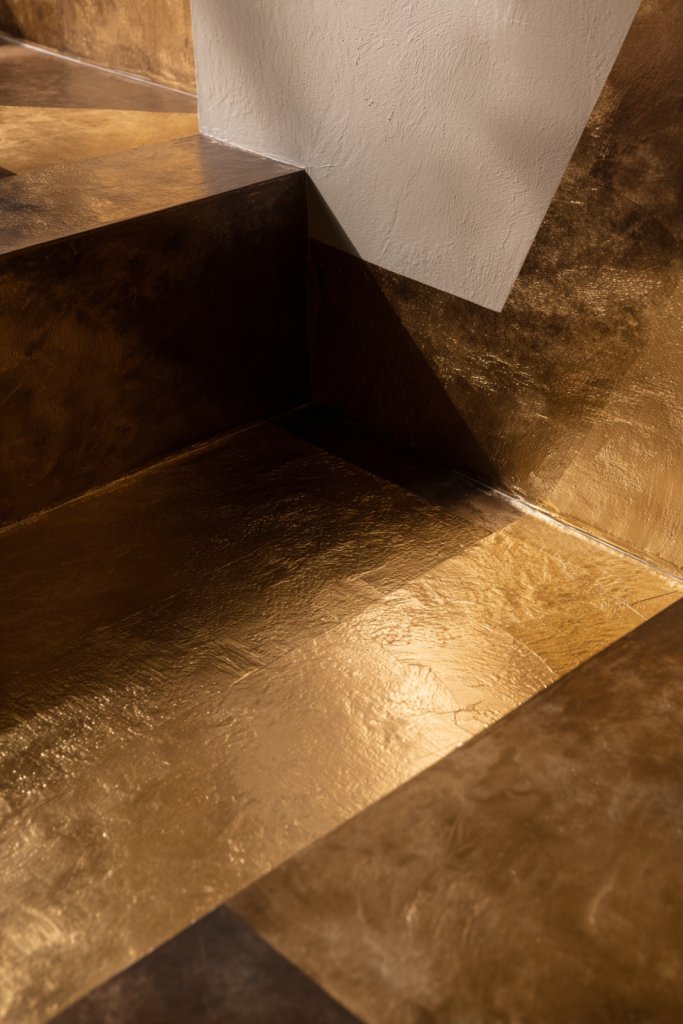
Looking to add a touch of glam and sophistication? Metallic accents can instantly elevate your bedroom’s aesthetic. Gold, copper, or bronze foils reflect light beautifully, creating a luminous, upscale vibe. It’s a subtle way to make your wall pop without overwhelming the space with color.
Imagine a wall with metallic geometric patterns or delicate foil accents brushed onto textured surfaces. The reflective quality adds depth and richness, especially when paired with soft lighting. The warm tones of copper or the shimmering glow of gold catch the eye and create a luxurious atmosphere. It’s like having a piece of art that also works as decor.
Use metallic foils sparingly in combination with matte paints for contrast, or cover entire sections for a bold statement. Incorporate metallic decals, borders, or abstract shapes to suit your style. Mix warm and cool tones for a balanced look or keep it monochrome for a sleek, modern vibe. Seasonal accents like metallic seasonal motifs can add variety.
Apply metallic foil or decals over a painted or textured base. For foils, use adhesive spray or foil adhesive, carefully smoothing out bubbles with a squeegee. For decals, peel and stick following the pattern. Seal with a clear protective finish to prevent tarnishing or peeling. Use lighting to enhance the metallic shimmer and create focal points.
Customize by combining metallic accents with colored paints or textured wallpapers. Incorporate small metallic accessories around the room to tie the look together. Use lighting fixtures, like sconces or LED strips, to reflect off the metallic surfaces. Personal touches like monograms or initials in metallic foil add a bespoke element.
Metallic accents bring a luxe, modern edge that’s easy to incorporate. They add a shimmer and depth that transform your room into a glamorous retreat. Once you see how light plays off the surfaces, you’ll be inspired to experiment more with metallic decor. Ready to shine?
14. Chalkboard or Writable Wall for Personalization
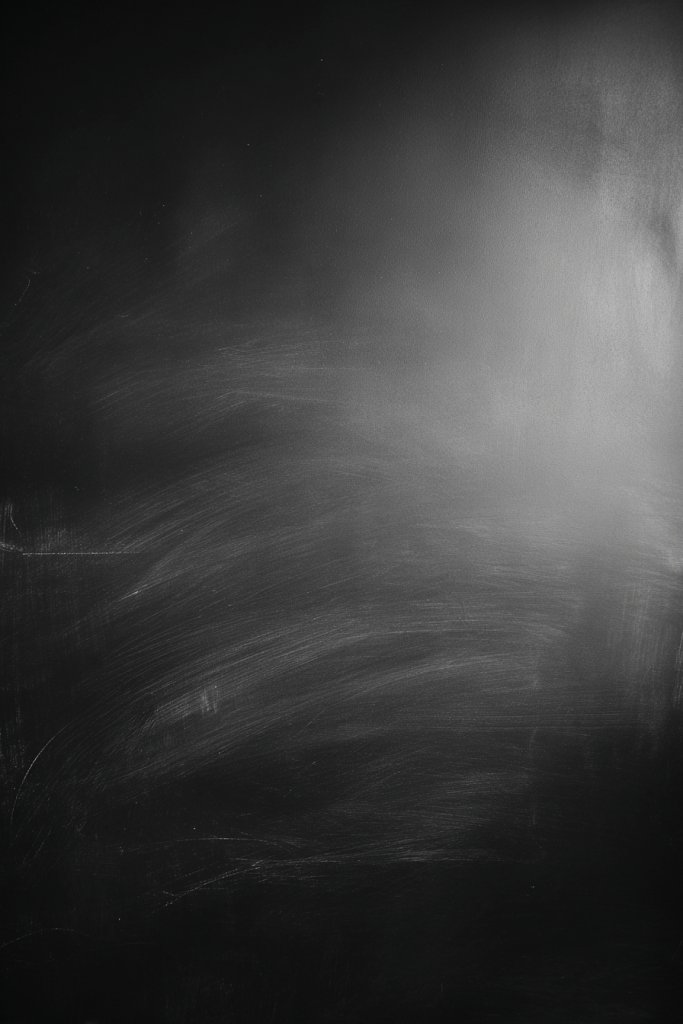
Want a space that’s both functional and fun? A chalkboard or writable wall invites personal expression and keeps your room lively. It’s perfect for leaving love notes, doodling, or tracking your daily goals. Plus, it’s easily updated, so your bedroom can evolve with your mood.
Picture a large blackboard wall where you can write inspiring quotes or sketch playful designs. The matte surface contrasts beautifully with surrounding decor, adding an element of interactivity. Chalk dust and colorful chalks bring a playful, artistic vibe. It’s a versatile backdrop that can change daily, making your space feel dynamic.
Choose traditional chalkboard paint for a classic look or opt for a whiteboard surface for a cleaner, modern feel. Incorporate frames or decorative borders to integrate it seamlessly into your decor. Seasonal themes or motivational quotes can refresh the space regularly. For a more subtle look, use a small section or a painted panel.
Start by cleaning the wall thoroughly and applying a primer if needed. Paint with chalkboard or whiteboard paint using a roller or brush, applying multiple coats for an even surface. Let it dry completely before using. For added durability, seal with a clear topcoat. Use chalk or markers to personalize and update regularly.
Add decorative borders, decals, or themed artwork around the writable area to make it feel intentional. Incorporate storage for chalks or markers nearby for easy access. Change quotes and doodles seasonally or as your mood shifts. Personal touches like initials or custom designs add character.
A writable wall encourages creativity and makes your bedroom uniquely yours. It’s a simple project that adds functionality and personality. Watching it evolve over time makes you feel accomplished and inspired. Ready to write your own story?
15. Textured Wall Tiles with Ceramic or Porcelain
Hoping to add luxury and durability? Textured wall tiles made of ceramic or porcelain can turn your bedroom into a spa-like retreat. They offer endless design options, from intricate patterns to sleek textures. Plus, they’re resistant to moisture and easy to clean, making them practical as well as stylish.
Picture a wall covered in textured tiles with embossed geometric patterns or tactile surfaces resembling natural stone. The play of light over these textured surfaces creates shadows and highlights, adding depth and richness. The tiles’ gloss or matte finish enhances the visual appeal, making the wall a true focal point that exudes sophistication.
Select from a variety of textures—smooth, ridged, embossed—based on your style. Use patterned tiles in small doses for accent walls or cover entire sections for high impact. Mix with smooth tiles or painted surfaces for contrast. Seasonal accents could include adding decorative trims or combining with textured paint.
Prepare your wall by cleaning and leveling the surface. Use a tile adhesive suitable for ceramic or porcelain tiles and apply with a notched trowel. Carefully place each tile, aligning patterns and spacing evenly. Grout the tiles once set, wiping away excess for a clean finish. Seal the grout for added durability and easy maintenance. Consider professional help for large or complex installations.
Customize with different tile textures and colors for a layered effect. Incorporate decorative trims or borders to frame the tiled area. Use accent lighting or LED strips to emphasize the texture and patterns. Personal touches like mosaic inserts or initials embedded in the tiles can make the feature uniquely yours.
Textured wall tiles elevate your bedroom with a touch of elegance and craftsmanship. They create a lasting impression and add value to your space. Once installed, you’ll enjoy a luxurious, durable feature that’s easy to maintain. Ready to tile your way to a stunning upgrade?
16. Shadow Box Wall with Built-in Shelves or Niches

Want a wall that’s both decorative and functional? Shadow boxes with built-in shelves or niches give depth and dimension while offering space for display or storage. They add an architectural element that transforms flat walls into layered, interesting features. Plus, they’re versatile enough for any style.
Imagine a wall with recessed niches or shadow boxes arranged in an eye-catching pattern. You can fill these with books, sculptures, or decorative objects—avoiding overused items like plants or artwork. The depth creates shadows that change throughout the day, adding visual intrigue. The layered look makes the room feel more crafted and intentional.
Choose from symmetrical or asymmetrical arrangements based on your aesthetic. Use different depths or shapes—square, rectangular, or circular—for variety. In smaller rooms, keep niches narrow and shallow; larger bedrooms can accommodate deeper, more prominent boxes. Finish with paint, wallpaper, or textured finishes inside the niches for added personality.
Plan your layout with a pencil sketch, then cut drywall or install pre-made shadow boxes. Secure the boxes or shelves firmly to the wall with appropriate anchors. Paint or decorate the inside of the niches to coordinate with your room’s theme. Arrange decorative objects within, balancing function and style. Seal edges for a polished look and ensure stability.
Add ledges or lighting inside or around the niches to highlight your objects. Personalize with textured finishes, wallpaper, or paint inside the boxes. Incorporate a mix of display items—sculptures, candles, or collectibles—avoiding common decor like vases or books. Use the niches for seasonal decor or personal treasures.
Shadow boxes create a layered, curated feel that elevates your room’s style. They blend architecture with decor, making your space feel thoughtfully designed. Once complete, you’ll enjoy a feature that’s both functional and artistic. Ready to build your own layered wall?
17. Monochrome Wall with Subtle Pattern or Texture
Craving a sophisticated, understated look? A monochrome wall with subtle pattern or texture offers elegance without overwhelming your space. It’s perfect for creating a calm, cohesive environment that feels polished and modern. Plus, it acts as a neutral backdrop for your decor to shine.
Visualize a wall painted in a single hue, like soft taupe or muted gray, with a delicate pattern or textured finish. The subtle variation invites touch and adds depth without bold contrasts. The light plays gently over the surface, highlighting the nuanced surface details, creating a refined, layered effect.
Opt for textured paints, embossed wallpapers, or matte finishes that add depth. Keep patterns minimal—like tone-on-tone geometric or subtle embossing—to maintain sophistication. Seasonal updates can involve swapping textiles or accessories that complement the tone. Larger rooms can handle more pronounced textures, while smaller rooms benefit from subtle finishes.
Prepare your wall with a smooth primer and base coat. Choose a textured paint or wallpaper with a subtle pattern. Apply with rollers, brushes, or spray for even coverage. For textured finishes, work in layers or use specialty tools. Seal with a matte or satin topcoat to preserve the surface and prevent damage. Take your time to ensure a smooth, even application.
Add decorative trims or molding to emphasize the subtle pattern. Incorporate textiles and accessories in matching tones for layered depth. Use lighting to cast gentle shadows and enhance the texture. Personalize with small metallic or glossy accents that catch light without overpowering the monochrome scheme.
A monochrome wall with subtle pattern exudes understated elegance, elevating your entire bedroom. It’s a versatile choice that’s easy to update with small accessories. Once finished, you’ll feel confident in your refined, stylish space. Ready to embrace subtle sophistication?
18. Minimalist Line Art Wall with Vinyl Decals
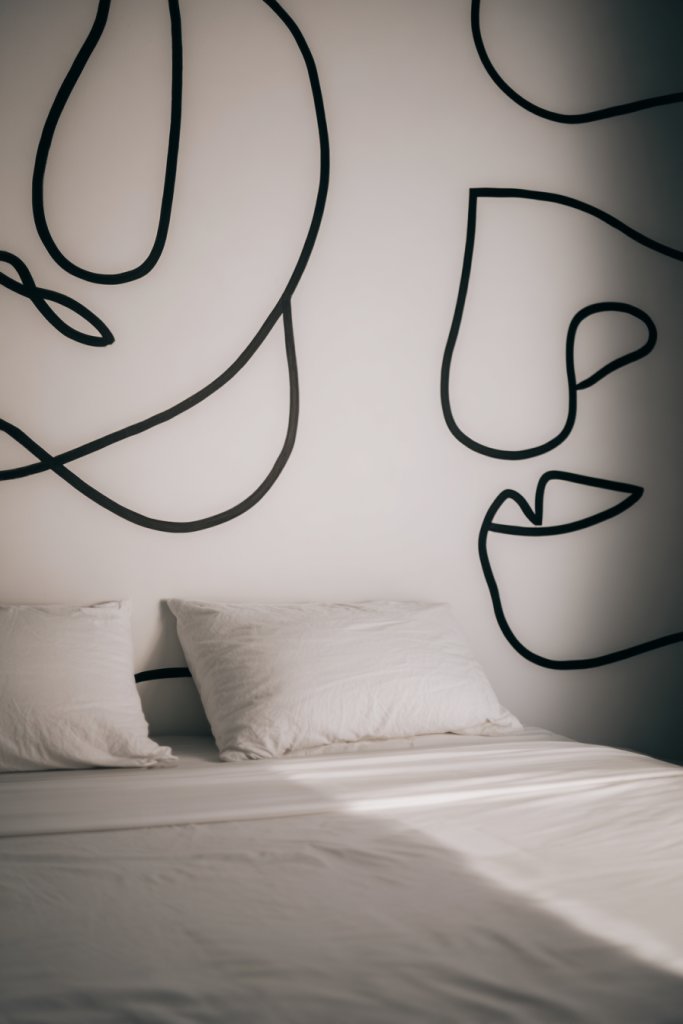
Searching for a sleek, modern statement? Minimalist line art vinyl decals offer a subtle yet impactful focal point. They add artistic flair without clutter or overwhelming detail. Perfect for lovers of clean design and understated elegance, these decals can transform your wall in minutes.
Imagine a delicate, continuous line drawing of a face or abstract shapes in black or metallic foil. The simplicity draws the eye and complements contemporary decor. When paired with soft lighting, the decal’s lines become more pronounced, adding depth and intrigue. It’s like a piece of art with a mind of its own, whispering style.
Choose from a variety of minimalist designs—geometric, botanical, abstract—to match your aesthetic. Keep the color palette simple—black, white, metallic—to maintain the minimalist vibe. For seasonal updates, swap decals or add subtle accents. Large, single decals work well in spacious rooms, while smaller ones suit compact spaces.
Clean your wall thoroughly to ensure adhesion. Carefully position the decal using masking tape or a level. Apply slowly, smoothing out bubbles with a squeegee or your hand. For intricate designs, use a hairdryer to help the decal adhere smoothly. Seal with a clear spray if you want extra durability or remove easily when you want a change.
Combine multiple decals for a custom mural effect or add metallic accents for shimmer. Frame or border the decal with trim or paint for a more finished look. Use lighting to create shadows that emphasize the minimalist lines. Personalize with initials or small icons that reflect your personality.
Minimalist line art decals add a refined, modern edge to your bedroom. They’re easy to install and remove, making them perfect for renters or those who love changing styles. Once in place, they elevate your decor effortlessly. Ready to keep it simple but stylish?
19. Vintage or Retro Wallpaper for Nostalgic Charm
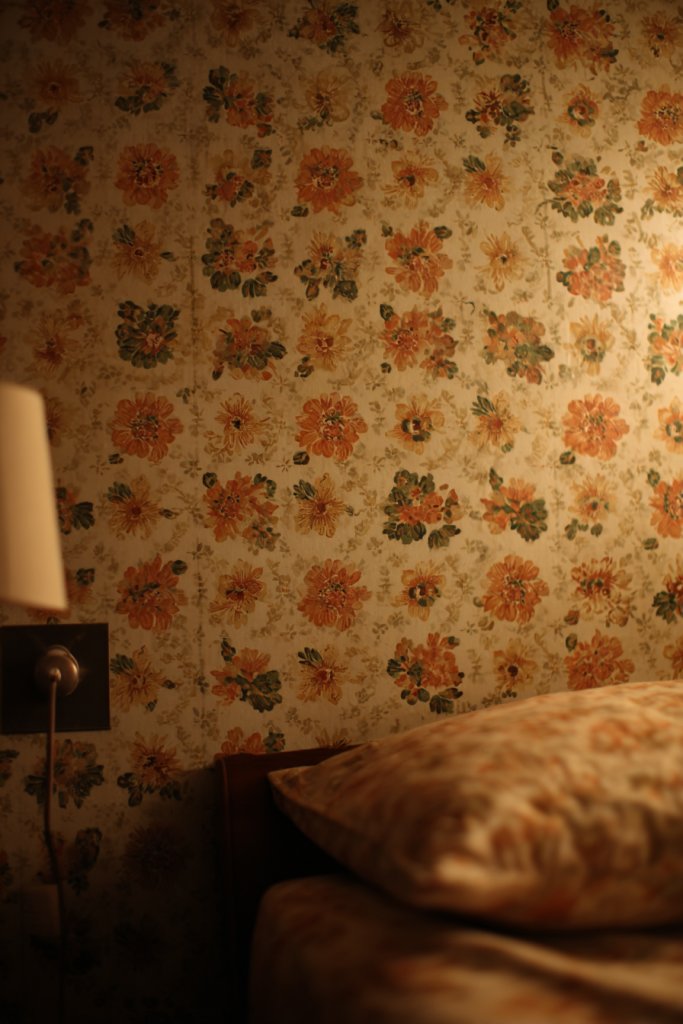
Craving a touch of nostalgia? Vintage or retro wallpaper can bring charm and personality rooted in history. It’s perfect for creating a cozy, character-filled space that feels lived-in and loved. If you love the idea of blending old-world charm with modern comfort, this is your go-to solution.
Visualize a wall adorned with floral or geometric patterns reminiscent of the 1950s or Victorian era. The intricate details and faded textures evoke warmth and stories of the past. When paired with modern furniture, it creates a stylish contrast that feels both classic and fresh. The patterns add richness and a sense of history to your space.
Choose bold, large-scale patterns for a statement or subtle, faded designs for a more understated look. Decorate with vintage-inspired accessories like antique frames or retro lighting. Seasonal updates can include mixing and matching different eras or styles for a layered, curated look. Smaller bedrooms benefit from scaled-down patterns to avoid visual overload.
Start by selecting a vintage-style wallpaper that fits your aesthetic. Prepare your wall by cleaning and smoothing it thoroughly. Carefully apply the wallpaper, matching patterns and handling seams with precision. Use a smoothing tool to eliminate bubbles and ensure adhesion. Seal the edges with a trim or decorative border if desired. Protect with a clear coating for longevity.
Incorporate vintage frames, mirrors, or accessories that complement the wallpaper. Mix textures like lace, velvet, or distressed wood to enhance the nostalgic feel. Seasonal touches like throw pillows or bedding in vintage fabrics can tie everything together. Personalize with family photos or heirloom accents.
Vintage wallpaper adds warmth, character, and a story to your bedroom. It’s a bold choice that reflects personality and taste, making your space truly yours. Once you see the transformation, you’ll be inspired to explore more nostalgic decor. Ready to step back in time?
20. Custom Wood or Metal Cutout Art as a Focal Piece
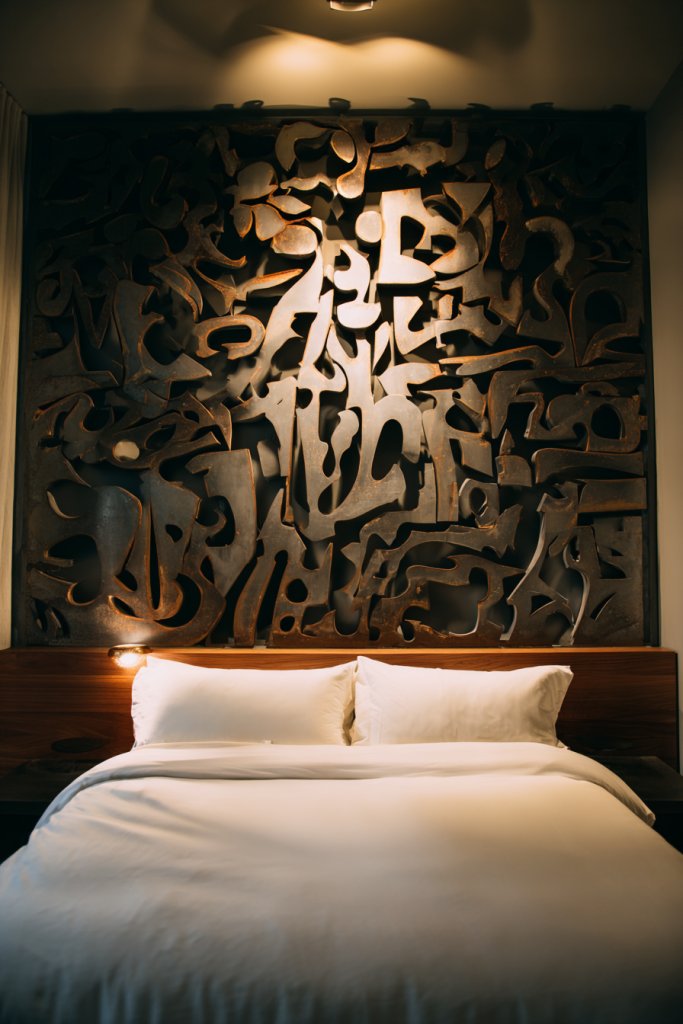
Looking for a truly unique statement? Custom wood or metal cutout art can serve as a personalized focal point that reflects your style and passions. It’s a durable, artistic feature that’s both modern and timeless. Plus, it’s a chance to showcase something meaningful or completely one-of-a-kind.
Imagine a large, intricately cut wooden or metal silhouette—perhaps of a favorite animal, abstract shape, or meaningful symbol—mounted prominently on your wall. The clean lines and bold contrast draw attention and add dimension. When lit properly, the shadows and textures create a captivating visual effect. It’s like having a sculpture that doubles as decor.
Choose materials and finishes that match your decor—natural wood, painted metal, or brushed finishes. Custom designs can be minimalist or elaborate, depending on your taste. Mount the art piece at eye level or above your bed for maximum impact. Seasonal or themed motifs can change over time, keeping your space fresh.
Work with a craftsman or DIY if you have the tools. Ensure the design is scaled correctly for your wall. Mount securely using appropriate hardware—anchors or brackets. Finish with paint, stain, or clear coat to enhance the material’s natural beauty. Proper lighting can accentuate the cutouts and add drama.
Add personalized details like engraved initials or meaningful quotes integrated into the design. Incorporate lighting to create shadows or highlight textures. Pair with other decor elements like textiles or shelving to balance the focal point. Change or update the art over time for a fresh look.
Custom cutout art showcases your personality and artistic taste, making your bedroom truly unique. It’s a lasting investment that elevates your space with craftsmanship and style. Once you see it in place, you’ll be proud of your original decor statement. Ready to create your own masterpiece?
Conclusion
Exploring these diverse bedroom accent wall ideas opens up endless possibilities for personal expression and style. Whether you prefer vibrant colors, textured designs, or artistic murals, each idea offers a unique way to enhance your space. Don’t hesitate to experiment and make your bedroom truly your own masterpiece. Start creating your dream bedroom today—your perfect focal wall is just a project away!