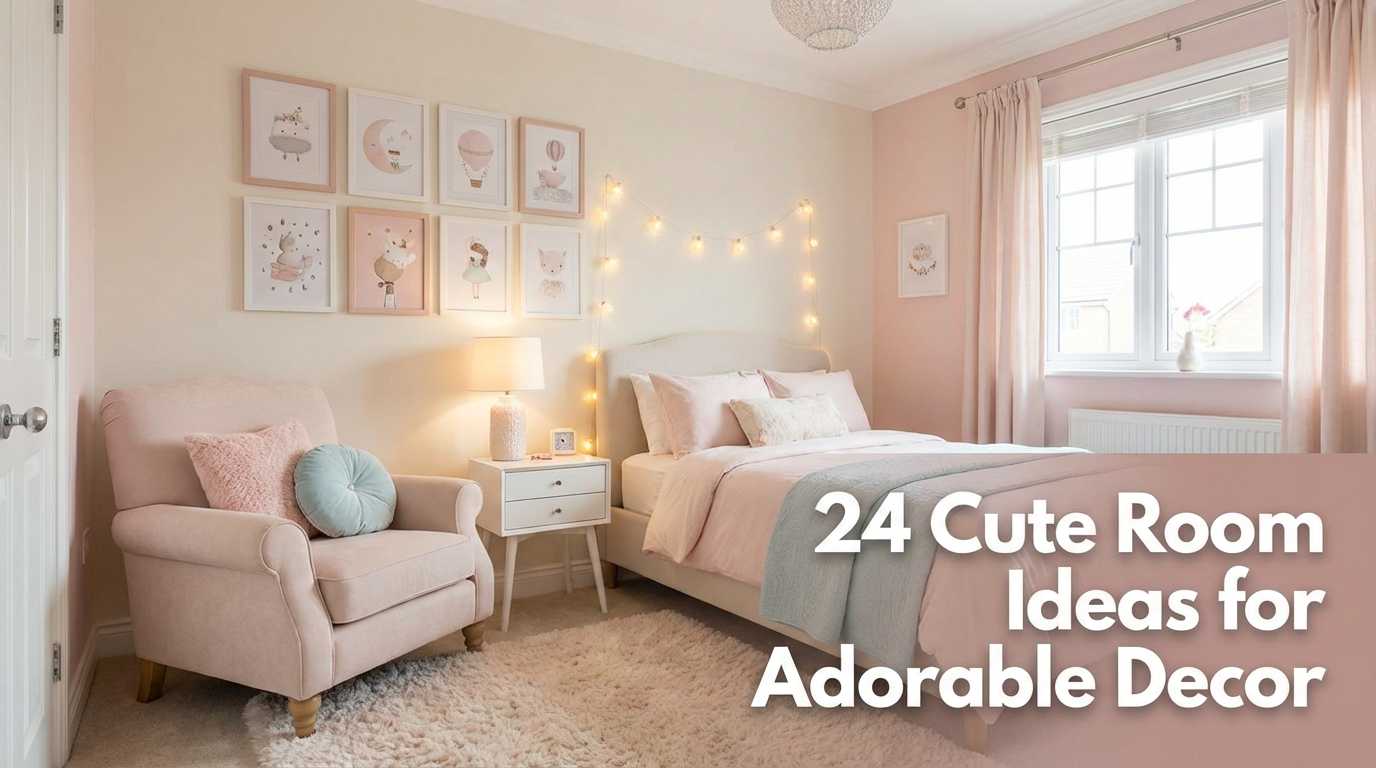
There’s something undeniably charming about a room that exudes cuteness and warmth—it’s like stepping into a cozy, whimsical haven. Cute room ideas have surged in popularity because they combine playful colors, adorable decor, and personal touches that make any space feel special and inviting.
In this article, you’ll find a delightful mix of ideas to inspire your decorating journey. Whether you love pastel palettes, quirky accessories, or fairy-tale-inspired accents, there’s something here to spark your creativity and help you craft a space that’s truly adorable and uniquely yours.
1. Whimsical String Light Canopy Over Bed
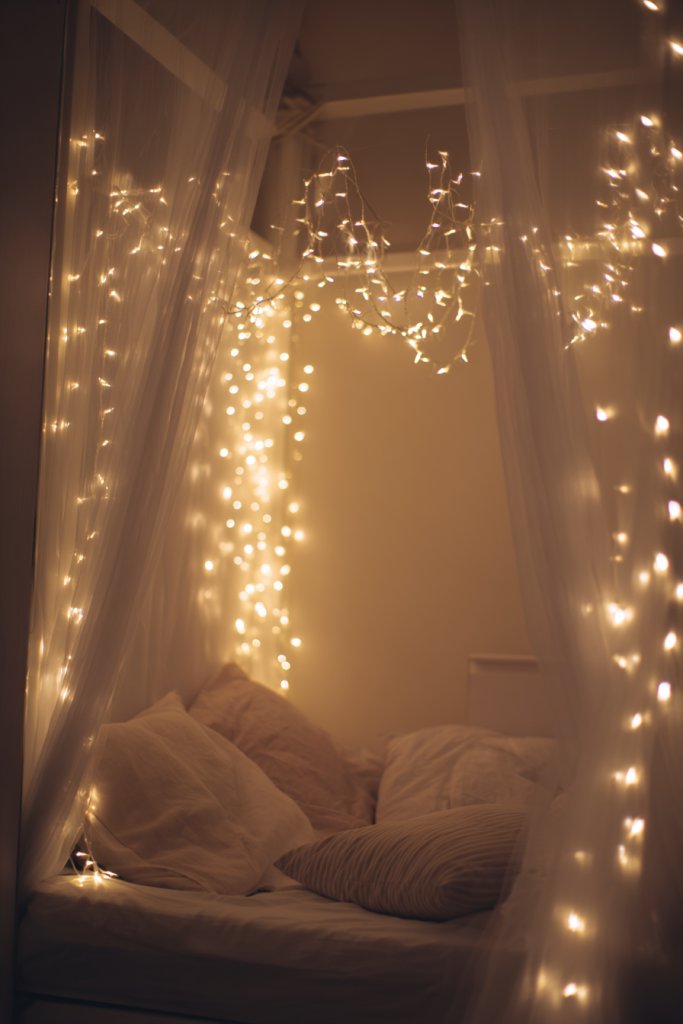
Ever wish your bedroom felt more like a fairy tale or a cozy retreat? Sometimes, a simple glow can turn a dull space into a dreamy haven. Instead of expensive decor, all it takes is a small touch of magic to elevate your sleep zone. If you crave a more enchanting atmosphere without the fuss, this idea might be just what you need.
Picture soft, twinkling fairy lights draped in a gentle canopy over your bed. The warm glow creates a cocoon-like feeling, making your space feel intimate and inviting. The lights cast playful shadows on textured bedding and plush pillows, adding depth and charm. As you relax, the gentle flicker soothes your mind, transforming your room into a tranquil escape.
Customize the color of the lights—warm white for classic coziness or pastel shades for a whimsical vibe. You can hang them in a simple straight line, swirl in a loose pattern, or create a canopy with multiple strands for a more dramatic effect. Seasonal tweaks like adding star-shaped clips or themed ornaments can make it festive. For smaller rooms, opt for a compact setup, while larger spaces can host sprawling designs.
Gather flexible string lights, preferably LED for durability and energy efficiency. Secure the wires with small hooks, adhesive clips, or clothespins along the ceiling or wall edges. Drape the lights in a canopy shape over your bed frame or headboard, ensuring they’re evenly distributed. Use extension cords safely, hiding excess wiring behind furniture or along corners. Turn on the lights before bedtime to ensure even coverage and ambient glow.
Add decorative clips or small fabric banners between light strands for extra flair. Mix in glow-in-the-dark stars or mini lanterns for variety. Choose lights with dimming features to adjust ambiance based on your mood. You can also incorporate a remote control for easy operation from bed, making it even more effortless to create the perfect atmosphere.
A string light canopy turns your bedroom into a dreamy retreat, perfect for unwinding after a long day. It’s a simple, cost-effective way to boost your space’s charm and ambiance. Once you see how a few twinkle lights can transform your room, you’ll wonder why you didn’t do it sooner. Get ready to enjoy a more magical sleep environment anytime you want.
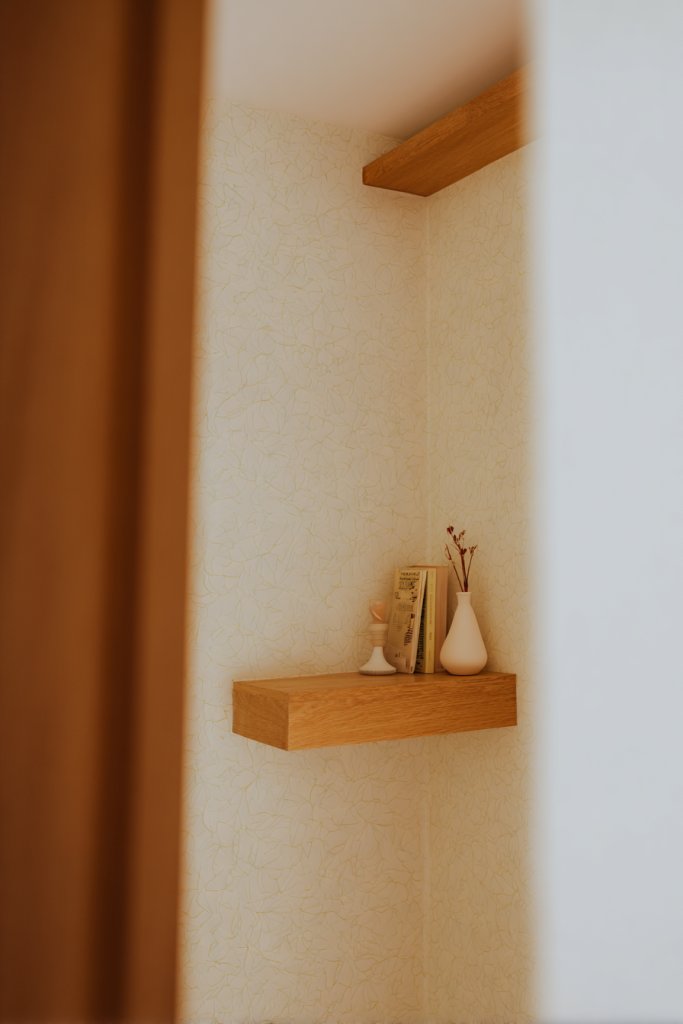
2. Vintage-Inspired Wall Shelf Display
Ever feel like your room lacks personality or a touch of vintage charm? Cluttered surfaces can make a space look chaotic instead of curated. If you’re craving a personal, stylish way to showcase your favorite tiny treasures, vintage-inspired wall shelves are the perfect solution. They add character without overwhelming your decor.
Imagine a delicate wooden shelf mounted on a pastel-colored wall, adorned with tiny trinkets, miniatures, or framed keepsakes. The aged paint or distressed finish gives it a nostalgic feel, reminiscent of old apothecary or jewelry cabinets. The shelves hold your collectibles in a charming display, creating a mini museum of your personality. Soft lighting highlights your favorite pieces, making the display pop.
Choose shelves with ornate brackets or simple floating designs to match your style. For a boho vibe, go for distressed or painted wood with uneven edges. Seasonal swaps can include adding fairy lights or small decorative signs. Space constraints might mean stacking smaller shelves vertically or clustering a few at different heights for visual interest. You can also mix materials like metal and wood for eclectic appeal.
Select lightweight shelves that suit your wall type—drywall anchors for plaster or toggle bolts for heavier wood. Measure and mark where each shelf will go, keeping height and spacing in mind. Use a level to ensure they hang straight. Attach the brackets securely, then place your chosen decor on each shelf. Avoid overcrowding—less is more when creating a vintage display. Regularly dust and reposition items to keep your display fresh.
Paint or stain shelves in colors that complement your room palette. Add vintage-style hooks underneath for hanging jewelry or small accessories. Incorporate tiny ceramic or glass containers to organize loose items neatly. Personalize the display with monogrammed tags or handwritten notes that add a cozy, lived-in feel. This setup invites admiration and sparks conversation.
A vintage-inspired wall shelf display turns a plain wall into a personal gallery of memories. It’s an easy DIY project that adds instant charm and functionality. Plus, it’s flexible—swap items whenever your mood or season changes. Once you get the hang of styling, your room will feel uniquely yours, filled with curated treasures that tell your story.
3. Colorful Patchwork Throw Pillows
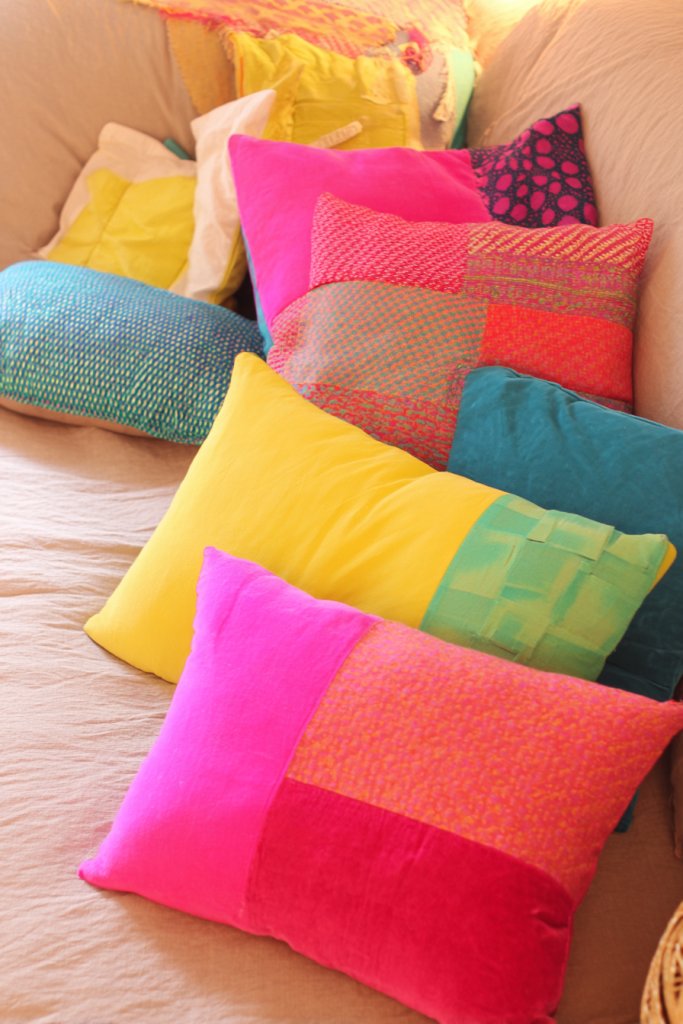
Feeling like your space needs a splash of life or a cozy upgrade? Throw pillows are the easiest way to add color and personality without a full redecorate. But plain pillows can be boring—why not go for a vibrant patchwork that instantly livens up your bed or sofa? It’s a simple fix with big style impact.
Picture a collection of bright, patterned pillows in mismatched fabrics and textures. Each patch tells a little story—floral, geometric, or playful prints—that come together in a cheerful mosaic. They sit atop a soft duvet or sofa, inviting you to sink in. The colors pop against neutral backgrounds, turning an ordinary space into a lively oasis. The tactile mix of fabrics adds a cozy, inviting feel.
Mix and match different fabrics, like velvet, linen, or cotton, to create variety. Use seasonal color schemes—warm tones for fall, cool pastels for spring—to keep things fresh. You can also opt for larger square pillows or smaller accent cushions. For a more refined look, keep the patchwork within a consistent color palette or go wild with contrasting hues. Layer pillows of different shapes for added visual interest.
Start with fabric scraps or buy pre-made patchwork pillow covers from craft stores or online shops. Sew or glue patches together if you’re DIY-ing, or purchase ready-made. Insert your favorite pillow forms—preferably plump and soft—for maximum comfort. For a quick update, just swap out plain covers for patchwork ones on your existing pillows. Experiment with different arrangements until you find your perfect mix.
Add decorative trims like tassels or piping for extra flair. Personalize with embroidered initials or small appliques that reflect your style. Mix in a few textured or metallic fabrics for a luxe touch. Creating a set with different patchwork patterns allows you to rotate and refresh your decor easily. It’s all about making your space feel lively and uniquely yours.
Colorful patchwork pillows are a playful, affordable way to elevate your decor. They reflect your personality and can be tailored to any style or season. Once you see how a few vibrant cushions transform your space, you’ll be hooked. This simple update makes your room feel cheerful, welcoming, and full of personality.
4. Rustic Mason Jar Storage Solutions
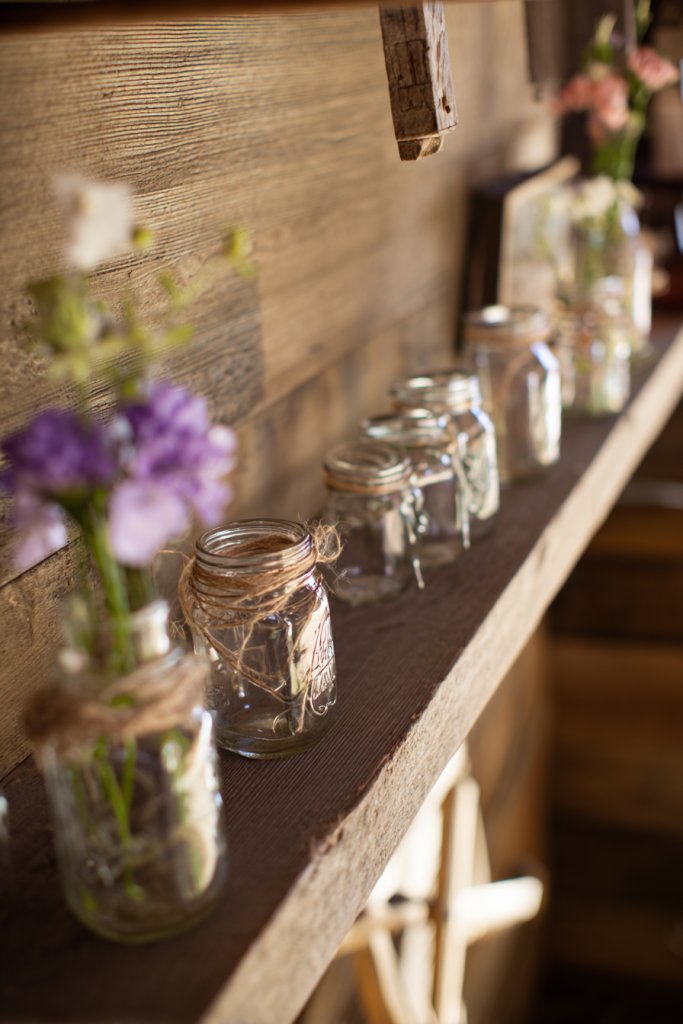
Cluttered desks and messy shelves can kill the vibe in your space. Instead of buying fancy organizers, why not embrace a rustic charm with mason jars? They’re versatile, affordable, and instantly add a cozy farmhouse feel. Plus, they keep your essentials organized and within reach. If you hate clutter but love style, this idea is a win.
Visualize a row of clear glass jars with metal lids sitting on a wooden shelf or countertop. Inside, you might find colorful pens, tiny brushes, or cotton pads—everything looks neat and inviting. The transparent glass showcases your supplies while the rustic finish adds warmth to the room. Sometimes, a simple jar with a handwritten label is all you need for a charming, functional display. The combination of glass and wood creates a balanced, natural aesthetic.
Decorate jars with twine, lace, or painted designs to match your decor theme. Use different sizes for varied purposes—small for jewelry or makeup, large for stationery. Arrange jars in clusters or line them up for a minimalist look. Seasonal touches like faux greenery or mini ornaments inside jars can make the setup festive. For small spaces, stacking jars vertically saves valuable surface area.
Start by cleaning and drying mason jars thoroughly. Fill them with your chosen supplies—pens, brushes, beads, or snacks—and secure the lids properly. Label each jar using chalkboard tags or adhesive labels for easy identification. Mount a wooden plank or attach a metal rail on the wall, then set the jars on-mounted hooks or in a caddy. Regularly tidy and refill the jars to keep your organization system functional. Bonus: DIY painted jars add a custom touch.
Paint or stencil designs on the jars for a personalized look. Use colored lids or add decorative charms to the jar closures. Incorporate mini chalkboards or labels to switch out what’s stored inside. Group jars by color or theme for a cohesive appearance. This setup isn’t just practical—it’s also a cute decor element that shows off your style. Plus, it’s easy to change as your needs evolve.
Rustic mason jar storage makes your space feel warm and inviting while staying organized. It’s a simple DIY project that anyone can do, even with limited tools. Seeing your clutter transformed into a charming display boosts confidence and creativity. Once you master this trick, your entire room will feel more welcoming—and your supplies easier to find and use.
5. Adorable Wall Decal Murals
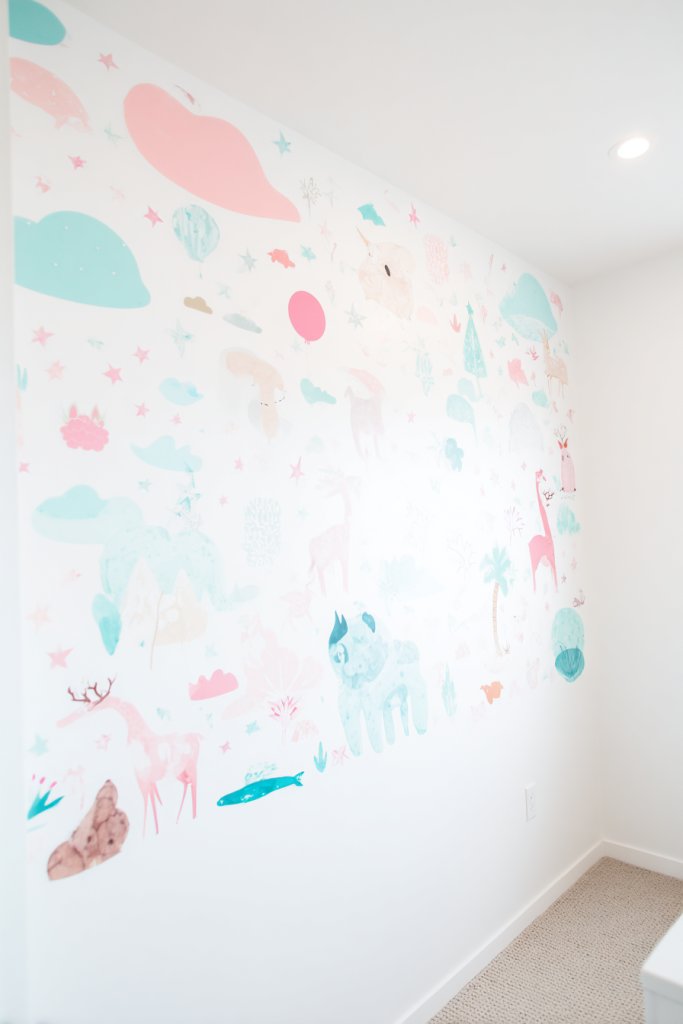
Plain walls can make a room feel dull and uninspired. If you want an easy way to brighten your space and add personality, wall decals are a perfect choice. They’re removable, affordable, and come in countless cute designs. Whether you love stars, animals, or whimsical motifs, decals instantly transform boring walls into playful backdrops. Who says decorating has to be permanent?
Imagine a wall decorated with a cluster of colorful star-shaped decals or adorable animal characters. They seem to come to life against a neutral background, adding charm and whimsy. The decals are flat but create a layered effect, making the room feel lively without clutter. Different sizes and shapes create a dynamic visual flow, perfect for a playful or cozy vibe. They brighten the space and make it feel personalized.
Mix and match decal designs for a custom look—combine stars with clouds, moons, or cute animals. Use decals to frame a specific area, like a reading nook or bed wall. Change the theme seasonally or for special occasions by swapping out designs. For a more subtle effect, opt for metallic or pastel-colored decals. Large decals can serve as a statement piece, while smaller ones add delicate accents.
Clean the wall thoroughly to ensure decals adhere properly. Plan your layout by arranging decals on the floor first, then transfer the design onto the wall. Peel and stick, pressing firmly to avoid bubbles. Use a level or ruler for precise placement of larger decals. If you want to remove or reposition, decals peel off cleanly without damaging paint. Keep extra decals for future updates or touch-ups. Easy, mess-free, and fun.
Create a themed decal set based on your favorite characters or motifs. Add glitter or metallic accents for extra sparkle. Combine decals with other decor elements like fairy lights or plush toys for a layered look. Personalize with your name or a favorite quote in decal form. This approach makes the room feel uniquely yours and adaptable as your style evolves.
Wall decals are a simple way to make a big visual impact effortlessly. They can turn a plain space into a vibrant, playful environment in minutes. Plus, they’re removable, so you can experiment without commitment. Once you see how decals can instantly elevate your room, you’ll feel inspired to get even more creative with your decor. It’s a quick, fun upgrade anyone can try.
6. Miniature Floating Shelves for Trinkets
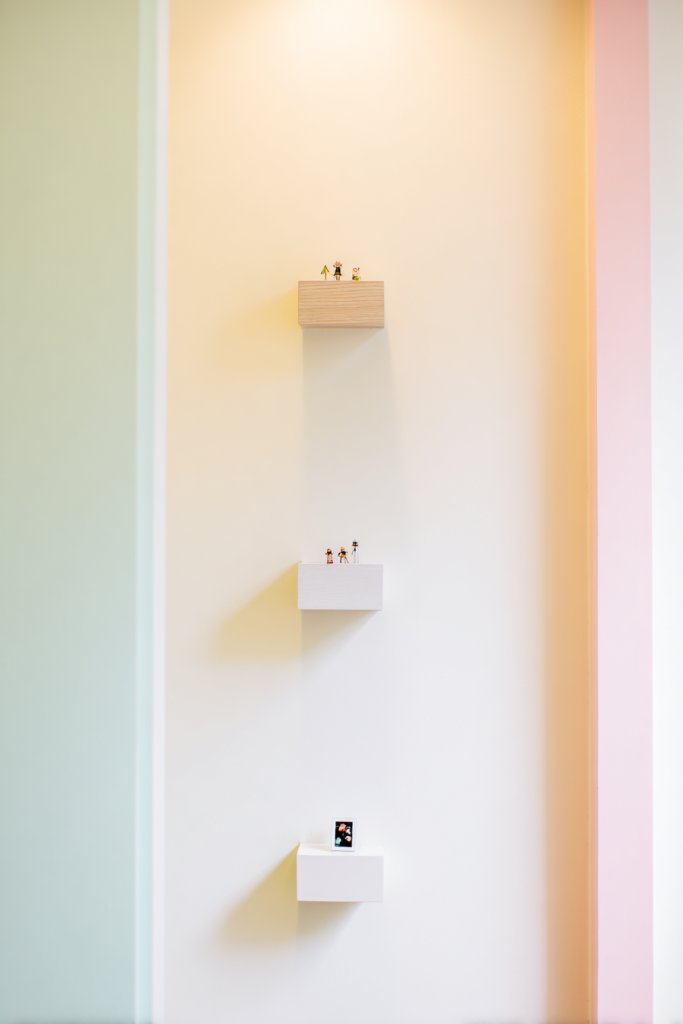
Do you have tiny collectibles or photos cluttering your surfaces? Floating shelves are a sleek and practical way to display your favorite trinkets while saving space. They add visual interest and keep your clutter off tables and counters. If you love curated displays but hate mess, miniature floating shelves are your new best friend.
Imagine a set of tiny, white or pastel-colored shelves mounted on a wall, each holding a cute figurine, mini plant, or framed photo. The clean lines make the display feel modern and uncluttered. Think of it as a miniature gallery—each shelf a mini stage for your favorite items. The visual balance of spaced-out shelves creates an airy, organized look that feels playful and refined.
Arrange shelves at different heights for a dynamic effect. Use them to display themed collections, like tiny cars or vintage keys. For a cohesive look, choose matching or complementary colors. Incorporate seasonal or holiday-themed items to keep the display fresh. Small brackets or invisible mounts make installation simple, even in tight spaces or small walls.
Select lightweight, durable shelves that suit your wall type—pre-drilled with anchors for drywall or direct to studs. Measure and mark placement carefully, then drill and secure brackets. Mount the shelves, ensuring they’re level. Arrange your favorite tiny items, balancing height and visual weight. For added style, layer items or cluster them for a more intentional look. Regularly dust and swap items to keep your display current.
Paint shelves in colors that match or contrast with your wall for extra flair. Use decorative stickers or washi tape on the brackets for a fun touch. Incorporate LED strip lighting underneath for subtle illumination. Personalize by adding tiny nameplates or custom tags for each item. This setup is perfect for showcasing your personality and collections.
Mini floating shelves turn blank walls into mini art galleries, making your space feel more curated and complete. They’re easy to install and customize, so you can experiment risk-free. As you see your tiny treasures beautifully displayed, your confidence in DIY decor grows. It’s a small change with a big impact, perfect for creating a charming, personalized room.
7. Playful Color Block Wall Technique
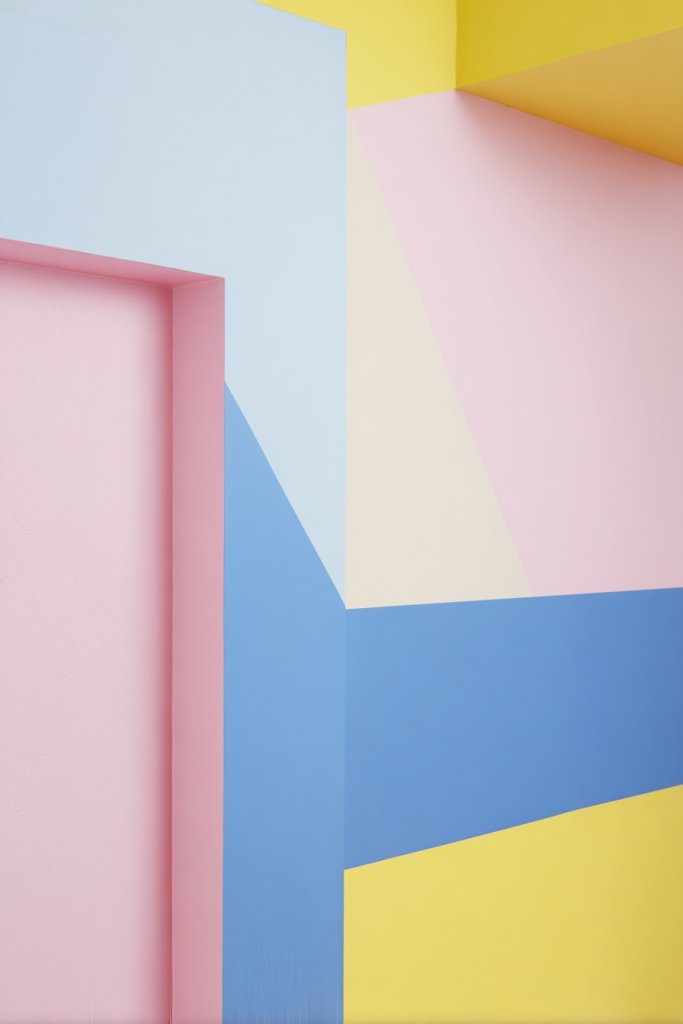
Does your room feel flat or uninspired? A splash of color can instantly energize your space. But painting an entire wall might seem overwhelming or too permanent. Enter the color block technique—a fun, modern way to add personality without committing to a full repaint. It’s perfect for adding a playful touch that’s easy to update later.
Imagine a wall divided into bold, contrasting blocks of color—bright pink next to mint green, or sunny yellow paired with navy. The sharp edges create a graphic, contemporary look that draws the eye. The blocks add depth and dimension, making your room look more lively and dynamic. The vibrant colors reflect your personality and instantly lift the mood of the space.
Use painter’s tape to create clean lines and sharp edges. Experiment with different shapes—rectangles, triangles, or irregular forms—for a more artistic vibe. Seasonal color themes can keep the look fresh, like icy blues for winter or warm oranges for fall. For smaller rooms, opt for fewer, larger blocks; in bigger spaces, try multiple smaller sections for a mosaic effect. Incorporate metallic or glitter accents for extra flair.
Prepare your wall by cleaning and priming if needed. Use painter’s tape to outline your shapes carefully, ensuring straight edges. Apply your chosen colors with brushes or rollers, using light coats for even coverage. Remove the tape before the paint fully dries to reveal crisp lines. Touch up any imperfections with a small brush. Protect your work with a clear sealant if desired. This technique is straightforward but impactful.
Add patterns or textured paint within your blocks for variety. Incorporate your favorite shades or match your decor palette. Use different finishes—matte, gloss, or satin—to add layers of visual interest. Incorporate metallic or neon accents for a modern twist. This approach allows you to personalize your room endlessly, reflecting your evolving style.
Color blocking is a bold, playful way to make your walls stand out. It’s a DIY-friendly project that makes a big impact with minimal effort. Once you see how a simple geometric design can energize your room, you’ll feel empowered to try more creative painting ideas. Your space will look fresh, fun, and uniquely yours, all thanks to a splash of color.
8. Cozy Reading Nook with Soft Cushions
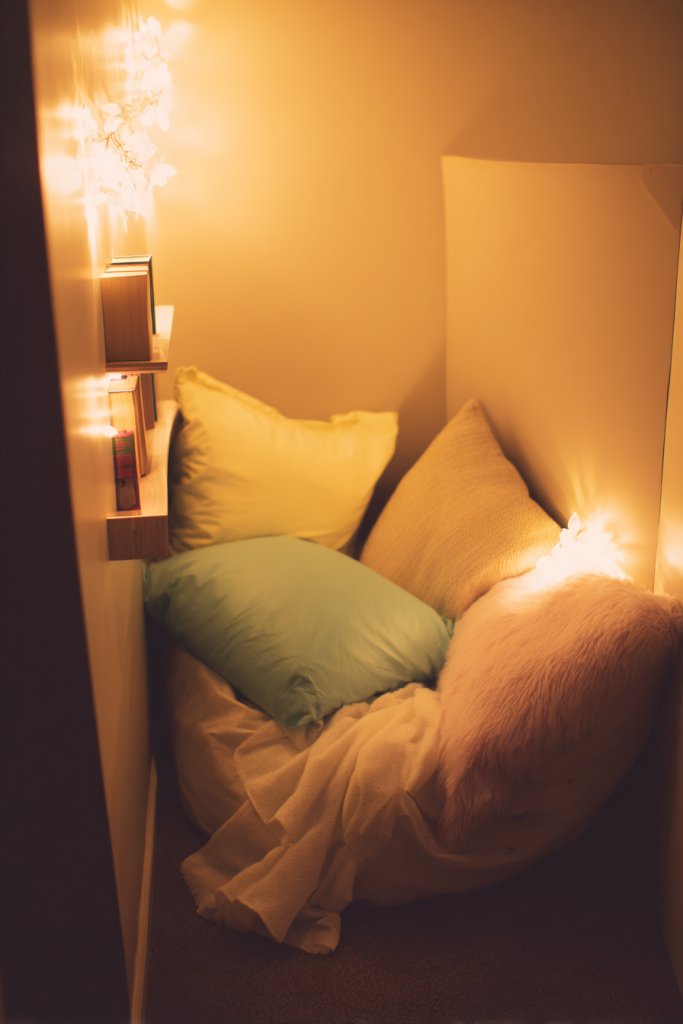
Ever dream of having a quiet corner where you can relax with a good book? Creating a cozy reading nook transforms an ordinary space into a retreat from everyday chaos. Soft cushions, warm lighting, and inviting textures make it the perfect spot to unwind. If you love reading or just want a peaceful hideaway, this idea is a game-changer.
Picture a small corner with a comfy armchair or a pile of plush cushions on the floor. Layered throws and textured pillows create a nest-like feel, inviting you to settle in. A soft rug underfoot adds warmth, while fairy lights or a small lamp provides gentle illumination. The space is filled with sensory comfort—soft fabrics, warm tones, and quiet ambiance. It’s a little sanctuary designed for your relaxation.
Use a window seat, a cozy armchair, or even a built-in bench for the base. Decorate with an assortment of cushions in various textures and sizes—think velvet, faux fur, or chunky knit. Seasonal updates might include cozy blankets or themed pillows. Keep it versatile with removable covers or easy-to-clean fabrics. Small shelves or baskets nearby can store your favorite books or magazines.
Choose a quiet corner with good natural light if possible. Select a comfortable seat—an armchair, floor cushions, or a daybed. Layer with multiple cushions and throws for softness and visual appeal. Add a small side table or a storage ottoman for convenience. Use soft, warm lighting—string lights, a table lamp, or battery-operated candles. Make sure the space feels inviting, not cluttered, and adjust until it’s perfect.
Personalize with a theme—nature, vintage, boho—and decorate with small trinkets or framed quotes. Swap out cushions seasonally for fresh looks. Incorporate a favorite blanket or handmade throw for added comfort. Use decorative baskets or boxes to keep clutter out of sight. A personalized touch makes your nook a true reflection of your style.
A cozy reading nook encourages you to slow down and enjoy your downtime. It’s a simple project that adds a lot of value to your daily routine. Once you create your perfect escape, you’ll look forward to winding down there every day. Your space becomes more than decor—it’s a personal sanctuary for relaxation and joy.
9. Bright, Patterned Area Rugs
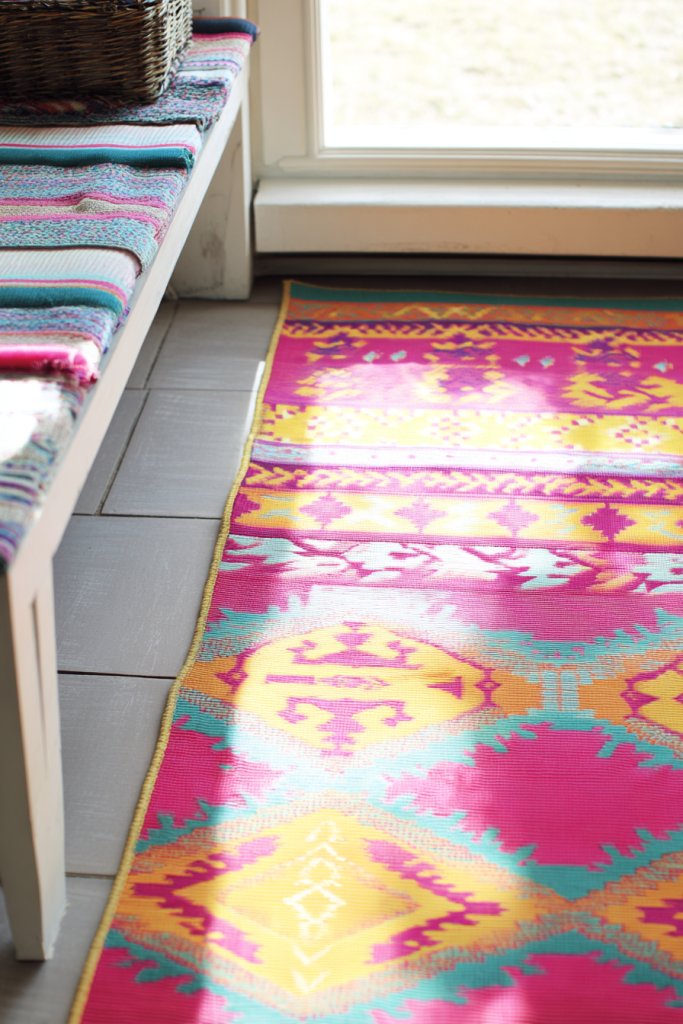
Does your room feel dull or incomplete? A vibrant, patterned rug can instantly inject personality and warmth into any space. It’s a simple way to anchor your decor and add a pop of color. Plus, it makes your room feel cozier underfoot. If you’re tired of boring floors, this idea is a quick fix with big style payoff.
Imagine a bold, geometric rug in bright reds, blues, or playful pastels sprawled across your floor. The pattern creates a visual focal point, guiding the eye and tying together different decor elements. It adds texture and depth, making the space feel layered and inviting. The plush surface cushions your steps, making your room feel more comfortable and lively. It’s a statement piece that transforms the entire vibe.
Choose rugs with patterns that complement your existing color palette—floral, chevron, or abstract designs work well. For small rooms, select smaller rugs or runners; larger spaces can handle expansive, bold prints. Layer rugs with different textures or add borders for extra flair. Seasonal updates might include swapping out bright patterns for softer, muted tones or adding faux fur for winter coziness. Always consider durability if you have pets or high traffic.
Measure your space carefully to pick the right size. Vacuum and clean your floor thoroughly before laying down the rug. Roll out the rug, smoothing out wrinkles and ensuring it lies flat. Use non-slip pads underneath if needed for safety. Coordinate the rug’s colors with your decor to create harmony or contrast for a more eclectic look. Regular maintenance keeps it looking fresh and vibrant.
Add decorative border tapes or fringes to enhance the edge detail. Consider layering a smaller patterned rug over a neutral one for a layered effect. You can also DIY your own painted or stitched designs for a personal touch. Incorporate colors that reflect your mood or season, making your space feel dynamic. The right rug becomes a signature element of your decor.
A bright, patterned rug can completely change the feel of a room, making it feel more lively and welcoming. It’s an easy, affordable upgrade that offers instant gratification. Once you see how much a rug can influence your space, you’ll be inspired to experiment more with textures and patterns. It’s a simple way to refresh your decor and boost your confidence in styling your home.
10. DIY Pom-Pom Garland Decor
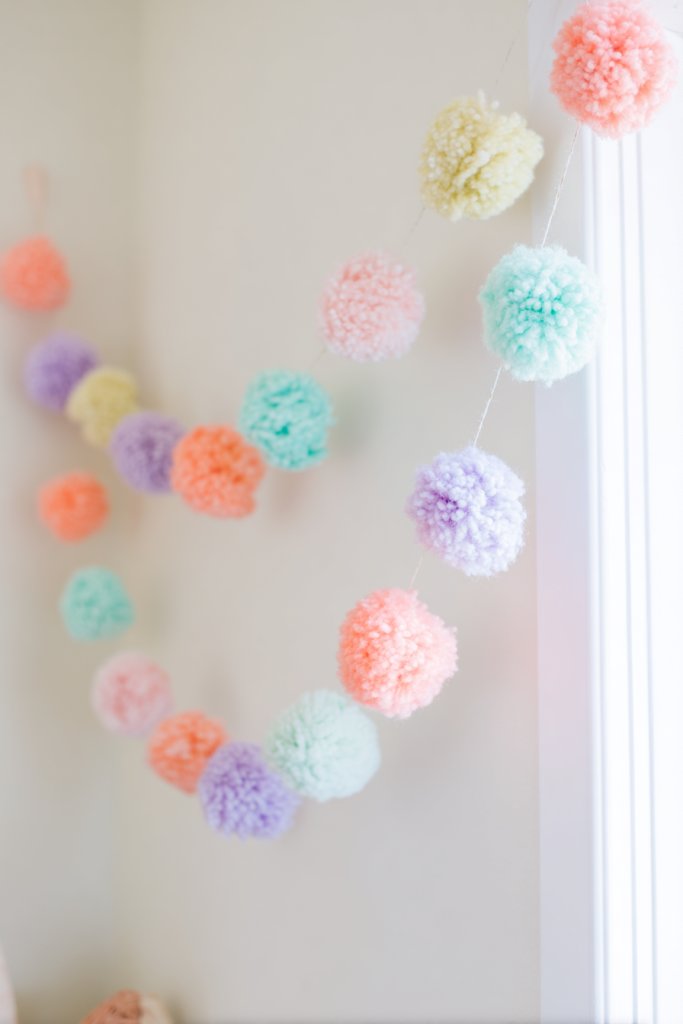
Looking for a fun, inexpensive way to add a playful touch to your room? A DIY pom-pom garland is perfect for injecting color and whimsy into any space. It’s an easy craft project that results in a charming decoration. Plus, it’s customizable to match your favorite colors and themes. If you love handmade decor, this is your new go-to.
Visualize a string of fluffy pom-poms in pastel pinks, blues, and yellows hanging across a window or wall. The soft textures and bright colors create a cheerful, lively atmosphere. The garland sways gently with air currents, adding movement and a cozy vibe. It’s a simple touch that makes your room feel more inviting and fun, perfect for celebrations or everyday cheer.
Create your garland with different sizes and colors of pom-poms for a varied look. Hang it in a straight line, zigzag, or loop it for a more dynamic effect. Incorporate metallic or glitter pom-poms for extra sparkle. Use it as a centerpiece for parties or as everyday decor in your bedroom or playroom. Adjust the length based on your space and preference. DIY kits or tutorials make it accessible for all skill levels.
Gather yarn in your chosen colors, along with scissors and a glue gun or needle and thread. Wrap yarn around your fingers or a card to create multiple loops, then tie in the middle and cut the loops to form pom-poms. Trim to shape and fluff for fullness. String the pom-poms onto a sturdy thread or twine, spacing them evenly. Hang your garland with hooks or pushpins, ensuring it’s taut and secure. Play around with different lengths and arrangements.
Mix in metallic or glitter pom-poms for extra shine. Attach small decorative charms or tassels for added flair. Choose colors that match your room’s theme or season. Create themed garlands for holidays or special occasions. You can also make mini garlands for table decor or larger ones for a statement wall. Personal touches turn a simple craft into a cherished decor element.
A pom-pom garland adds a handcrafted, joyful vibe to any room. It’s a project anyone can do and customize, making it a fun way to express your creativity. Seeing your cheerful decor brighten up your space will boost your confidence in DIY projects. Once you master this, you might find yourself making garlands for every occasion and space you want to personalize.
11. Multi-Functional Loft Bed with Play Space
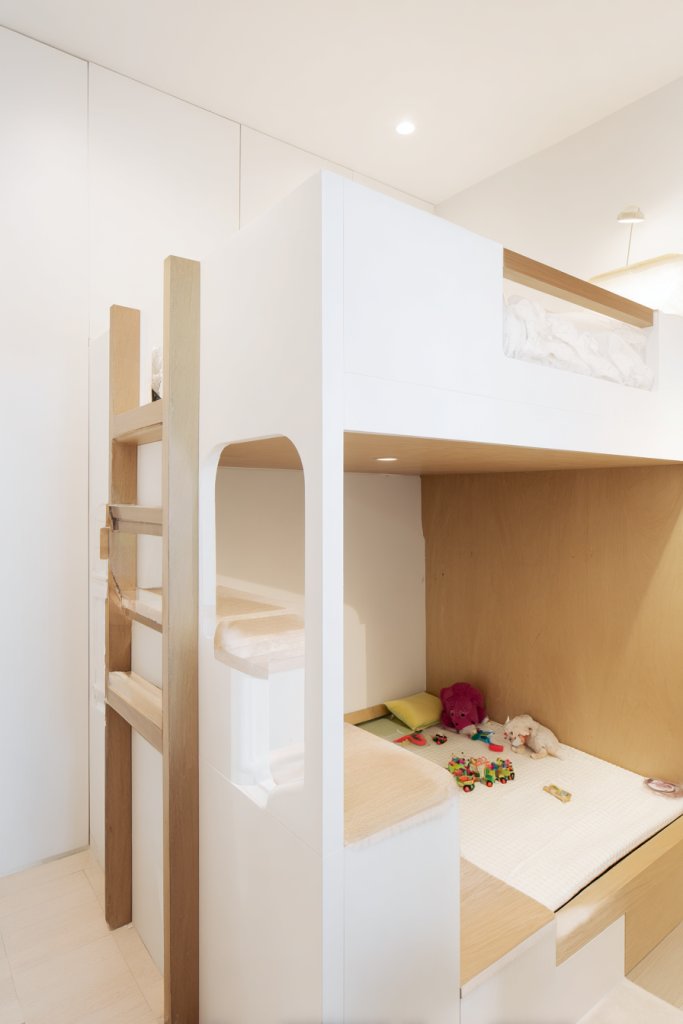
Living in a small room or shared space often means sacrificing play or study areas. A multi-functional loft bed maximizes vertical space, giving you a cozy sleeping zone and an additional play or work area underneath. It’s perfect for kids’ rooms, dorms, or tiny apartments. Want to make the most of limited space without sacrificing style? This solution is your answer.
Imagine a sleek loft bed with a sturdy frame, painted in a playful pastel or neutral tone. Underneath, a mini playroom or study nook is set up with a small desk, cushions, and storage bins. The elevated bed frees up floor space for toys, games, or a small seating area. Bright, cheerful colors and clever organization make it feel like a private mini-world within your room. It’s a clever blend of function and fun.
Choose a loft bed with built-in storage, shelves, or a desk to customize functionality. For kids, add colorful curtains or themed bedding to match their interests. For adults, a minimalist style with sleek lines and neutral colors works well. The space underneath can serve as a cozy reading corner, study zone, or storage area, depending on your needs. Incorporate safety rails and soft mats for a secure, comfortable setup.
Measure your ceiling height and available floor space before selecting a loft bed. Assemble the frame carefully following the manufacturer’s instructions, ensuring stability. Organize the area underneath with multi-purpose furniture—like a small desk with storage drawers or a bean bag. Use soft rugs or mats for comfort and safety. Decorate with bright textiles or storage baskets to keep everything tidy. Regular checks for stability and safety are essential.
Add themed bedding, curtains, or wall decals to match your style. Use colorful cushions or fairy lights (away from restricted items) to create a cozy vibe. Personalize the space underneath with artwork or favorite toys stored in cute bins. Change accessories seasonally or as your taste evolves. This setup adapts beautifully to both kids and adults, making the most of vertical space.
A multi-functional loft bed transforms a small room into a versatile, fun space. It’s an investment in clever design that boosts your confidence in making compact spaces work smarter. Seeing your room turn into an organized, multi-purpose haven will inspire you to rethink other areas. It’s a perfect solution for maximizing style and function in tight quarters.
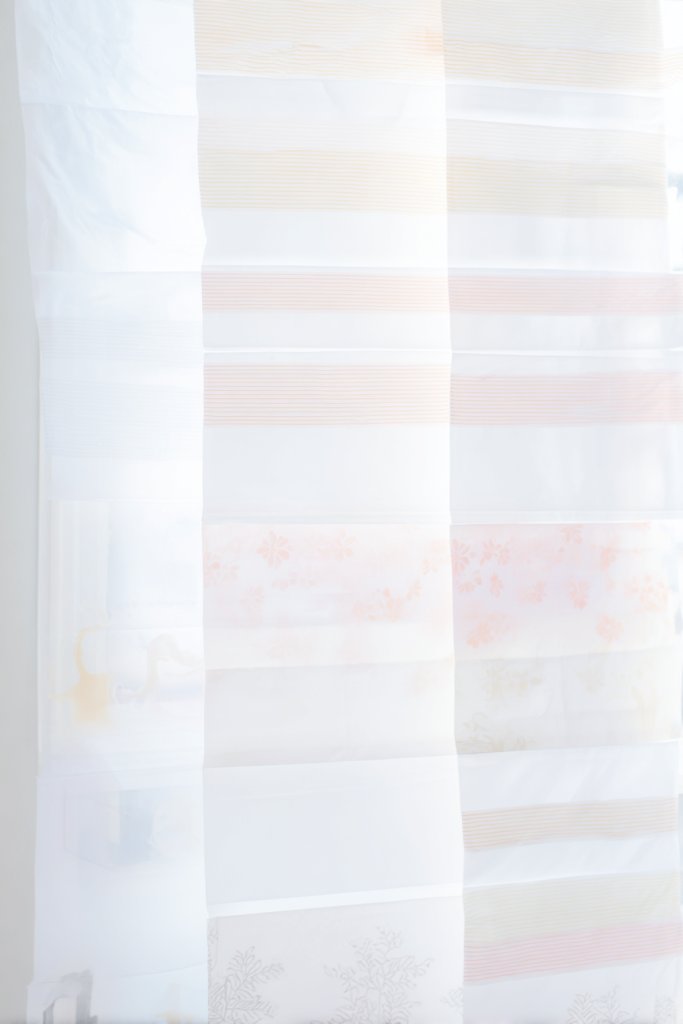
12. Charming Curtain Tiebacks with Ribbons
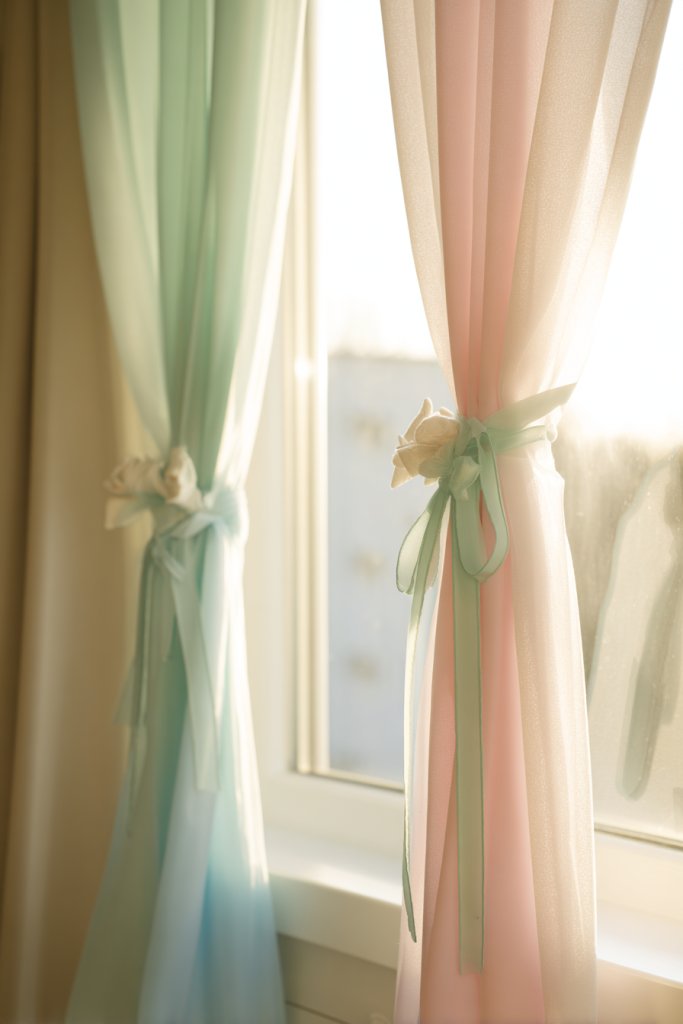
Plain curtains can look boring and lack personality, especially if they’re just functional. Want to add a sweet, decorative touch that also keeps your curtains neatly in place? Charming ribbon tiebacks are an easy, inexpensive way to elevate your window treatments. They add a dash of personality without major upgrades.
Imagine soft fabric ribbons tied into bows around your curtains, with gentle drapes held back in a charming manner. The ribbons come in pastel shades, patterned prints, or textured fabrics, adding visual interest. The subtle bows frame the window beautifully, making the room feel cozy and thoughtful. It’s a small detail that makes a big difference in overall decor.
Use different ribbon widths, textures, or embellishments like pearls or beads for added charm. Change the color of the ribbons seasonally or to match your decor palette. For a more whimsical look, incorporate small charms or tassels into the bows. You can also use fabric strips instead of ribbons for a more textured appearance. Adjust the length of the tiebacks based on your curtains’ fullness.
Select ribbons or fabric strips that complement your curtains and room style. Gather scissors, hot glue or sewing supplies for embellishments. Tie the ribbons into neat bows around curtain tieback hooks or tiebacks attached directly to the wall or window frame. Secure with knots or clips if needed, ensuring they stay in place. Arrange the curtains to showcase the bows prominently for maximum charm. Change or update the ribbons easily for a fresh look.
Add decorative charms, faux pearls, or tassels to the ribbons for a personalized, luxe touch. Use monogrammed or patterned ribbons that reflect your personality. Coordinate tiebacks with other textiles or accessories in your room for cohesion. Swap out ribbons for special occasions or seasons to keep the decor lively and fun.
Charming curtain tiebacks are a simple way to add elegance and personality to your windows. They’re easy to install and change, giving you control over your decor’s look. Once you see how a small bow can elevate your space, you’ll be inspired to add similar details elsewhere. It’s a subtle, stylish upgrade that makes a big impact.
13. Creative Corkboard with Fun Shapes
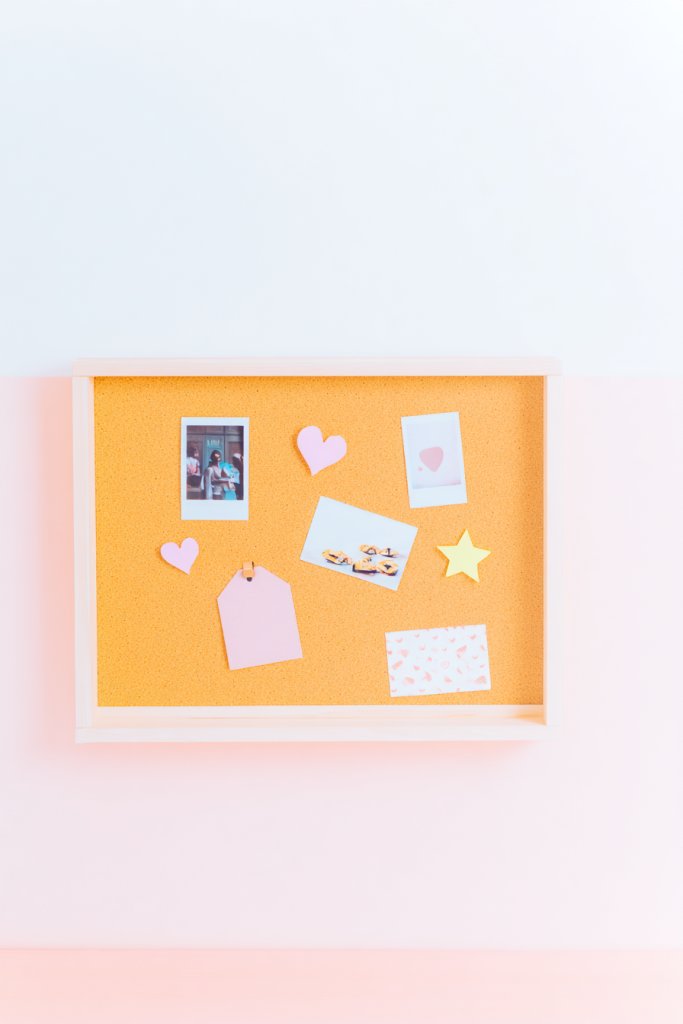
Keeping track of notes, photos, or inspiration can clutter your space, making your room feel chaotic. A creative corkboard helps organize your essentials while adding a playful decorative element. Instead of a plain rectangle, why not opt for a fun shape that reflects your personality? It’s a smart, stylish way to stay organized.
Visualize a corkboard shaped like a cloud, star, or heart, mounted on a wall in your room. Pins hold photos, memos, or small keepsakes, creating an engaging visual display. The shape adds a whimsical touch that complements a playful or cozy decor style. Bright colors or patterns on the corkboard frame can enhance its appeal and make it a focal point.
Choose shapes that match your theme—clouds for a dreamy look, stars for a whimsical vibe, or geometric patterns for modern decor. Use different colored pins or clips to categorize or highlight items. Change the shape or design seasonally or for special events. Large shapes can serve as statement pieces, while smaller, multiple shapes create a quirky gallery. Mix materials like cork and fabric for texture.
Purchase pre-cut cork shapes or craft your own with foam or cardboard covered in cork sheets. Attach the shape to the wall with strong double-sided tape or nails, ensuring it’s level. Decorate by pinning photos, notes, or small art pieces. Rotate or update items regularly to keep the display fresh and functional. Consider adding decorative elements around the shape, like fairy lights or washi tape.
Decorate the border with washi tape, paint, or stickers that match your decor. Use themed pins, clips, or small ornaments to enhance the shape. Personalize with handwritten labels or quotes that inspire you. Incorporate your favorite colors or patterns for a cohesive look. It becomes a fun, functional art piece that motivates and organizes.
A creative corkboard turns a dull wall into a dynamic display of memories and ideas. It’s a fun project that boosts your organizational skills and creative confidence. Seeing your favorite photos and notes in a fun shape makes everyday organizing more enjoyable. Once you try this, you’ll want to craft shapes for every corner of your home.
14. Pastel Color Palette Accents
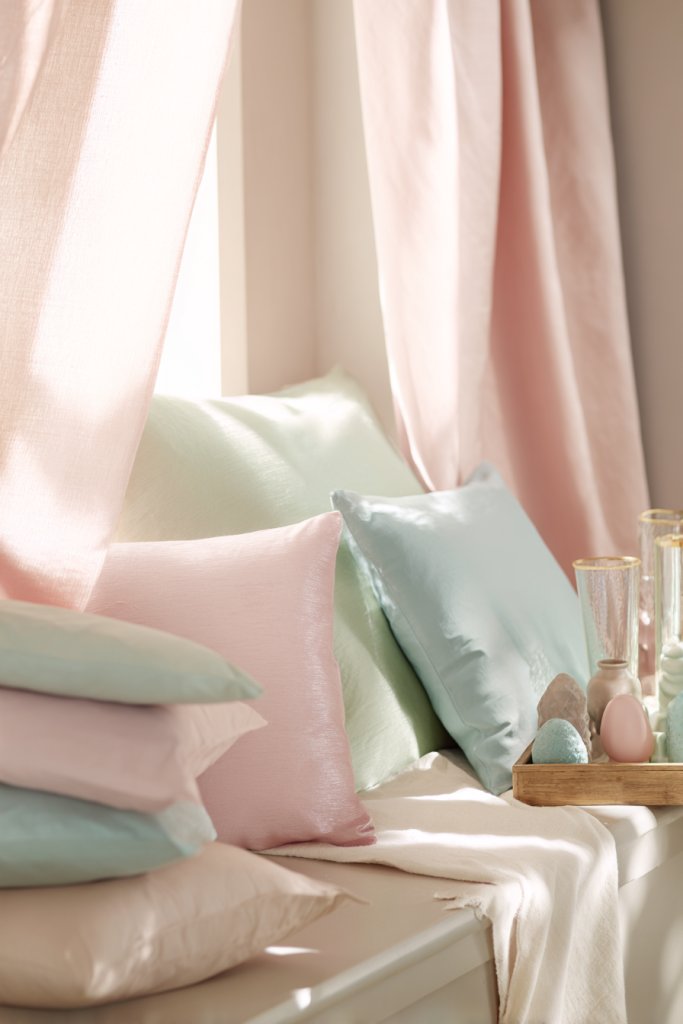
Feeling like your room lacks softness or a gentle vibe? Pastel colors are a perfect way to create a calming, adorable atmosphere. They’re subtle yet impactful, giving your space a fresh, airy feel. If bold hues feel too overwhelming, pastels offer a soothing alternative that still adds personality.
Imagine a bedroom with blush pink, mint green, and soft lavender accessories blending seamlessly. A pastel-colored lamp, storage bins, and bedding set a cohesive, tranquil mood. The muted tones reflect light beautifully, making the space feel brighter and more inviting. Textured fabrics like linen or velvet in pastel shades add depth and softness, inviting you to relax.
Use pastel accents sparingly for a delicate look or go all-in with a full pastel palette for a dreamy effect. Incorporate pastel cushions, rugs, and curtains for a layered, cohesive style. Switch out seasonal accessories—like pastel Easter decorations or spring-inspired textiles—to keep the vibe fresh. Pair pastels with neutral tones like white or beige for a balanced, sophisticated look. Mix textures for a richer feel.
Choose pastel-colored textiles—bedding, cushions, or curtains—that complement your existing decor. Incorporate pastel accessories like storage bins or small decor pieces in matching shades. Use paint or wallpaper in pastel hues for an accent wall if you’re comfortable with DIY projects. Keep the color palette consistent across different elements for harmony. Avoid overloading the space—balance pastels with neutrals to prevent it from feeling too sweet or washed out.
Add pops of metallic or neutral accents to elevate the pastel theme. Incorporate personalized touches like monogrammed pillows or custom wall art in pastel shades. Use textured fabrics or embroidered details for extra interest. Seasonal updates might include pastel-themed decor for holidays or blooms. Personal touches ensure your space remains fresh and reflective of your style.
Pastel accents make your room feel soft, light, and welcoming. They’re easy to incorporate and adapt as your style evolves. Once you see how gentle hues transform your space, you’ll be inspired to experiment with other subtle color combinations. Creating a calming sanctuary has never been easier or more adorable.
15. Playful Ceiling Decor with Paper Lanterns
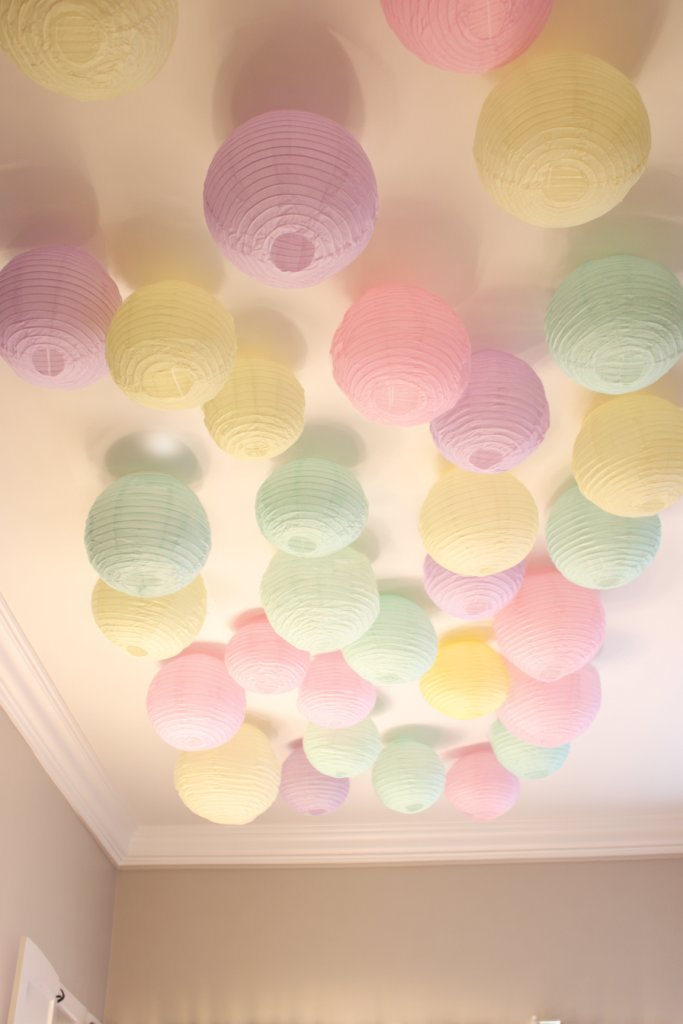
The ceiling often gets overlooked in room decorating, but it offers a great opportunity for a playful statement. Want to add a touch of whimsy and color overhead? Paper lanterns are lightweight, inexpensive, and instantly transform any dull ceiling into a fun focal point. They’re perfect for parties or everyday decor.
Visualize a cluster of colorful paper lanterns hanging at varying heights from the ceiling. They sway gently with air movement, creating a lively, festive atmosphere. The soft glow from inside the lanterns adds warmth and ambiance. Whether in a bedroom, playroom, or dorm, they create a cheerful, inviting space that feels lively and playful. The variety of colors and sizes adds depth and dimension.
Mix and match lantern sizes, shapes, and colors for a dynamic look. Hang them in a symmetrical cluster or a random pattern for a more relaxed vibe. Use twine, ribbon, or string to suspend the lanterns, ensuring they’re securely attached. Seasonal themes—like red and green for holidays or pastel shades for spring—can change the mood easily. For a more elegant look, opt for metallic or patterned lanterns.
Select lightweight paper lanterns in your preferred colors. Attach a sturdy hook or ceiling mount, then hang the lanterns at different heights for visual interest. Use LED string lights inside or around the lanterns for added glow. Ensure the cords are hidden or neatly arranged to avoid clutter. Adjust the heights after hanging to balance the overall look. Consider adding decorative ribbons or tassels for extra fun.
Decorate the lanterns with paint, glitter, or washi tape to match your theme. Combine with other ceiling decor like hanging stars or feathers for a layered effect. Incorporate themed lanterns for holidays or special occasions. You can also DIY your own lantern covers for a personal touch. A colorful ceiling transforms your entire room into a playful haven.
A ceiling full of paper lanterns adds a whimsical, festive vibe that’s hard to beat. It’s a quick, inexpensive way to make your space feel lively and personalized. Once you see how a few hanging orbs can change the room’s atmosphere, you’ll be inspired to get creative with other ceiling decor. Elevate your space with a simple, playful upgrade that’s sure to impress.
16. Cozy Faux Fur Rugs and Throws
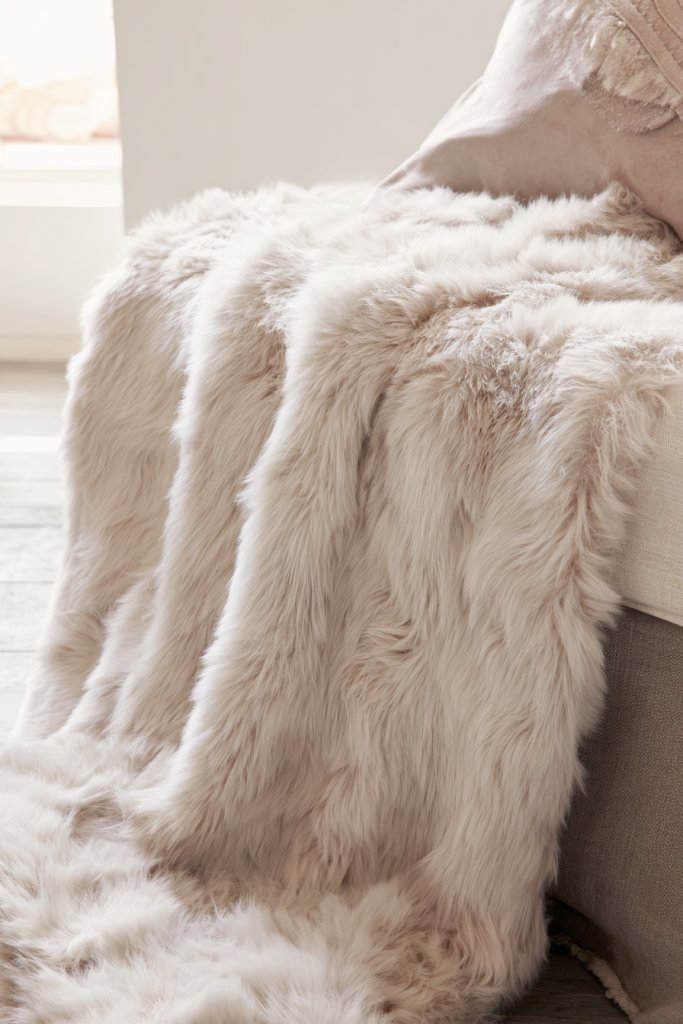
Feeling like your space is missing a cozy touch? Faux fur rugs and throws are the perfect way to add softness, warmth, and a touch of luxury. They instantly elevate the comfort level of any room while making it look more inviting. If you love sinking into plush textures, this idea is a no-brainer.
Imagine a fluffy faux fur rug in a neutral tone spread across your bed or sitting area. Layered with textured cushions and a soft throw, it creates a plush oasis. The tactile quality invites you to touch and relax, making your space feel more indulgent. The subtle sheen and soft fibers add a luxe vibe that elevates simple decor into something special. It’s like having a mini cloud right in your room.
Choose rugs and throws in natural tones—cream, beige, or pastel shades—to keep the look soft and calming. Mix textures like shaggy, long pile, or faux sheepskin for variety. Use throws to drape over beds or chairs, or fold them neatly on a bench for easy access. Seasonal updates can include warmer tones or patterned faux fur for a different look. Layering different textures creates depth and visual interest.
Pick a faux fur rug that fits your space—large enough for your seating or bed area. Place it on a clean, flat surface, securing with non-slip pads if necessary. Drape matching or coordinating throws over furniture or beds, folding or layering for maximum coziness. For added style, combine different faux fur textures or colors. Wash and care for faux fur according to manufacturer instructions to maintain softness.
Add decorative trims or embroidery to throws for a personalized touch. Incorporate small plush pillows or cushions with faux fur covers. Mix with other textures like knit or velvet for a richer feel. Use seasonal or themed colors—think icy blues or warm caramel—to reflect your mood. Personal touches make your space uniquely cozy and stylish.
Faux fur rugs and throws bring instant comfort and sophistication to your room. They’re easy to swap out or update seasonally, keeping your decor fresh. Enjoy the tactile luxury and visual softness they provide, making your space feel more inviting. Once you experience how plush textures change your environment, you’ll want to incorporate cozy elements everywhere.
17. Cute Themed Bedding Sets
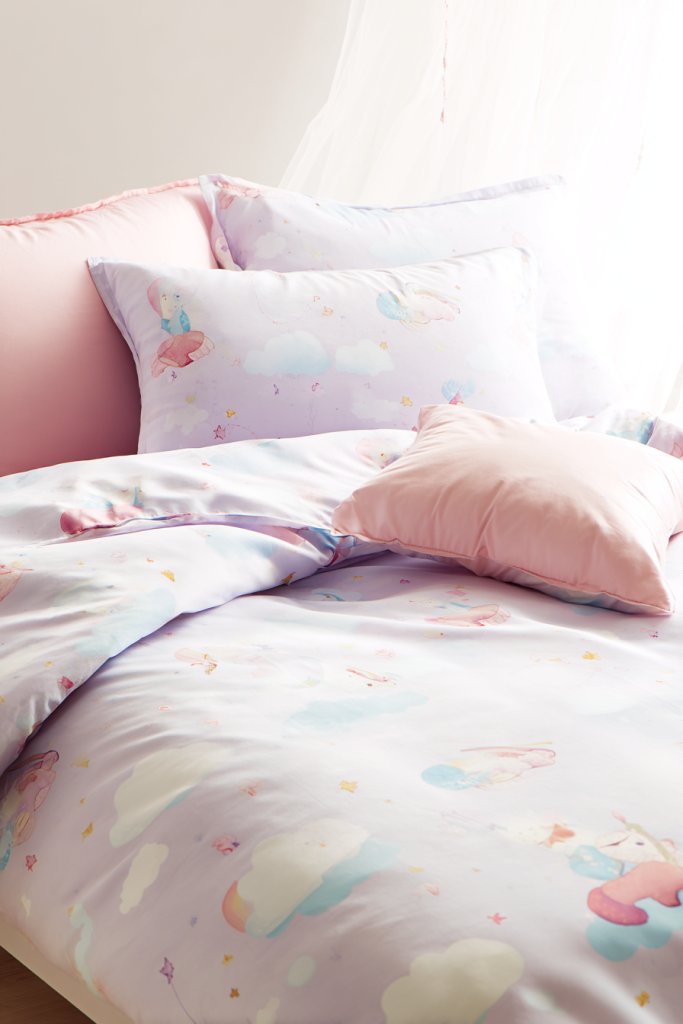
Tired of plain, boring bedding that doesn’t reflect your personality? Themed bedding sets are a simple way to add charm, fun, and a personal touch to your bedroom. Whether you love animals, clouds, or cartoon characters, the right bedding can instantly transform your space. It’s an easy upgrade that makes going to bed more exciting.
Picture a bed covered with a duvet featuring adorable animal prints or fluffy clouds. Coordinated pillowcases and sheets complete the look, creating a cohesive, playful scene. Bright colors or pastel shades set a cheerful tone, making your room feel lively and inviting. The themed bedding becomes the centerpiece, adding personality and a sense of fun that brightens your entire space.
Mix and match different themed sets for variety or stick to one for a unified look. Use complementary cushions or throws in matching patterns or colors. Seasonal updates could include swapping to holiday-themed bedding or lighter fabrics for summer. For a more mature aesthetic, choose subtle patterns or muted tones with fun accents. Layer with textured blankets or decorative pillows for added depth.
Select bedding sets that fit your mattress size and match your decor style. Wash and prepare your new bedding before use. Coordinate with wall colors and accessories for a cohesive look. Add matching curtains or rugs if desired, but keep the focus on the bedding as the statement piece. Change the covers seasonally or whenever you want a fresh vibe. Keep extras handy for quick updates.
Add embroidered initials or small patches to customize your bedding. Incorporate themed cushions or plush toys for extra cuteness. Use decorative trims or piping for a more polished appearance. Personal touches like hand-stitched details or DIY pillowcases elevate the decor. Your bedding becomes a reflection of your style and personality.
Cute themed bedding makes your room feel playful and inviting. It’s a simple swap that instantly boosts mood and decor appeal. Once you see how a themed set can redefine your space, you’ll be inspired to experiment more. Creating a cozy, adorable bedroom is easier than you think—just start with your bedding!
18. DIY Mason Jar Fairy Light Centerpiece
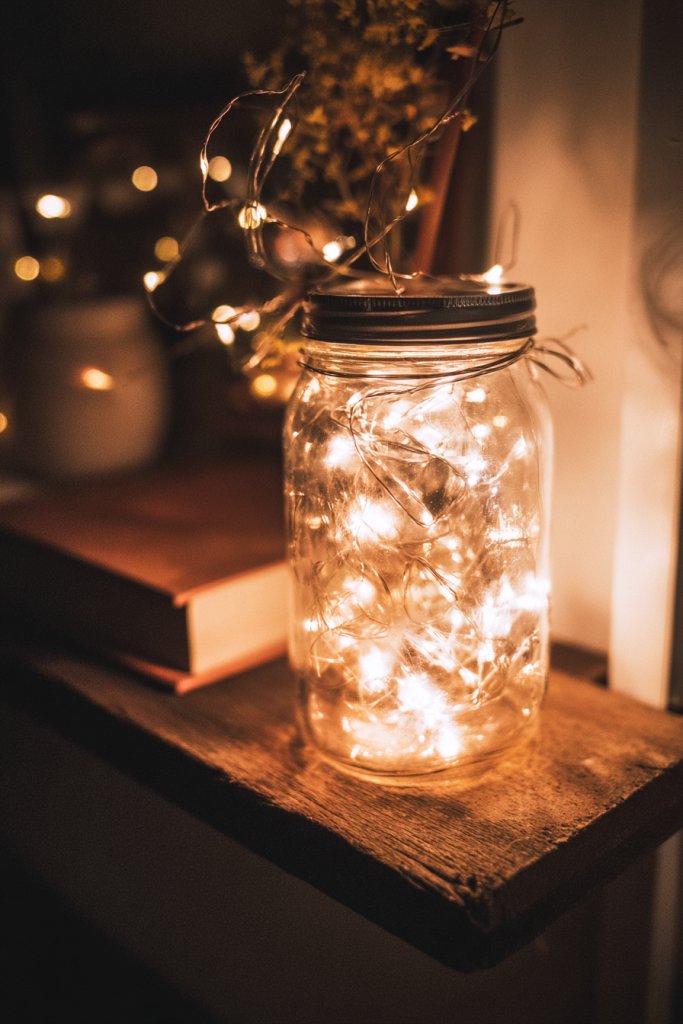
Looking for a charming, personalized decor piece for your bedside or shelf? A DIY mason jar fairy light centerpiece combines rustic charm with soft illumination. It’s a perfect project for adding a warm, magical glow without breaking the bank. If you love handcrafted decor, this idea is both fun and functional.
Imagine a clear mason jar filled with tiny warm fairy lights, their glow shimmering through the glass. The jar sits atop a wooden tray or wrapped with twine, creating a cozy focal point. The soft flickering lights cast gentle shadows, adding ambiance to your space. You might add small decorative elements like beads or faux snow inside for extra detail. It’s a simple yet enchanting display that elevates your decor.
Use different jar sizes or shapes for variety. Wrap the jars with decorative ribbons, lace, or painted designs to match your style. Incorporate seasonal elements—like mini pinecones for winter or flowers for spring—inside or around the jar. Place the jars on trays, plates, or hang them in clusters for a more dramatic effect. Change the fairy lights’ color or brightness to suit your mood.
Gather empty mason jars, fairy lights (preferably battery-operated), and decorative elements. Insert the fairy lights into the jar, arranging the wires evenly. Secure the battery pack outside or at the back of the jar for easy access. Decorate the outside with ribbons, twine, or paint if desired. Place the jars on your bedside table, shelf, or hang upside down from a hook. Turn on the lights and enjoy the gentle glow.
Customize jars with paint, stickers, or labels for a special touch. Use different light colors or flickering modes for varied ambiance. Add small keepsakes or charms inside for a personal story. Group multiple jars with different styles for a curated look. This decor is perfect for parties, cozy nights, or as a thoughtful gift.
A mason jar fairy light centerpiece adds warmth and charm effortlessly. It’s a project anyone can do, and it creates a unique, magical vibe that’s hard to find in store-bought decor. Seeing your DIY glow-up will boost your confidence in crafting and decorating. Once you’ve created your first centerpiece, you’ll want to make more for every nook and cranny.
19. Bright, Quirky Wall Clocks
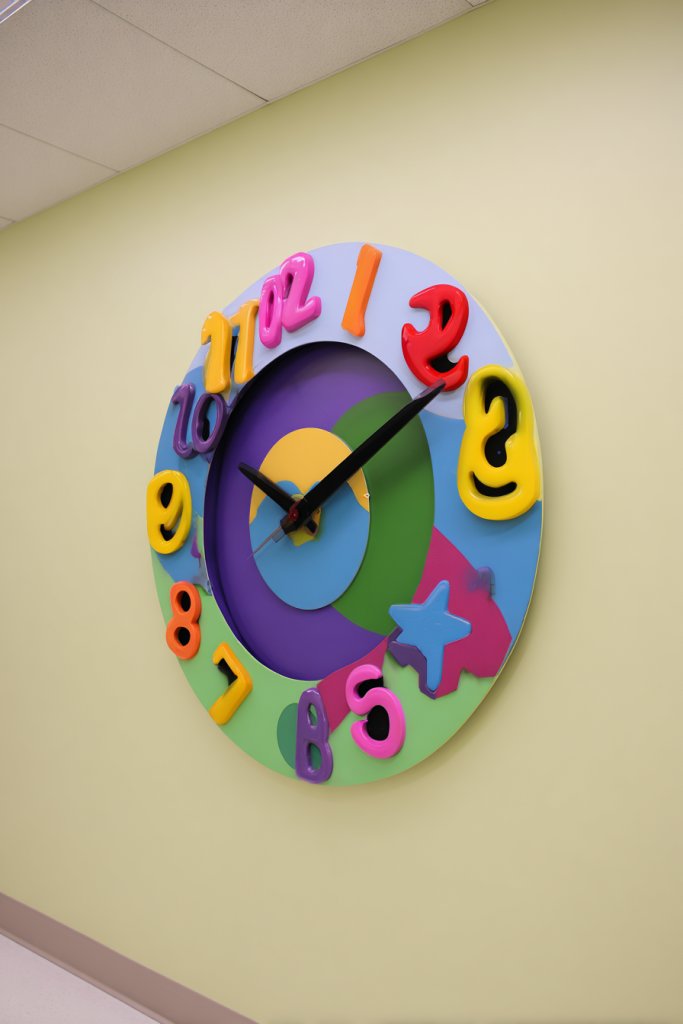
Is your room missing a fun, functional focal point? A quirky wall clock can be both a practical necessity and a playful decor statement. Forget boring round designs—think bold shapes, colors, or characters that make you smile every time you check the time. It’s a small detail that can totally change your room’s vibe.
Visualize a colorful, playful clock with exaggerated numbers or a fun shape like a star or heart. The vibrant hues contrast with neutral walls, adding instant energy. The clock’s design becomes a piece of art—something that catches your eye and sparks conversation. Its whimsical look complements a casual, youthful, or eclectic decor style, making time-telling enjoyable.
Choose clocks with bold colors, unusual shapes, or themed motifs—like animals, food, or geometric patterns. Mount it at eye level for maximum impact. Mix and match with other playful decor items, such as patterned cushions or quirky art. For a more subtle look, pick clocks with minimalistic or pastel designs. The key is balancing the clock with your overall decor for harmony.
Select a clock that suits your style and room size, ensuring it fits your wall space. Mount it securely using appropriate hardware, making sure it’s level. Choose a clock with clear, easy-to-read numbers or characters—especially if it’s a statement piece. Keep batteries fresh and set the time accurately. Pair it with other colorful accessories for a curated look. Regularly dust or wipe for a clean appearance.
Customize by adding stickers or paint to plain clocks for extra flair. Coordinate with other room elements—like matching colors or patterns. Use themed clocks for holidays or special occasions. Incorporate a funny or motivational quote on the clock face for daily inspiration. This small detail makes your decor playful and uniquely yours.
A quirky wall clock combines function with fun, instantly elevating your decor. It’s a simple upgrade that adds personality and charm, making your space more lively. Seeing your playful clock in action boosts your confidence in mixing practical items with creative decor. It’s a small change with a big visual impact—ready to make time more fun?
20. Small Statement Mirror with Decorative Frame
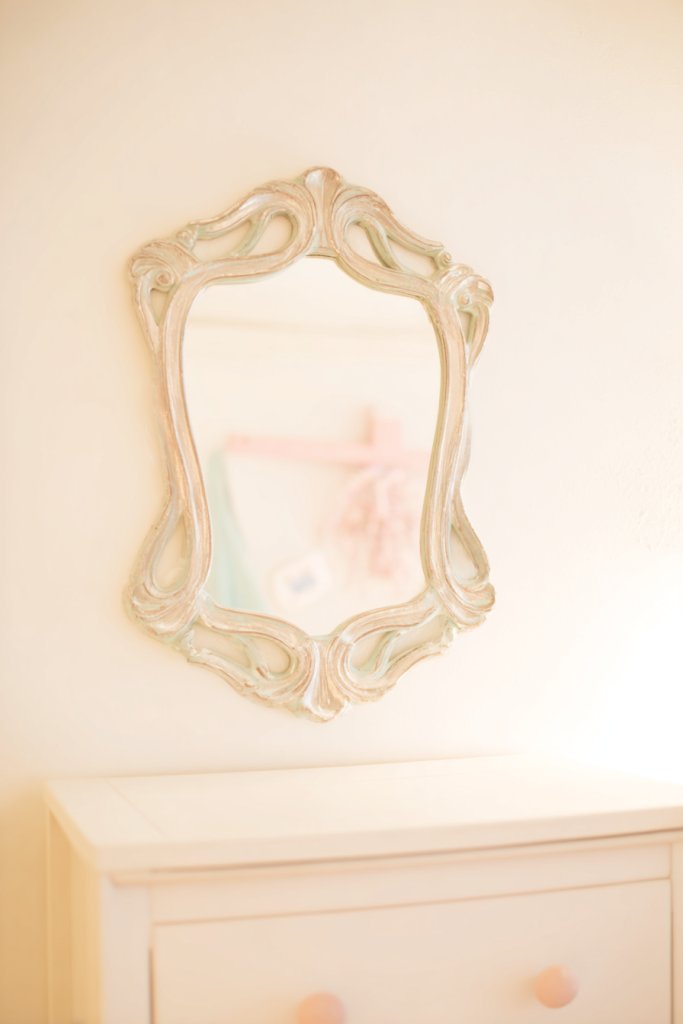
Plain, large mirrors can sometimes feel overwhelming or dull. Want a stylish piece that brightens your space and adds a touch of personality? A small statement mirror with a decorative frame can do wonders. It’s a functional decor element that also serves as a charming accent, making your room feel more open and inviting.
Imagine a petite mirror with an ornate, pastel-colored frame hanging above your dresser or beside your bed. The frame’s intricate details or playful shapes add visual interest, turning a simple reflection into an artful display. The mirror reflects light, making the room appear brighter and more spacious. Its size is perfect for accenting a corner or enhancing a small wall without overpowering the room.
Choose frames with whimsical shapes—like flowers, stars, or abstract designs—that match your decor style. Opt for finishes such as distressed paint, metallic, or matte for different vibes. Hang the mirror at eye level, or angle it for functional or decorative purposes. Pair it with other decorative elements like small shelves or art for a layered look. Change the frame style seasonally for variety.
Select a mirror with a frame that suits your aesthetic. Mount it securely using appropriate hardware, ensuring it’s level. Consider adding adhesive hooks or wall anchors if needed. Position the mirror to reflect natural light or other decor for maximum effect. Keep the glass clean and streak-free for clarity. Regularly check the mount for stability over time.
Paint or decorate the frame with stickers, washi tape, or small embellishments to match your theme. Add a small shelf or hooks nearby to hold jewelry or accessories. Incorporate fairy lights or decorative accents around the mirror for extra charm. Personalize with quotes or motifs painted or glued onto the frame. It’s a small detail that makes your decor truly unique.
A statement mirror not only enhances your decor but also boosts your confidence in mixing functional and artistic pieces. Its charm and versatility inspire creative arrangements and focal points. Seeing your space brighten and reflect your style encourages you to keep experimenting. This small, stylish touch can make a big difference in how you feel about your room.
21. DIY Fabric Wall Art Panels
Want to add color and texture to your walls without committing to expensive artwork? DIY fabric wall art panels are a creative, affordable way to personalize your space. They offer softness and visual interest, turning plain walls into cozy galleries. If you love crafting and decorating, this project is perfect for you.
Picture soft fabric panels in your favorite patterns and textures—floral, geometric, or abstract—hanging in a grid or asymmetrical arrangement. The fabrics add tactile richness and vibrant color, transforming a blank wall into a textured masterpiece. Attach them to a decorative rod or directly to the wall using clips or adhesive strips. The mix of soft textiles creates a layered, inviting look that invites touch.
Use different fabrics for variety—cotton, linen, velvet—and combine patterns or solids for contrast. Frame or border the fabric panels with decorative trims or piping for a polished look. Change the arrangement seasonally or for different moods, creating a gallery wall of textures. Hang the panels using stylish clips, rings, or tension rods to keep it flexible and easy to update. Incorporate bold or pastel colors depending on your decor theme.
Cut fabric pieces to your preferred size, hemming edges if needed. Attach fabric to a sturdy backing—like canvas, foam board, or lightweight wood—using fabric glue or staple guns. Mount the panels on a decorative rod or directly affix them to the wall with removable adhesive strips. Arrange in a pattern that suits your space—grid, random, or a themed shape. Regularly dust or wash fabric covers to keep them looking fresh.
Add decorative trims, embroidery, or painted details to customize each panel. Incorporate your favorite colors or motifs to reflect your style. Mix textures—like velvet with cotton—for added depth. Create themed panels for holidays or special occasions. Personal touches make your wall art uniquely yours and adaptable to your evolving taste.
DIY fabric wall art transforms a blank wall into a tactile, colorful display. It’s a fun project that boosts your confidence in decorating with textiles. Once you see how fabric adds warmth and personality, you’ll be inspired to experiment more with textures and patterns. Your space will feel cozy, personalized, and stylish—all handmade with love.
22. Colorful Pegboard Organizer
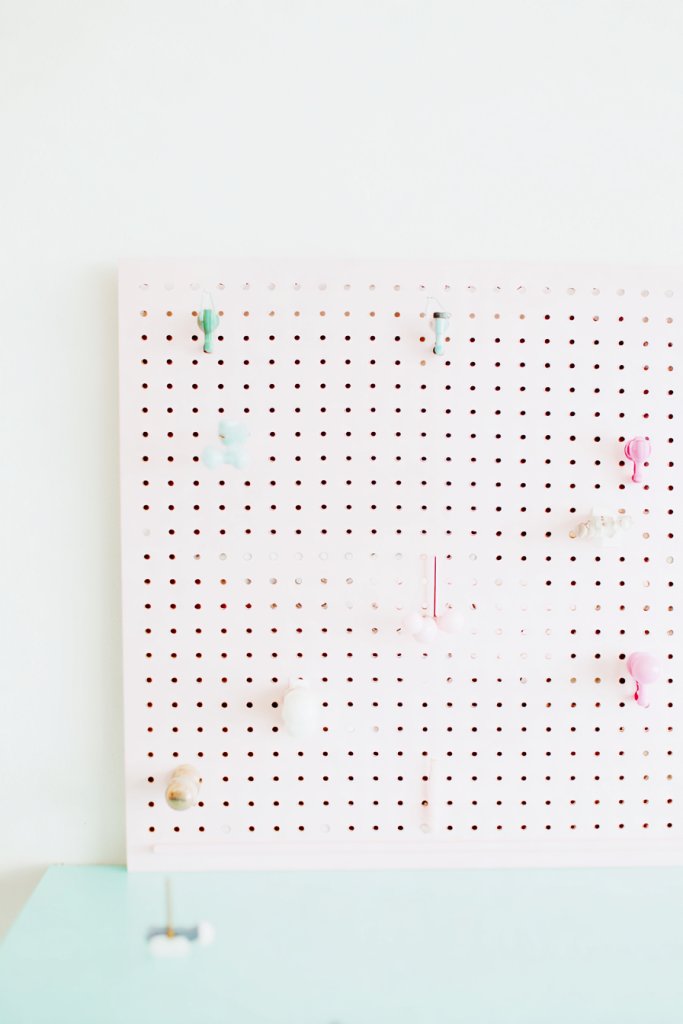
Messy desks or cluttered vanity tables drive you crazy? A colorful pegboard organizer offers a practical, stylish solution. It keeps your accessories, craft supplies, or small decor items within reach while adding a pop of color and personality. If you crave order and visual appeal, this project is a win-win.
Picture a bright, painted pegboard mounted above your workspace or dressing area. Hooks and small baskets hold jewelry, brushes, or stationery, all organized and displayed in a cheerful pattern. The vibrant colors and varied storage options create a lively, functional wall that’s both attractive and useful. It turns clutter into decor, making your space more inviting and efficient.
Paint the pegboard in your favorite bold or pastel hues, or leave it in a neutral tone for versatility. Arrange hooks and baskets in a grid or freeform pattern for visual interest. Use themed accessories—like colorful clips for hair ties or office supplies—to match your style. Change the layout seasonally or when you need a new look. Pair with other colorful decor for a cohesive space.
Install the pegboard securely on your wall using appropriate anchors and screws. Arrange hooks, shelves, and baskets in a pattern that maximizes space and accessibility. Organize your items logically—by size, color, or type—to streamline your routine. Regularly update the contents and rearrange for variety. Keep the surface clean and free of dust for optimal appearance.
Decorate the borders with washi tape or paint for extra flair. Use colorful or themed accessories to match your decor. Incorporate small decorative elements like stickers, or add labels for easy identification. Personalize with your favorite color combinations or motifs. This functional decor piece becomes a vibrant expression of your style.
A colorful pegboard organizer makes your space more efficient and lively. It’s a simple, customizable project that boosts your confidence in DIY organization. Seeing everything neatly arranged and easily accessible encourages you to keep your space tidy. It’s a small change with a big impact on your daily routine and decor aesthetic.
23. Sweet-themed Decorative Banners

Want to add instant cheer and personality to your room? Decorative banners with cute motifs like hearts, stars, or cupcakes are just the thing. They’re perfect for celebrations or everyday decor, bringing a festive and fun vibe. If you love DIY projects and want a quick upgrade, banners are a playful solution.
Imagine a string of fabric or paper banners hanging across a window or wall, decorated with cheerful motifs and bright colors. They sway gently, adding movement and a sense of celebration. The playful shapes and patterns create a lively, inviting atmosphere—perfect for a girl’s room, party space, or cozy corner. They’re a simple way to inject personality and joy.
Create banners in different themes—birthday, holiday, or just because. Use fabric, paper, or felt in your favorite colors and patterns. Add embellishments like pom-poms, tassels, or glitter for extra fun. Hang them at varying heights for a layered look or keep them straight for a clean, playful line. Change or update banners seasonally for ongoing freshness.
Cut fabric or paper into your desired shapes—hearts, stars, cupcakes—using templates or freehand. String them on twine, ribbon, or yarn, tying knots or using clips to secure. Mount using hooks, thumbtacks, or pushpins, ensuring they’re taut and evenly spaced. For a more polished look, add decorative borders or fringe. Keep extra shapes for future decorating or swapping.
Decorate banners with hand-stitched details, stickers, or painted accents. Incorporate your favorite colors or themes—like unicorns or flowers. Add small charms, tassels, or fairy lights for extra sparkle. Personalize with initials or messages to make it special. This makes your decor not just cute but meaningful.
Decorative banners instantly brighten any space and make it feel festive. They’re a DIY-friendly project that adds a playful touch and boosts your creative confidence. Once you see how a few simple shapes can transform your decor, you’ll be inspired to craft more personalized touches. It’s a cheerful, easy upgrade anyone can enjoy.
24. Personalized DIY Photo Collage Wall
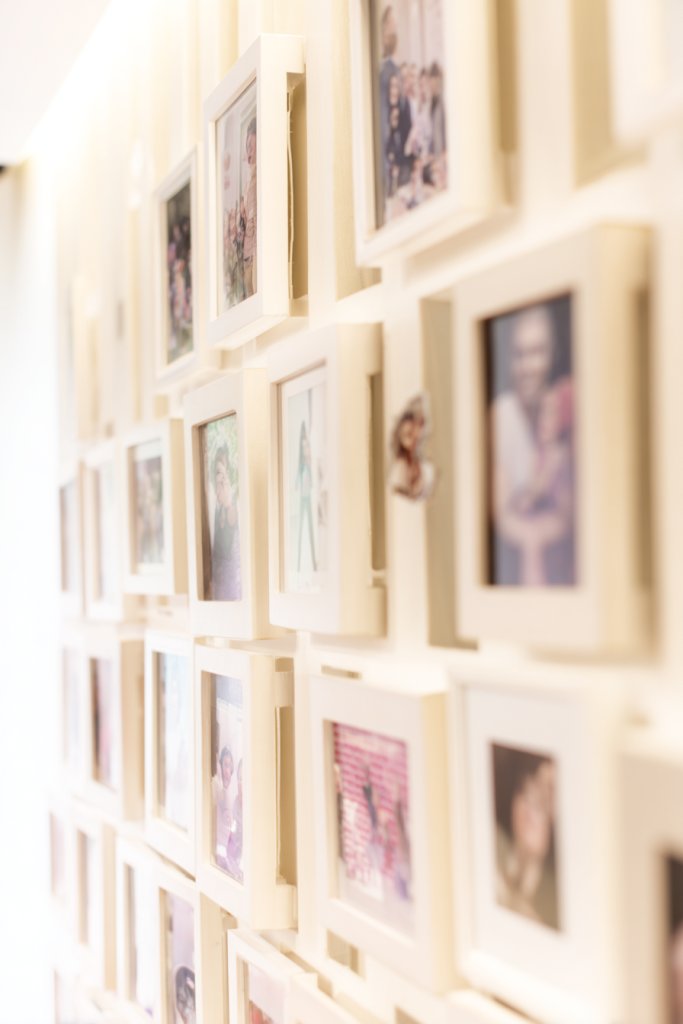
Your room should tell your story, but blank walls often fall flat. A personalized photo collage wall is a heartfelt way to showcase memories and add a personal touch. It’s simple, customizable, and instantly makes your space feel more lived-in. If you love nostalgia and creativity, this project is perfect for you.
Picture a vibrant collage of photos arranged in a playful, freeform layout across a wall. Include snapshots of friends, family, pets, or special moments. Mix in decorative paper or patterned backgrounds for added depth. Use colorful frames or washi tape to secure photos, creating a lively, dynamic display. The arrangement becomes a visual timeline of your favorite memories, making your room uniquely yours.
Create a themed collage—like travel, family, or milestones—or mix everything for a eclectic look. Use different frame styles and sizes for visual interest. Incorporate fun elements like stickers, quotes, or decorative paper behind photos. Change out or add new photos seasonally or for special events. For a less cluttered look, organize in a grid or shape, like a heart or circle.
Print your favorite photos in different sizes, then arrange them on the floor or a large board before hanging. Use washi tape, clips, or frames to mount photos securely. Mix in decorative paper or quotes for variety. Mount the collage on your wall with removable hooks or adhesive strips—easy to change later. Keep it balanced and visually engaging by spacing photos thoughtfully.
Add handwritten captions, doodles, or stickers for a playful touch. Incorporate small mementos or themed embellishments around the photos. Use colorful backgrounds or mats to make certain photos pop. Personalize with your favorite quotes or song lyrics. This collage becomes a storybook of your life, full of personality.
A DIY photo collage wall makes your space more meaningful and inviting. It boosts your confidence in personalizing your decor and preserving memories creatively. Once you see your favorite moments displayed beautifully, you’ll be motivated to keep adding or updating it. It’s a heartfelt, artistic way to make your room truly yours.
Conclusion
From soft color schemes to charming accessories, this collection of cute room ideas offers a variety of ways to infuse personality and sweetness into your space. Don’t hesitate to try out these ideas and customize them to fit your style—your perfect cozy retreat is just a few creative touches away. Embrace the fun of decorating and turn your room into an adorable sanctuary that you’ll love coming home to.