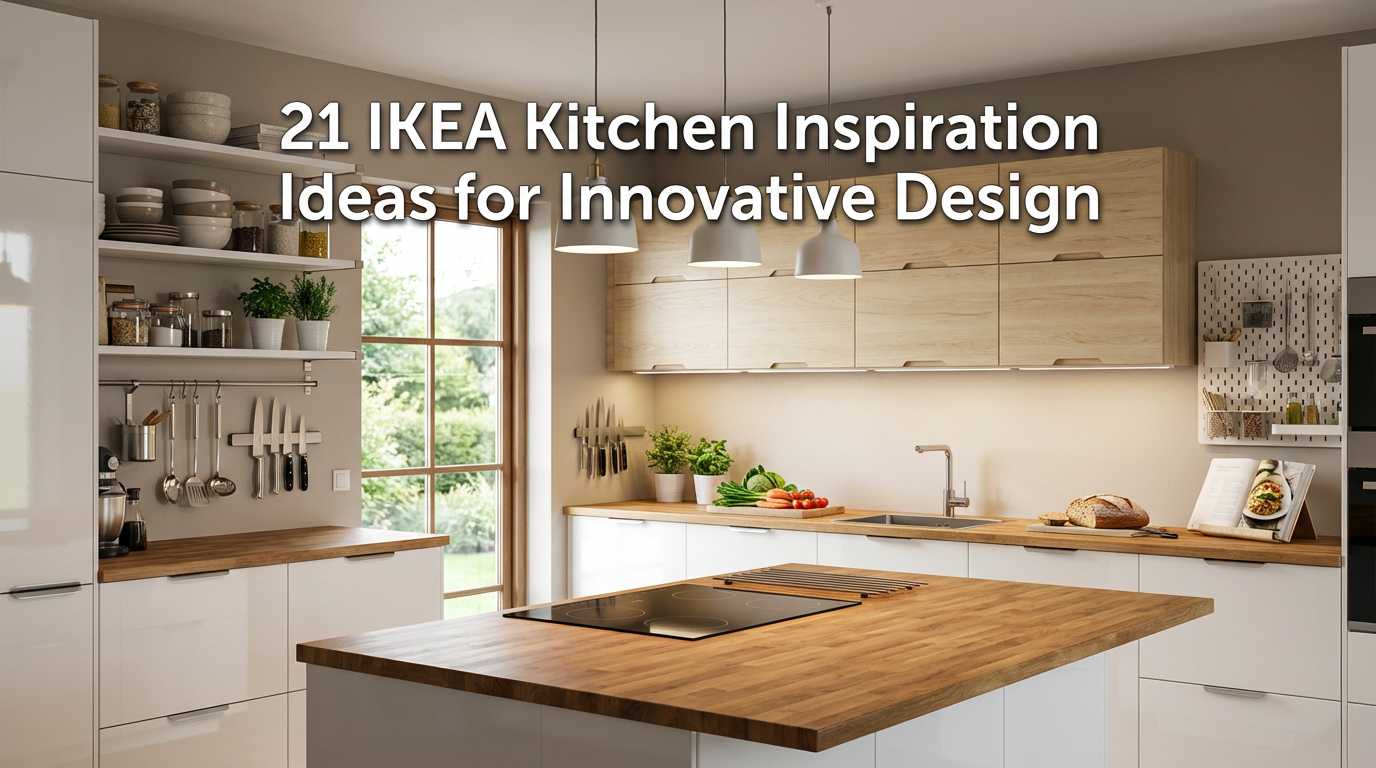
Imagine stepping into a kitchen that perfectly reflects your personality, blending functionality with style—that’s the magic of IKEA kitchen inspiration ideas! These designs have become incredibly popular because they offer affordable, customizable solutions that cater to every taste, space, and lifestyle.
In this article, you’ll find a vibrant mix of ideas that showcase innovative storage solutions, trendy color palettes, and clever layouts. Whether you prefer sleek modern aesthetics or cozy, rustic vibes, there’s something here to spark your creativity and help you craft a kitchen that feels uniquely yours.
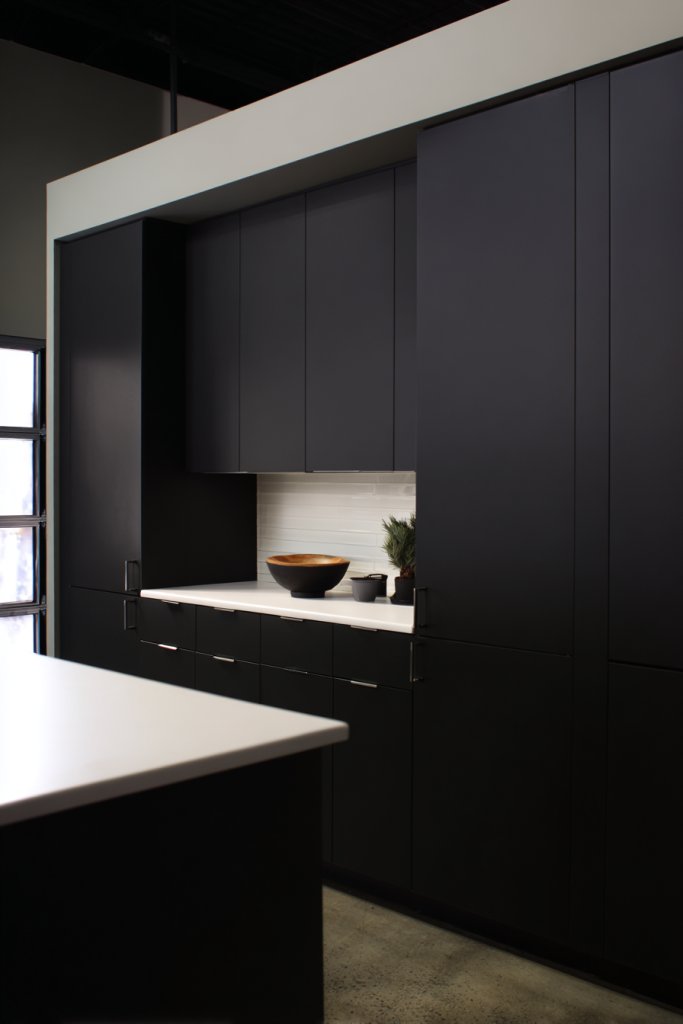
1. Monochrome Minimalist Kitchen with IKEA SEKTION Cabinets
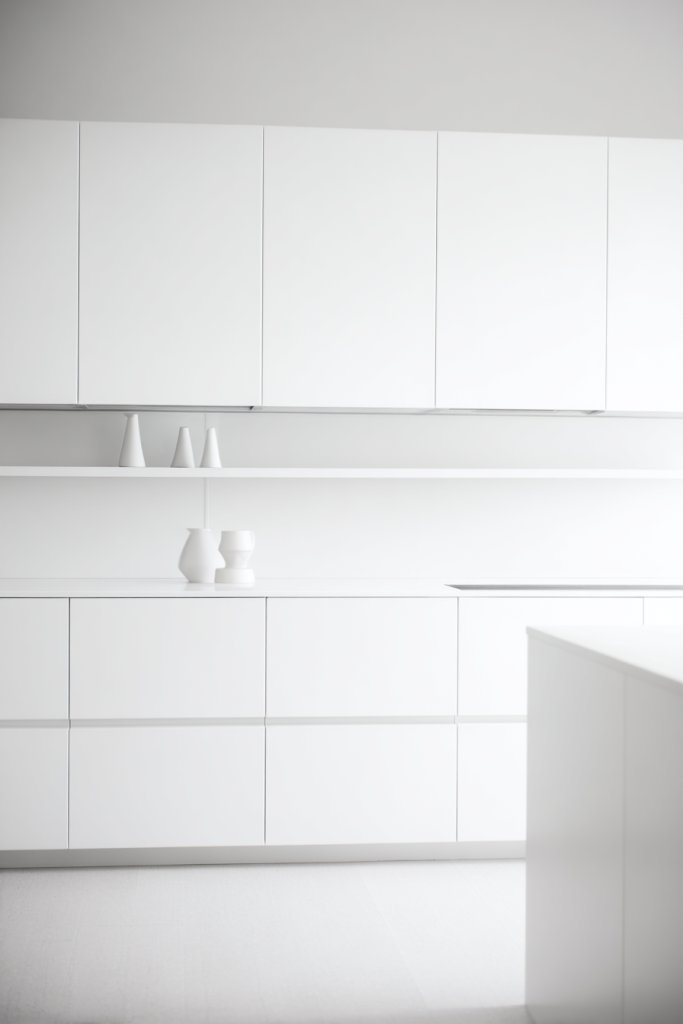
Ever feel overwhelmed by clutter and chaos in your kitchen? A sleek, uniform look might be just what you need to bring calm and order to your space. Monochrome designs are all the rage now because they make everything look effortlessly tidy. Plus, who doesn’t want a space that feels modern and clean without much fuss?
Imagine a kitchen where all cabinets are in a soft matte black or crisp white, creating a seamless flow from wall to wall. The handles are minimal, maybe just a subtle groove, keeping the look sleek. The countertops complement the cabinets, perhaps in a matching shade or a contrasting marble finish. The space feels airy, with plenty of natural light bouncing off the uniform surfaces, making it feel larger than life.
You can switch up the monochrome palette depending on your mood—deep navy, muted taupe, or even pastel shades for a softer vibe. For a cozy winter feel, add textured textiles like a wool rug or linen curtains. During summer, open shelving painted the same hue can display colorful dishes for a pop of contrast. This style adapts easily whether your kitchen is big or small, modern or traditional.
Start by choosing your base color—black, white, or grey work well. IKEA SEKTION offers a variety of door fronts and hardware to keep the look consistent. Measure your space carefully to determine how many cabinets you need. Install the cabinets level and flush for a seamless appearance, then add simple hardware like bar pulls or push-to-open mechanisms. Finish with a matching countertop, maybe in quartz or laminate, for durability and style. Keep the design minimal by avoiding clutter and opting for hidden storage solutions.
Add personal touches with subtle contrasting elements—like black handles on white cabinets or wooden accents for warmth. Incorporate textured textiles such as a woven placemat or a soft throw blanket for a cozy contrast. You can also use different finishes within the same color family—matte, gloss, or textured—to add depth. Small decorative elements like a sleek soap dispenser or a sculptural utensil holder can elevate the look without breaking the monochrome theme.
A monochrome minimalist kitchen proves that simplicity is powerful. It creates a calming environment that makes cooking less stressful and more enjoyable. Plus, it’s a timeless look that won’t go out of style, so your investment pays off long-term. Ready to embrace the sleek, clutter-free lifestyle? Start with clean lines and a neutral palette—you’ll love the results!
2. Open Shelving with IKEA KALLAX Units for Display and Storage
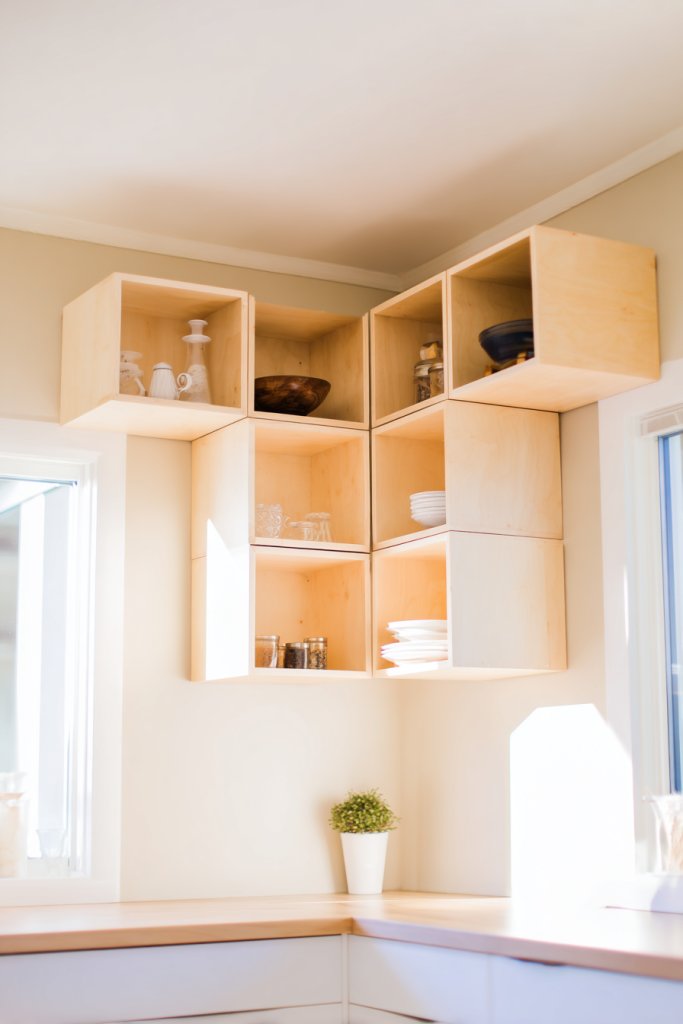
Tired of digging through crowded cabinets just to find that one dish or spice? Open shelving offers a simple solution to make your kitchen more functional and visually appealing. It’s perfect for those who want easy access and a chance to show off their favorite dishware or decorative pieces. Plus, it instantly makes the space feel more open and inviting.
Picture a wall where a series of white IKEA KALLAX units are mounted, creating a grid-like display. Inside, you have neatly arranged dishes, colorful bowls, or even quirky mugs that add personality. The open shelves are accented with decorative containers, small plants, or vintage kitchen tools, giving the space a warm, lived-in vibe. The natural light streaming in highlights the textures and colors, making everything pop.
You can customize open shelving to suit your taste—paint the KALLAX units in bold colors or leave them in natural wood for a rustic touch. For small spaces, stacking a few units vertically maximizes storage without taking up too much floor space. During holidays, swap out everyday items for seasonal decor to keep the look fresh and festive. This setup works equally well in open-plan kitchens or cozy nooks.
Begin by selecting the right size KALLAX units based on your wall space. Mount them securely using appropriate anchors to prevent accidents. Organize your items in baskets or decorative boxes inside the cubes to keep things tidy. Use a mix of open and closed storage if you want some concealment for less attractive items. Decorate the shelves with a combination of functional and decorative pieces, balancing practicality with style. Regularly update your display to keep it feeling fresh.
Inject personality by mixing in different textures—wood, ceramics, or metal accents. Incorporate a few decorative trays or bowls to contain loose items and add visual interest. During special occasions, display themed dishware or souvenirs from travels. Use LED strip lighting underneath the units for subtle illumination that highlights your curated collection at night.
Open shelving turns your kitchen into a showcase of your style and personality. It encourages you to keep things organized and accessible, making cooking more enjoyable. Plus, it’s incredibly versatile—change up the display whenever you like. This simple upgrade can dramatically change the vibe of your entire kitchen!
3. Bright, Colorful Baskets and Storage Solutions for a Playful Touch
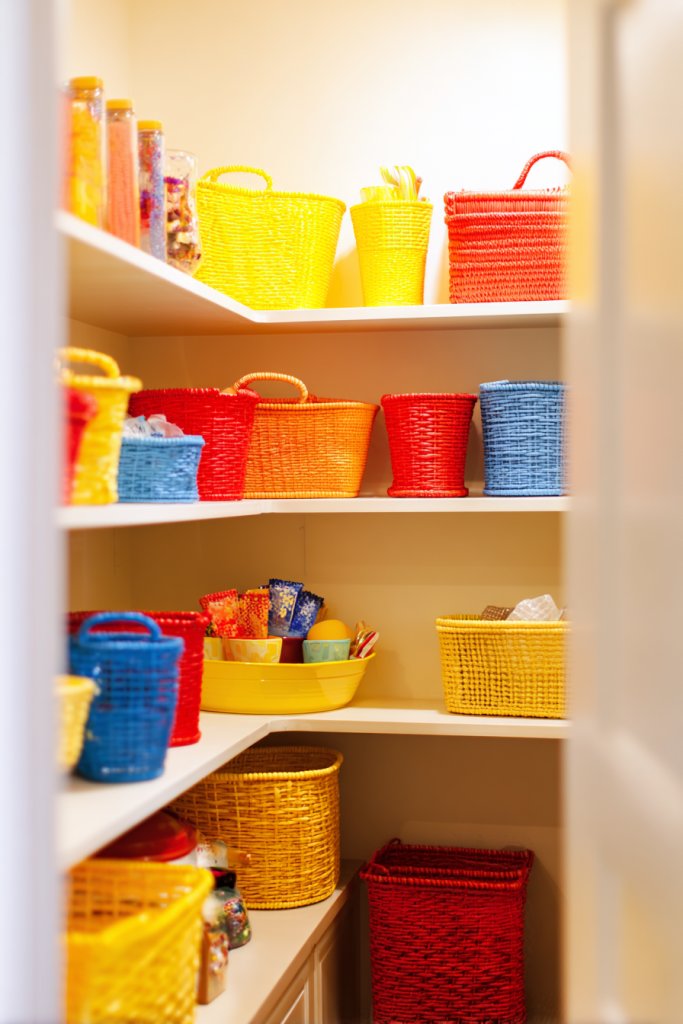
Does your kitchen feel dull and uninspired? Bright, colorful baskets and containers can instantly lift the mood and add a playful vibe. They’re also super practical, helping you organize everything from snacks to utensils without sacrificing style. Who says storage has to be boring? Injecting color can make your daily routine more cheerful and inviting.
Visualize a countertop lined with vibrant woven baskets in shades of coral, turquoise, and lemon yellow. Inside, you keep your everyday essentials—spoons, tea towels, or reusable bags—organized and within reach. The baskets add texture and color, creating a lively contrast against neutral cabinetry. The cheerful hues brighten the space, making it feel more welcoming and less sterile. The overall look is cozy, fun, and full of personality.
Mix and match colors to reflect your personality—bold primary shades or soft pastels work well depending on your aesthetic. For seasonal changes, swap out baskets or add decorative labels for different holidays or themes. Use smaller baskets inside larger ones to organize smaller items or create zones within your kitchen. This approach suits both large open kitchens and smaller apartments, adding a pop of color without clutter.
Choose baskets made from natural fibers like rattan or seagrass for durability and texture. IKEA offers various sizes and colors, making it easy to coordinate your look. Use them for storing pantry items, cleaning supplies, or even as decorative catch-alls for keys and gadgets. Place them on open shelves, inside cabinets, or under the sink for maximum versatility. Keep the storage functional by labeling baskets if needed, especially for shared kitchens.
Personalize baskets with fabric linings, custom tags, or painted initials to make them uniquely yours. Incorporate a few decorative textiles—like a soft throw blanket with chunky knit texture—near the baskets for added coziness. You can also hang small fabric pouches or fabric bins for extra storage with a whimsical touch. Combining color with texture creates a lively, inviting atmosphere.
Bright baskets turn mundane storage into a design feature that sparks joy. They make organization fun and accessible, encouraging you to keep your kitchen tidy. Plus, colorful containers are easy to update—swap out hues to match seasons or your evolving taste. Your kitchen will feel vibrant, cheerful, and totally Instagram-worthy!
4. Multi-Functional Island Using IKEA IVAR or SEKTION Components
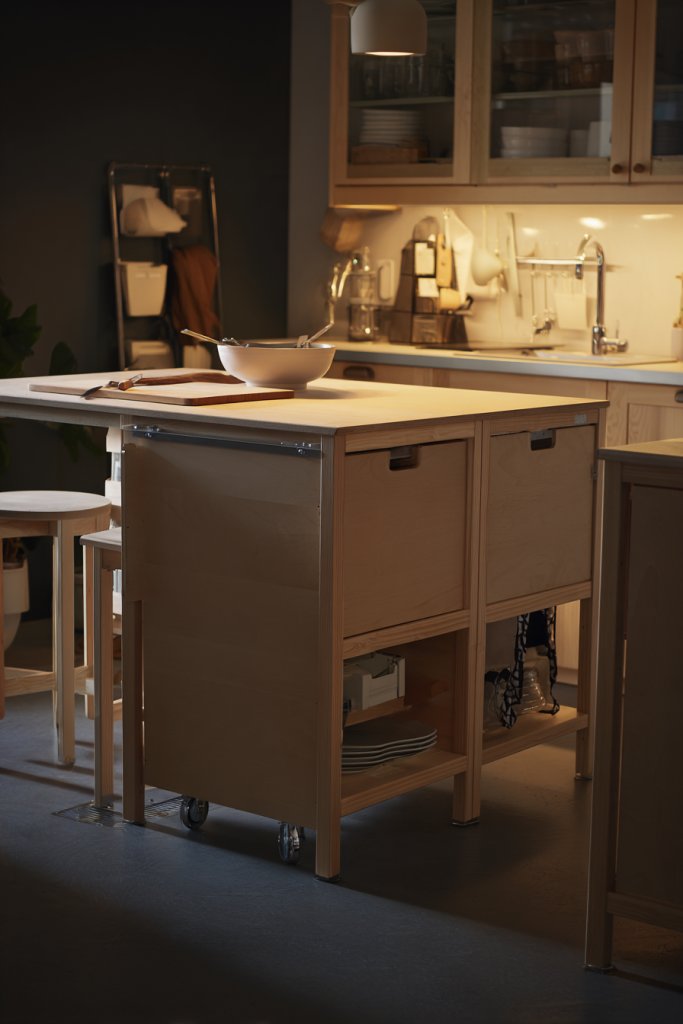
Ever wish your kitchen island could do more than just look good? A multi-functional island is the ultimate hack for small or busy kitchens. It offers prep space, storage, and even a spot to sit—sometimes all in one unit. Why settle for a single-purpose piece when you can have a versatile centerpiece?
Envision a sturdy wooden top from IKEA IVAR paired with open shelving underneath, filled with baskets and containers. The island doubles as a workspace and a casual dining area, with a couple of high stools tucked underneath. Light streams in from a nearby window, highlighting the natural grains of the wood and the sleek hardware. This setup balances practicality with style, making it the heart of your kitchen.
Customize your island with different finishes—painted legs, contrasting wood tops, or even a marble surface for elegance. Incorporate open shelves for easy access to frequently used items or add closed cabinets for hidden storage. During meal prep seasons, add a fold-down extension or extra countertop space. In smaller spaces, make it mobile with casters for flexibility. The key is to adapt it to your lifestyle and available space.
Start by selecting the components—use IKEA SEKTION for modular storage or IVAR for a rustic look. Measure your space carefully and plan the layout to include drawers, shelves, and possibly a built-in wine rack or utensil holder. Assemble the base first, ensuring stability before attaching the countertop. Use durable materials like butcher block or laminate for the surface. Incorporate hooks or magnetic strips for tools, keeping everything within arm’s reach. Regular maintenance involves cleaning and checking hardware for looseness.
Personalize your island with custom handles, a splash of color on the legs, or decorative corner accents. Add functional accessories like a roll-up towel holder or a magnetic knife strip. Use a chalkboard panel on the side for notes and recipes. Incorporate a small built-in trash or recycling bin for convenience. These touches make the island uniquely yours and highly functional.
A flexible, multi-purpose island elevates your entire kitchen experience. It encourages a more organized, efficient workflow while serving as a statement piece. Plus, it can grow with your needs—adding more storage or workspace as required. Embrace the DIY spirit and create a space that’s both beautiful and incredibly useful!
5. Scandinavian-Inspired Light Wood Accents with IKEA NORDMÄRKE or BEKVÄM
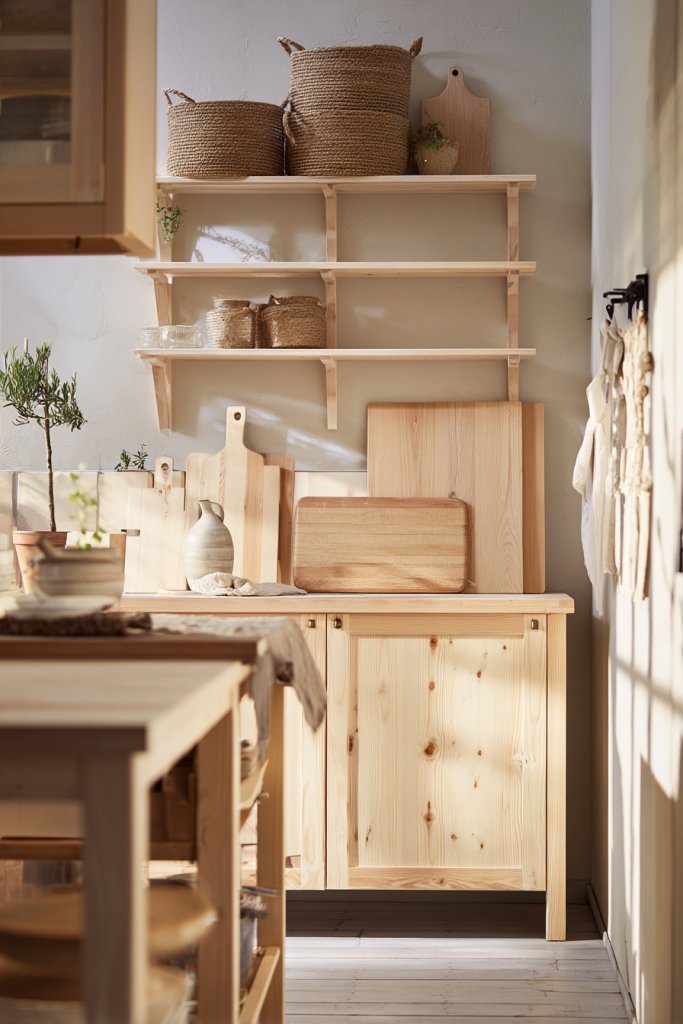
Does your kitchen feel cold or sterile? Warm, Scandinavian-inspired accents can instantly change that vibe. Light wood tones bring a natural, cozy feel that makes the space welcoming without cluttering. It’s a style that’s both timeless and easy to incorporate, especially if you love a minimalist aesthetic with a touch of nature.
Imagine soft, pale wood cabinets paired with a matching spice rack or utensil holder in light pine or birch. The shelves are adorned with simple ceramics and glass jars filled with dry goods, all in neutral shades. The subtle grain of the wood adds texture, while the overall light palette keeps the space bright and airy. A hint of warmth from the wood balances the cool tones of stainless steel appliances, creating harmony.
Mix light wood with white or pastel colors for a fresh look that suits spring and summer. During colder months, add cozy textiles like a knit placemat or a wool runner to reinforce the warm vibe. You can also incorporate darker wood accents for contrast or opt for painted accessories that mimic natural wood tones. This style adapts well to both small and large kitchens, emphasizing simplicity and warmth.
Choose IKEA’s NORDMÄRKE or BEKVÄM series for a cohesive look. Install open shelving or wall-mounted spice racks in the same wood finish to maximize vertical space. Use light-colored wood for cutting boards, stools, or storage containers. Pair these with white countertops and minimal hardware. Keep clutter hidden in sleek drawers, allowing the natural beauty of the wood to shine. Regularly clean and treat the wood to maintain its luster.
Add personal touches with engraved or painted initials on wooden accessories. Incorporate textured textiles like linen or cotton curtains and table runners. Mix in some sculptural clay or ceramic pieces for a handcrafted feel. Keep the overall aesthetic minimal but warm, emphasizing functionality with style. This approach creates a serene, inviting kitchen environment.
Scandinavian-inspired accents prove that less is more, focusing on quality and simple beauty. This style promotes a calm, clutter-free space that encourages cooking and gathering. Embrace the natural warmth of light wood to elevate your kitchen’s atmosphere. It’s a look that’s both timeless and refreshingly modern.
6. Creative Use of IKEA METOD Cabinets for Custom Pantry Solutions
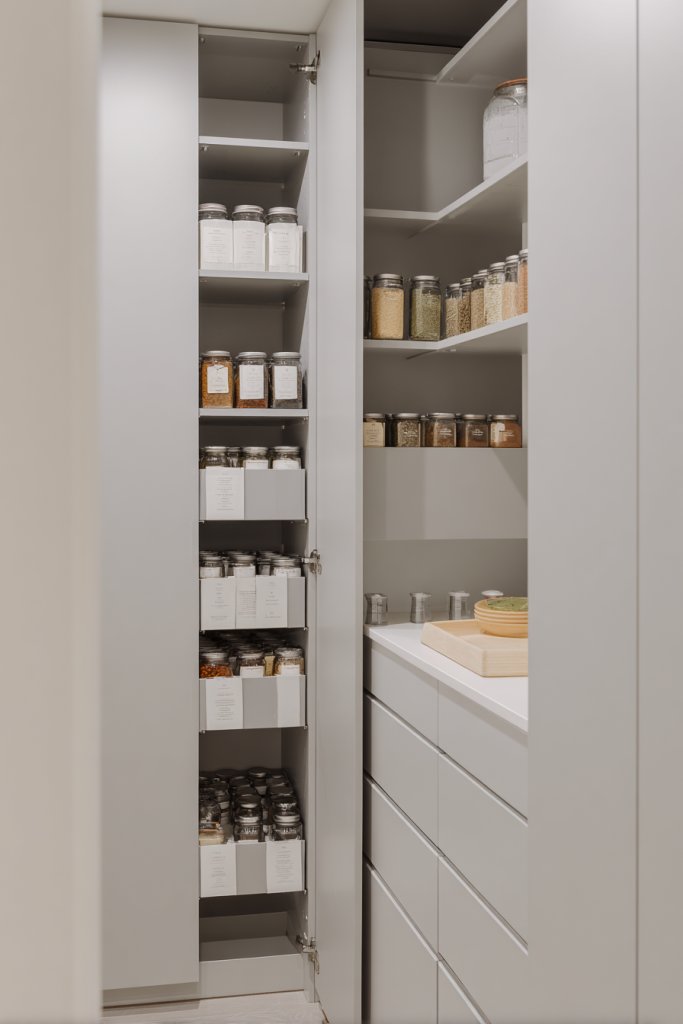
Is your pantry a chaotic mess that makes cooking more stressful? Customizing IKEA METOD cabinets can turn that nightmare into a neatly organized haven. Everyone deserves a dedicated space for dry goods, snacks, and spices without rummaging through clutter. Imagine opening your pantry to find everything in its perfect place—sounds like a dream, right?
Visualize tall, sleek METOD cabinets fitted with pull-out shelves, baskets, and labeled containers. Inside, spices are neatly stacked in a tiered rack, while bins hold snacks and baking supplies. The cabinets are painted in a neutral tone, blending seamlessly with the kitchen decor. Clear, organized, and accessible—your perfect pantry is now a reality. The interior lighting highlights the well-planned layout, making everything easy to find.
Customize your pantry with adjustable shelves, pull-out spice racks, or hidden compartments for small items. Use different finishes—matte, gloss, or textured—to match your overall kitchen style. For small spaces, stack cabinets vertically or add a sliding ladder for hard-to-reach shelves. Seasonal or special diet items can be stored separately in dedicated bins or baskets. The key is to make it adaptable to your household’s needs.
Start by measuring your space and sketching a layout for your cabinets. Choose METOD units that fit your storage needs—tall cabinets for bulk items, shallow ones for spices. Install pull-out mechanisms, which are a game-changer for accessibility. Use labeled containers and dividers to keep everything visible and easy to grab. Consider adding internal lighting inside the cabinets for better visibility at night. Regularly declutter and reorganize to keep it functional.
Personalize your pantry with custom labels or color-coded bins. Incorporate a small chalkboard on the door for notes or shopping lists. Use decorative baskets or vintage-inspired containers for a charming touch. Add a lazy Susan or turntable for corner cabinets to maximize space. These small details make your pantry both highly functional and uniquely yours.
A well-organized pantry built with IKEA METOD cabinets boosts your confidence in the kitchen. It transforms a chaotic area into a sleek, efficient space that inspires better cooking habits. Plus, it’s a project anyone can tackle with a little planning—no professional help needed. Get ready to enjoy a stress-free, beautifully organized kitchen!
7. Incorporating Multi-Color Cabinet Doors for a Bold Statement

Feeling bored with uniform kitchen cabinets? A splash of color might be just what you need to liven things up. Multi-colored cabinet doors create a bold visual statement and inject personality into your space. It’s a simple way to break the monotony and add a playful, vibrant touch. Who says your kitchen has to be all matchy-matchy?
Picture a kitchen where the upper cabinets are a sunny yellow, the lower ones in a deep navy, and the island in a rich emerald green. The contrasting colors draw your eye around the room, making it feel lively and energetic. The cabinet hardware is sleek and modern, balancing the playful colors. The overall effect is a cheerful, eclectic look that still feels cohesive and thoughtfully designed.
Mix different finishes—matte, gloss, or textured—to add depth. Use bold colors on accent cabinets or just on the island for a more subtle approach. Incorporate color themes based on seasons or holidays—think red and green for Christmas or pastel shades for spring. You can also paint just the cabinet fronts or add removable adhesive decals for flexibility.
Start by selecting your color palette and deciding which cabinets will get the bold hues. Use IKEA doors or paint existing ones with high-quality, washable paint designed for cabinetry. Ensure all surfaces are clean and smooth before painting. Install matching or contrasting hardware to complement the colors. Keep the design balanced by pairing bright cabinets with neutral countertops and walls. Regular touch-ups will keep the colors vibrant.
Add custom handles or knobs that match your color scheme—brass, matte black, or clear acrylic work well. Incorporate decorative trims or decals to create patterns or accents. Use matching textiles like colorful dish towels, pot holders, or seat cushions to tie the look together. Personal touches like hand-painted motifs or seasonal decals can also make the cabinets more fun.
Bold, multi-colored cabinets show that kitchen design is all about personality and fun. They make your space memorable and can be a conversation starter. Plus, they’re easy to update—just repaint or swap out doors when you’re ready for a change. Unleash your creativity and transform your kitchen into a lively, joyful hub!
8. Under-Cabinet Lighting for Ambiance and Functionality
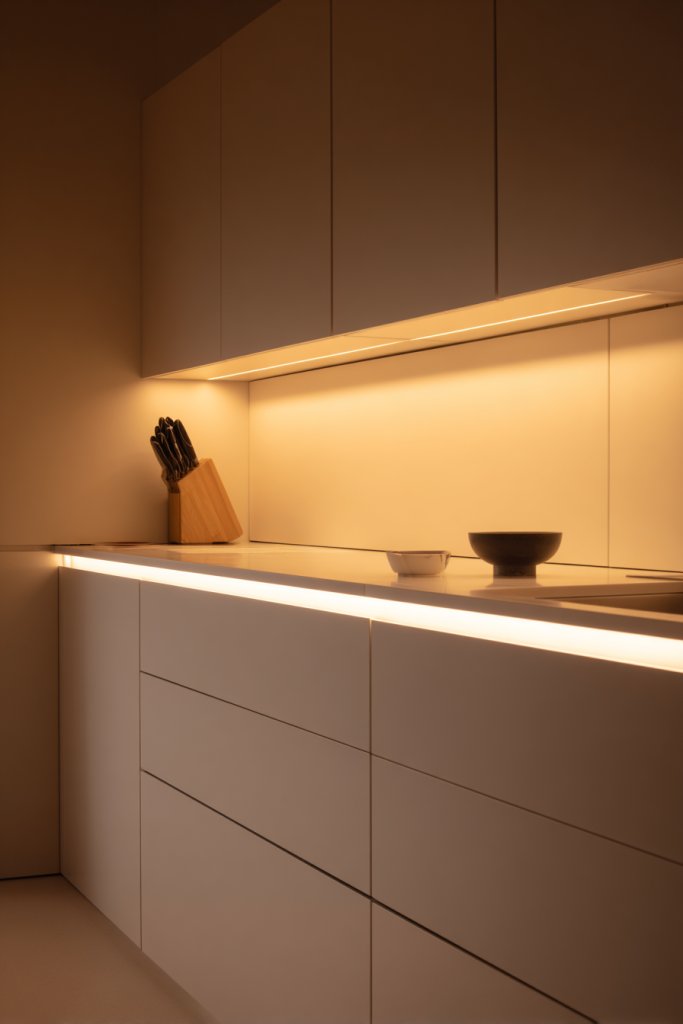
Ever struggled to see what you’re chopping or mixing? Under-cabinet lighting solves that problem while adding a cozy, inviting glow. It’s a simple upgrade that enhances both functionality and ambiance. Who doesn’t want a kitchen that’s bright enough for cooking yet warm enough for relaxing?
Imagine sleek LED strips installed beneath your upper cabinets, casting a soft, even light over your countertop. The light highlights your workspace without creating shadows or glare. The warm tone of the LEDs complements your decor, making everything look more appealing. You can see the texture of your cutting board and the sparkle in your utensil holder, making your kitchen feel welcoming and efficient.
Choose from different color temperatures—warm white for cozy evenings or cool white for task lighting. Install dimmable fixtures to adjust brightness depending on your mood or activity. For a more decorative touch, add color-changing LEDs or smart lighting that syncs with your music or voice commands. This setup works in both modern and traditional kitchens.
Start by measuring your cabinet length and choosing compatible LED strips or puck lights. Attach the strips with adhesive backing or mounting clips, ensuring they’re flush and straight. Connect to a power source—plug-in or hardwired—depending on your setup. Use a dimmer switch or a smart home app for control. Test the lighting for evenness and adjust as needed. Regularly clean the fixtures to keep the light bright and clear.
Coordinate the lighting color with your overall decor—think warm tones for a cozy vibe or cool for a sleek, modern look. Add motion sensors for hands-free operation during busy cooking times. Use the lighting to highlight decorative shelving or architectural features in your kitchen. Incorporate remote controls or voice commands for ultimate convenience.
Under-cabinet lighting transforms your kitchen into a functional, stylish space. It boosts your confidence in cooking and cleaning by improving visibility. Plus, it’s an easy upgrade with a big impact—perfect for DIY enthusiasts. Enjoy a brighter, more inviting kitchen every day!
9. DIY Backsplash Using IKEA Glass or Tile Panels

Looking to add a splash of style without breaking the bank? A DIY backsplash is the perfect project to elevate your kitchen’s look. IKEA offers glass and tile panels that are easy to install and customize. It’s a fun way to express your personality while protecting your walls from splashes and stains. Who says DIY can’t look professional?
Picture a wall behind your stove covered in a mosaic of colorful glass panels or sleek tiles in geometric patterns. The reflective surface of the glass adds depth and brightness, bouncing light around the room. The tiles are arranged in a pattern that complements your overall decor, perhaps with metallic accents or textured finishes. The result is a vibrant, eye-catching feature wall that instantly transforms the space.
Choose from a wide range of colors, textures, and patterns to suit your style—think subway tiles for a classic look or irregular mosaics for a boho vibe. For smaller kitchens, consider a partial backsplash that highlights a specific area. Seasonal or thematic designs can also add a playful touch, like holiday motifs or metallic accents. This approach allows endless customization.
Start by measuring your wall area carefully. Select the panels that fit your design vision—glass for sleek modernity or tiles for traditional charm. Clean the wall thoroughly before applying adhesive or mounting clips. Follow the included instructions for precise placement and use spacers for even grout lines if needed. Seal gaps with grout or silicone to prevent water seepage. Finish with a protective sealant if required.
Add your personal touch by mixing different colors or finishes within the same panel. Incorporate metallic or textured tiles for a richer look. Use decorative trim or corner pieces to frame the backsplash. Keep it clean and shiny with regular gentle cleaning, ensuring your DIY masterpiece stays stunning for years.
A DIY backsplash proves that you can achieve a high-end look on a budget. It inspires confidence to tackle other home projects, knowing you can create something beautiful yourself. Plus, it’s a practical upgrade that boosts your kitchen’s style and protects your walls—what’s not to love?
10. Space-Saving Corner Solutions with IKEA Lazy Susans and Carousels
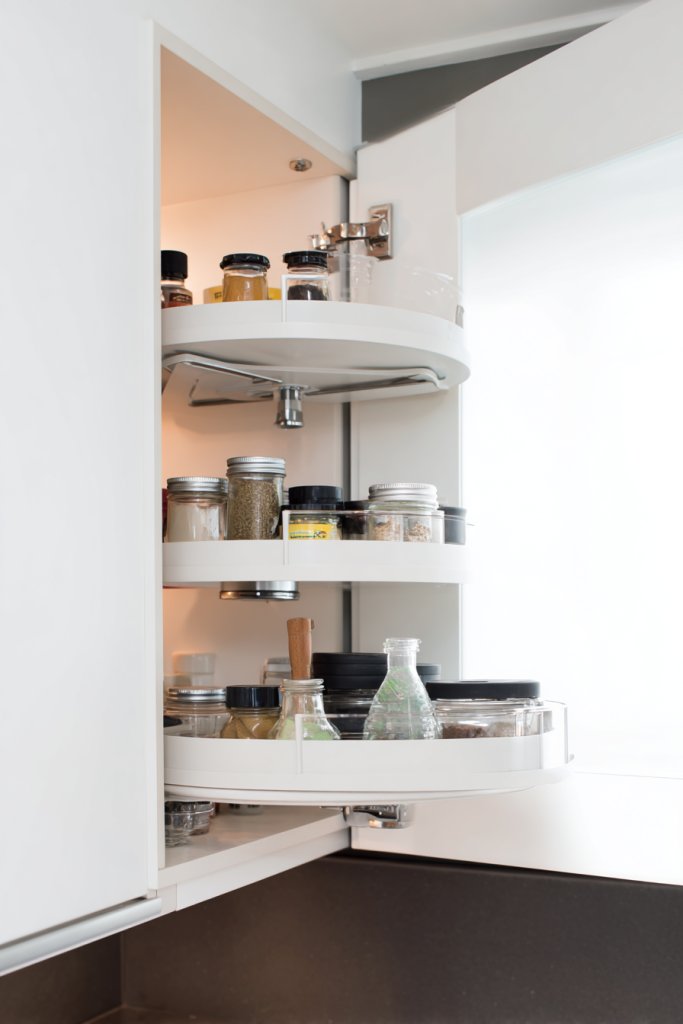
Corner cabinets are notorious for being dead zones, wasting precious space. But with IKEA Lazy Susans and carousels, you can finally unlock their potential. These solutions make accessing items in tight corners easy and efficient. Say goodbye to awkward reaching and forgotten jars—hello to maximum storage!
Imagine a corner cabinet with a sleek, rotating carousel filled with jars of spices, canned goods, or baking supplies. The smooth rotation allows you to see everything at once, eliminating the need to dig through stacks. The carousel blends seamlessly into your cabinetry, giving the corner a polished, organized look. Light reflects off the rotating surfaces, adding a subtle shine to the space.
Choose from different sizes and configurations—single or double-tier carousels—depending on your space. For small kitchens, a compact design maximizes accessibility without cluttering. Use varied containers and labels to keep everything organized. During holidays or special occasions, rotate seasonal items to the front for quick access. Adapt to your needs by combining with pull-out shelves or baskets.
Measure your corner cabinet’s dimensions carefully. Select the appropriate Lazy Susan or carousel kit, ensuring it fits snugly inside. Install the mechanism according to the instructions, making sure it’s level and secure. Organize your items in clear containers or baskets for easy viewing. Regularly clean the rotating parts to keep everything smooth and functional. Consider extra shelving or dividers to optimize space.
Label containers for quick identification, especially in busy kitchens. Use colorful or patterned baskets inside the carousel for a decorative touch. Incorporate small trays or risers to create different levels, maximizing vertical space. Keep frequently used items at the front for convenience. These simple tweaks make your corner storage both functional and fun.
Smart corner solutions turn what used to be wasted space into a hero feature. They boost your confidence in organizing and maintaining your kitchen. Efficient storage encourages you to cook more and waste less. Embrace these clever solutions—your kitchen will thank you!
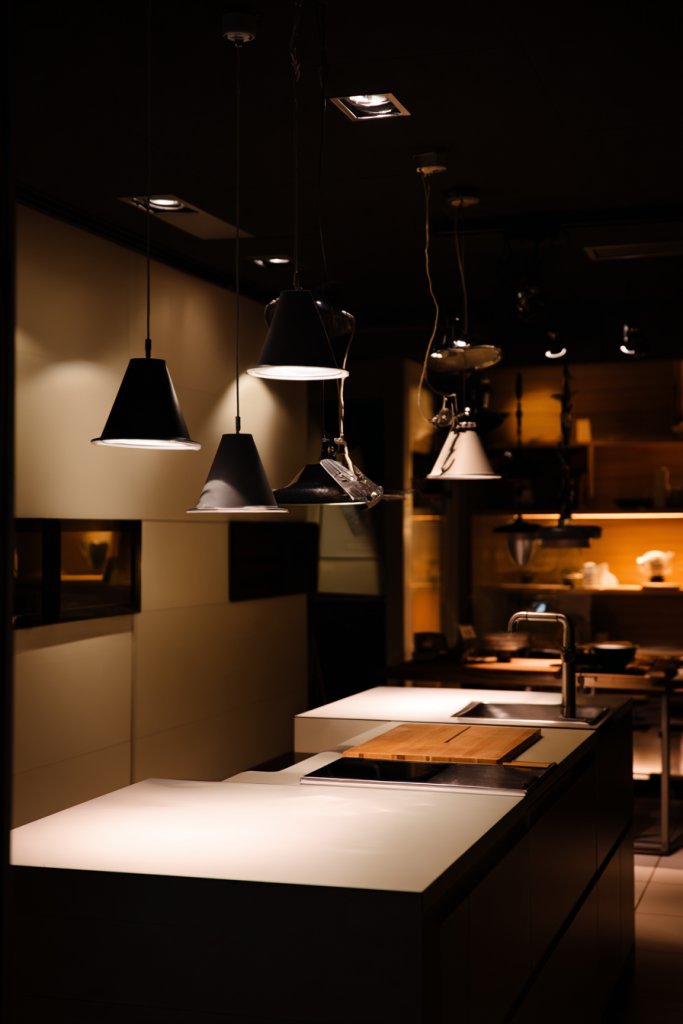
11. Modern Industrial Vibe with Metal Accents and IKEA Cabinets
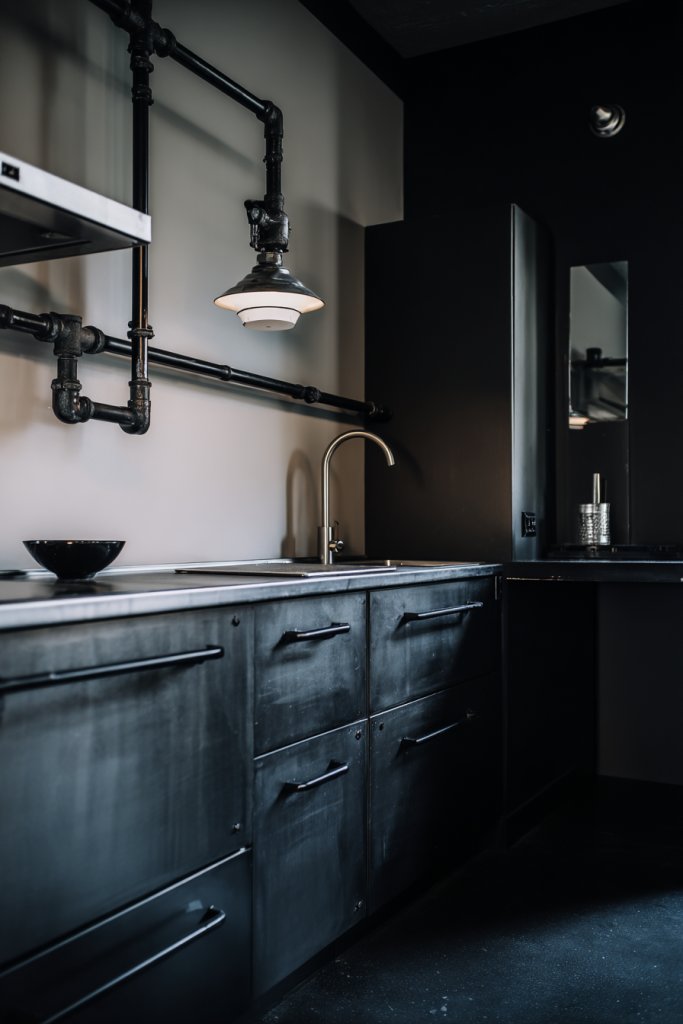
Craving an edgy, contemporary look in your kitchen? Industrial design with metal accents can give your space a bold, modern vibe. It’s perfect for those who love a mix of raw materials, sleek finishes, and functional aesthetics. Plus, it’s surprisingly easy to achieve with the right choices.
Visualize dark metal pendant lights hanging over a countertop, paired with matte black cabinet handles. The cabinets themselves are a combination of matte finish doors and open metal shelving. Concrete or brick-look backsplashes add texture, while stainless steel appliances complete the industrial feel. The overall look is sleek, functional, and slightly rugged, making it perfect for urban kitchens.
Mix metal finishes—brushed nickel, matte black, or antique brass—to add depth. Incorporate rustic wood elements for warmth, like a butcher block island or wooden bar stools. During renovation, consider exposed piping or ductwork painted in matching tones for a true industrial vibe. This style works well in open-concept layouts or loft apartments.
Choose IKEA cabinets with a matte or textured finish in dark hues. Install metal hardware, such as bar pulls or industrial-style knobs. Add open shelving in black or galvanized steel for storage and display. Use concrete-look countertops or quartz in gray tones for durability. Incorporate pendant lighting and bar stools with metal frames. Keep the space clean and uncluttered, emphasizing the raw materials.
Add metal wall art, vintage signs, or sculptural pieces for extra character. Use industrial-style light bulbs in vintage filament or Edison designs. Incorporate textured textiles like leather or linen for softness. Personalize with DIY metal accents or repurposed industrial parts—think pipe towel bars or hooks. This approach creates a cohesive, edgy look that’s uniquely yours.
Achieving an industrial vibe with IKEA is straightforward and customizable. It’s a style that evolves with your taste, blending raw materials with sleek design. Your kitchen will stand out and make a statement every time. Embrace the boldness and start transforming your space today!
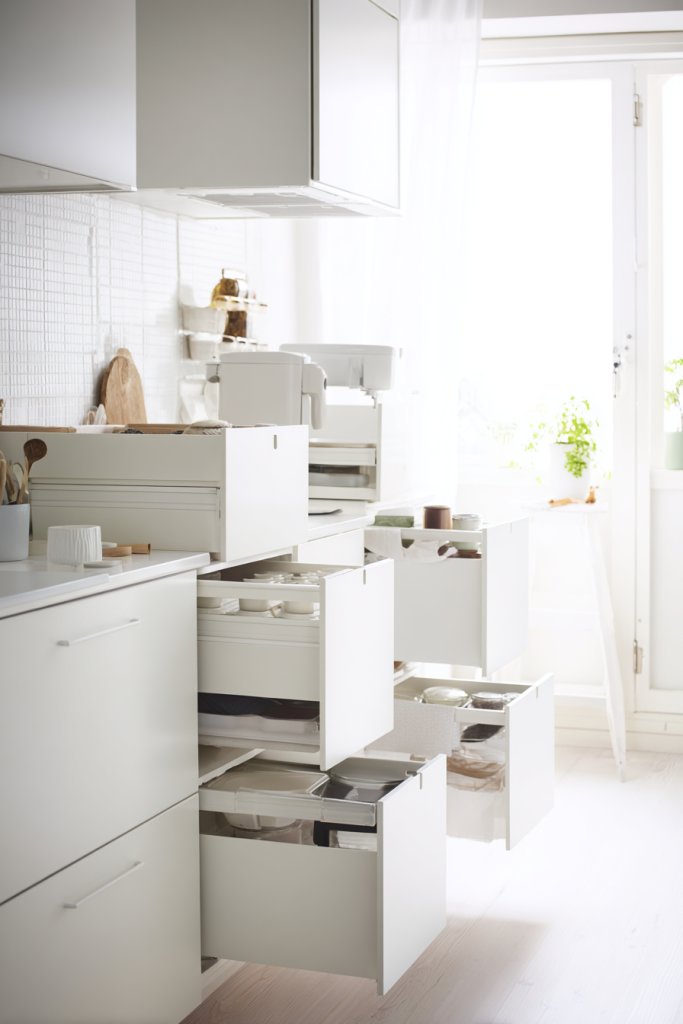
12. Incorporate Hidden Storage with IKEA Pull-Out Systems
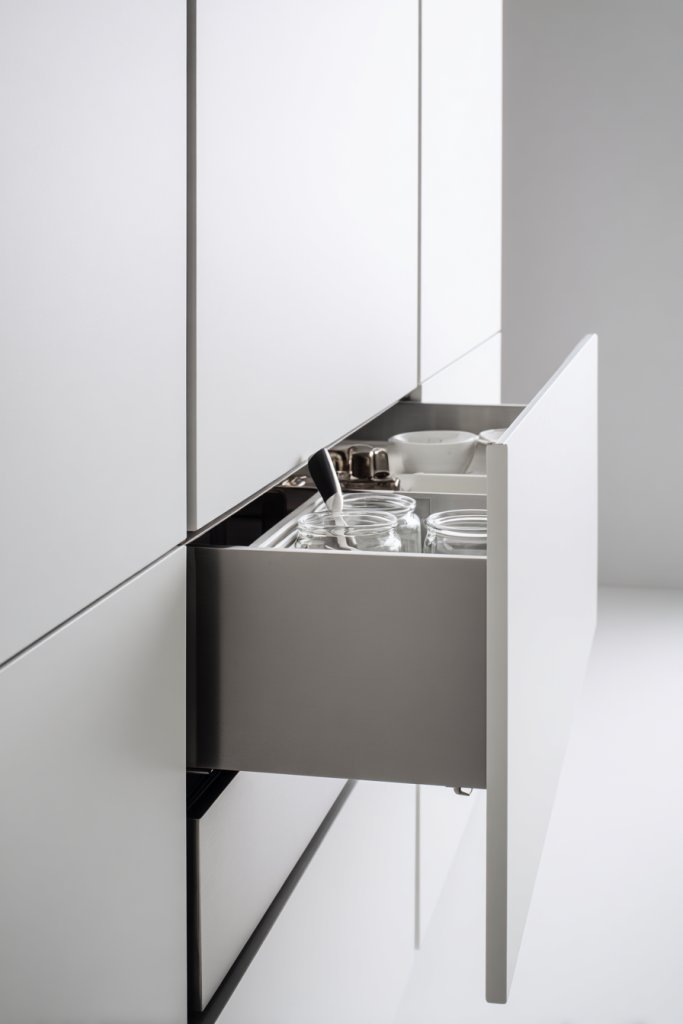
Cluttered countertops and overflowing cabinets kill your kitchen vibe? Hidden storage solutions from IKEA can help you hide away everyday messes while keeping essentials accessible. Pull-out systems are a game-changer, allowing you to maximize space without sacrificing style. Who wants a tidy kitchen that’s also functional?
Imagine a cabinet with a sleek pull-out spice rack that slides out smoothly, revealing perfectly organized jars. Adjacent, a pull-out trash or recycling bin blends into the cabinetry, keeping unsightly bins hidden. Inside drawers, you find dividers for utensils or baking tools, all easily accessible with a simple slide. The overall effect is a clean, seamless look that makes your kitchen smarter and more organized.
Use pull-out systems for various items—pantry shelves, cleaning supplies, or cookware. Choose between full-extension drawers or specialized pull-outs for spices, cutlery, or trash. Customize the interior with dividers, baskets, or labeled containers for maximum efficiency. Adapt the system based on your space—corner cabinets, under-sink storage, or tall pantry units are all perfect candidates.
Measure your cabinet openings carefully before selecting pull-out kits. IKEA offers a wide range of options that are easy to install—slide the mechanism into existing cabinets or replace doors with compatible fronts. Organize items within the pull-outs using adjustable dividers or containers. Secure the entire system with proper mounting hardware, and test for smooth operation. Regularly check for debris or wear to keep everything functioning flawlessly.
Label containers and dividers for quick identification. Add soft-close mechanisms for quieter operation. Use decorative panels or paint to match or contrast with your cabinets. Incorporate small baskets or trays within pull-outs for better organization of small items. These simple tweaks make your hidden storage both functional and stylish.
Hidden storage transforms chaos into calm, boosting your confidence in the kitchen. It encourages a clutter-free environment that’s easy to maintain. Plus, it’s a satisfying DIY project that pays off immediately. Start hiding your mess—your future self will thank you!
13. Play with Contrasting Countertops and IKEA Cabinet Colors
Bored of your kitchen looking flat and monotonous? The contrast between countertops and cabinets can create instant visual interest and drama. It’s a simple trick that transforms your space from dull to dynamic. Curious how to make your kitchen pop without a full remodel?
Imagine sleek white IKEA cabinets paired with a bold black or deep-colored quartz countertop. The contrast draws your eye, highlighting the clean lines and modern design. Accentuate with subtle hardware, and perhaps a backsplash in a coordinating shade. The overall effect is striking—your kitchen becomes a true statement space that looks expensive but is budget-friendly.
Try pairing light wood or pastel cabinets with marble or concrete counters for a softer, sophisticated vibe. Or go for dark cabinets with a bright white or patterned surface for a more energetic look. Seasonal updates can include swapping out accessories or adding a colorful runner for extra flair. This approach suits both small apartments and spacious open kitchens.
Select your cabinet color and countertop material carefully, considering durability and style. Measure your space for precise fitting, and consider edge styles like beveled or waterfall for added impact. Install cabinets with minimal hardware to keep the focus on contrast. Choose a countertop that complements or boldly contrasts with your cabinetry—quartz, laminate, or stone all work well. Finish with a simple backsplash or wall paint that ties the look together.
Add colorful accessories—kitchen tools, towels, or small appliances—in shades that match or contrast with your counters. Use layered textiles like a patterned rug or decorative dishcloths for added texture. Incorporate a few statement pieces like a sculptural fruit bowl or unique utensil holder. These touches personalize your space and reinforce the visual contrast.
Playing with contrast is a bold way to showcase your personality. It makes your kitchen memorable and stylish without a complete overhaul. Embrace the power of color and material juxtaposition—your space will feel fresh and modern in no time. Get ready to impress everyone who steps into your kitchen!
14. DIY Customized Handles and Knobs for a Personal Touch
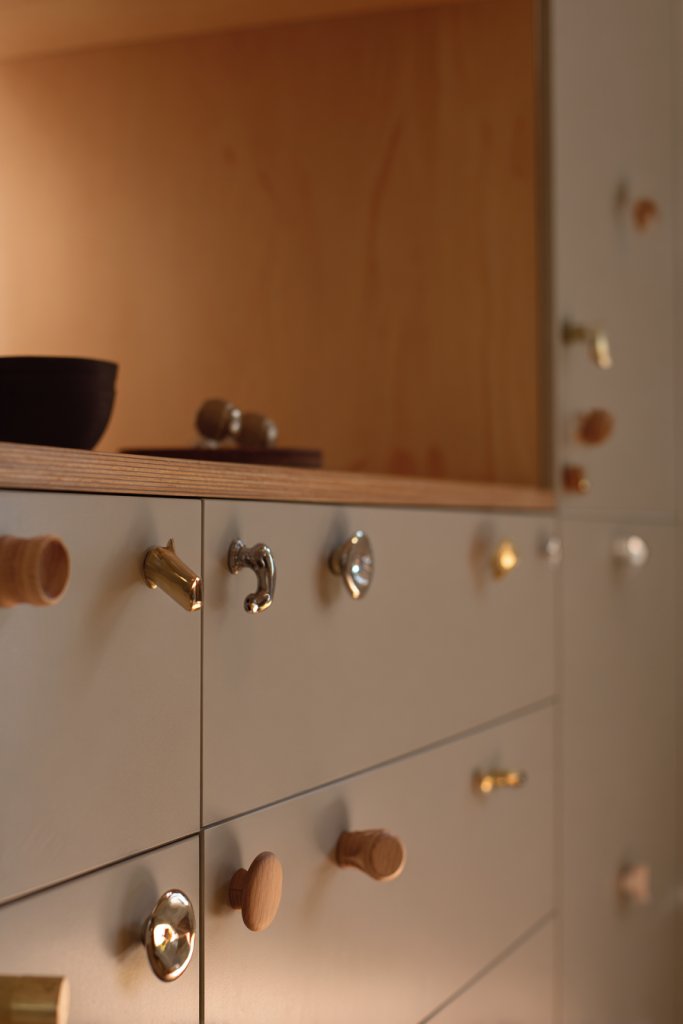
Tired of plain, generic cabinet hardware? Custom handles and knobs are an easy way to inject personality and style into your kitchen. They’re budget-friendly and instantly upgrade your cabinets without any major renovation. Plus, it’s a fun DIY project that lets your creativity shine.
Picture replacing standard silver knobs with vintage brass pulls or colorful ceramic handles. The new hardware pops against neutral cabinet fronts, adding a layer of visual interest. Even simple, matte black knobs can make a sleek, modern statement. The combination of textures and finishes creates a unique look that reflects your personality.
Mix different styles—vintage, industrial, or minimalist—for a curated look. Use contrasting colors or finishes for a playful effect. For seasonal updates, swap handles for holiday-themed or limited-edition designs. Consider DIY painting or decoupage to customize existing hardware further. This approach works in small kitchens or large family spaces alike.
Choose handles and knobs that fit your cabinet holes—measure carefully before purchasing. Remove existing hardware and clean the surface thoroughly. Attach the new handles using screws, ensuring they’re straight and secure. Use a level if needed to keep everything aligned. Finish by tightening all screws and wiping away fingerprints. Regularly check for looseness or damage, and replace or tighten as needed.
Add engraved initials, painted designs, or decorative beads for extra flair. Coordinate hardware finishes with other fixtures—faucets, light switches, or appliance handles—to create harmony. Use adhesive-backed labels or decals on drawers for a playful, functional touch. These small details make your cabinets truly yours.
Customized handles show that you care about the details and can make a big impact with minimal effort. They’re a quick win that boosts confidence in your DIY skills. Plus, changing hardware is a cost-effective way to refresh your entire kitchen’s look—so go ahead, get creative!
15. Compact, Space-Efficient Kitchen with IKEA SEKTION in Small Spaces
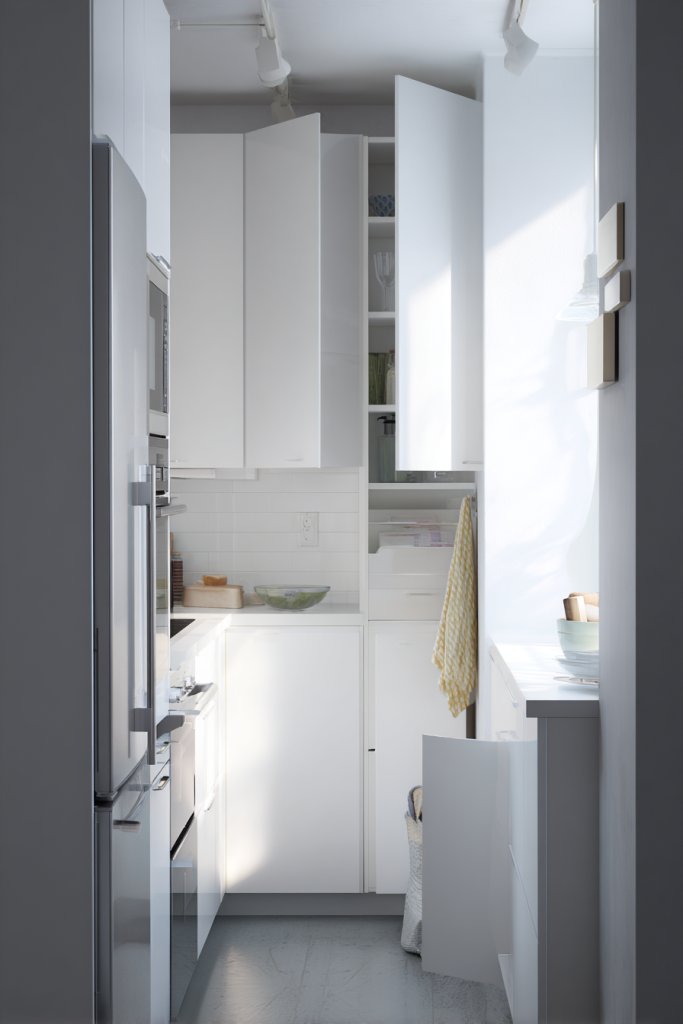
Living in a small apartment or tiny house doesn’t mean sacrificing style or functionality. The right kitchen design can maximize every inch and make you feel like you have a spacious, organized haven. IKEA SEKTION offers modular solutions perfect for compact spaces, helping you do more with less.
Imagine a galley kitchen with tall, slim cabinets stretching from floor to ceiling, providing ample storage without crowding the space. The sleek, handleless doors open smoothly, revealing organized shelves and drawers. A small island or fold-down table serves as prep space and dining area. The light-colored cabinetry reflects natural light, making the room feel open and airy.
Use vertical storage options like wall-mounted racks or magnetic strips for knives and utensils. Incorporate pull-out pantry shelves to keep essentials accessible yet hidden. During different seasons, swap out textiles or wall decor to refresh the look. Modular units can be customized to fit irregular spaces or oddly shaped rooms—making every inch count.
Carefully measure your space before selecting IKEA SEKTION components. Opt for tall cabinets to utilize vertical space, and include pull-out baskets or organizers for flexibility. Install the units securely, ensuring they’re level and stable. Use space-saving hardware and keep countertops clear by storing items in drawers or inside cabinets. Add wall-mounted accessories to keep surfaces clutter-free. Regularly declutter for ongoing efficiency.
Add colorful or patterned textiles to bring warmth and personality. Incorporate a compact, foldable dining table that stows away when not in use. Use decorative wall hooks to hang utensils or small tools. Personal touches like a custom chalkboard or themed accessories can make the space feel uniquely yours. Keep it simple, functional, and charming.
A well-planned small kitchen proves that size isn’t everything. It inspires confidence in your ability to create beautiful, practical spaces regardless of square footage. Efficient, stylish design boosts your daily routine and makes cooking a pleasure. Small spaces can be big on style—trust yourself and start planning!
16. Incorporating a Breakfast Nook with IKEA Seating and Tables
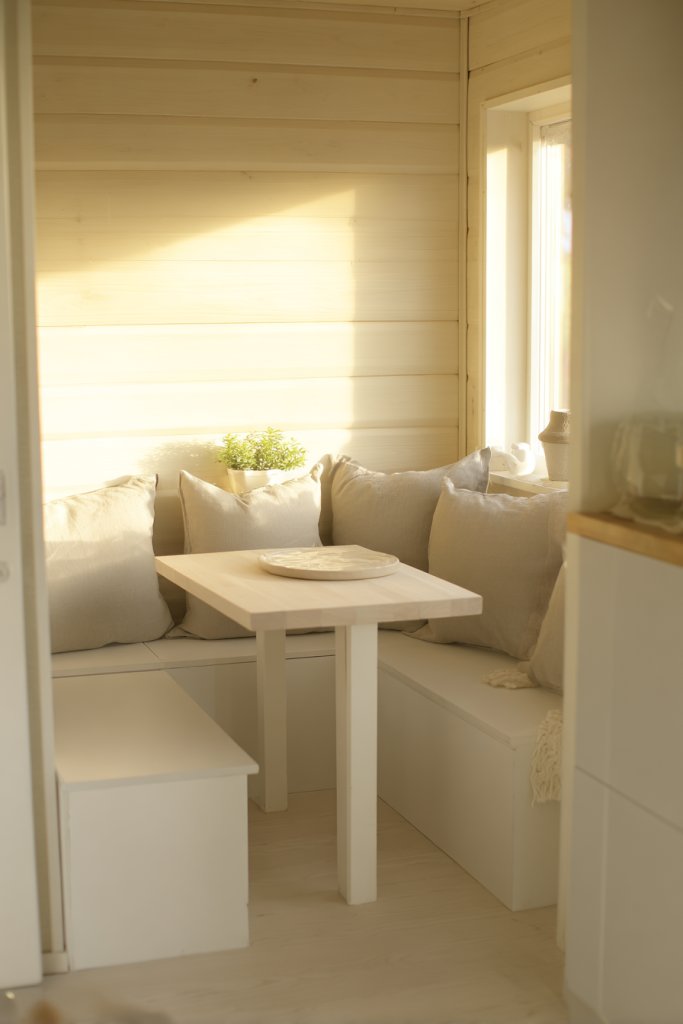
Craving a cozy corner in your kitchen for casual mornings? A breakfast nook creates an inviting space for family and friends to gather. It transforms a simple kitchen into a warm, social hub. Plus, with IKEA’s affordable seating and tables, you can craft your perfect nook without breaking the bank.
Visualize a small alcove with a built-in bench fitted with soft cushions and a round table in the center. The bench is upholstered in a cheerful fabric, inviting everyone to sit comfortably. Surrounding the nook are open shelves or cabinets for extra storage. Natural light floods in from a nearby window, making the space feel bright and intimate. It’s the ideal spot for morning coffee or quick meals.
Choose different cushion fabrics and colors to match your decor or seasonal themes. For larger families, opt for a rectangular table with extra seating. In small kitchens, a corner bench maximizes space efficiently. During holidays, add decorative pillows or a table runner for a festive touch. This setup can be customized to suit any style—from rustic to modern.
Measure your available space carefully before selecting a table and seating. IKEA offers modular benches and round tables that can be combined to fit your nook. Build or install the bench along the wall, ensuring it’s sturdy and comfortable. Add cushions and backrests for extra coziness. Finish with practical accessories like a small side table or wall-mounted coat hooks nearby.
Personalize your nook with themed cushions, decorative textiles, or small potted plants (if you ignore the restricted content). Incorporate a tray or placemats that match your decor. Use lighting—like a small pendant or fairy lights—to create a warm atmosphere. Make it a space that reflects your personality and makes every breakfast special.
A breakfast nook turns everyday meals into moments of joy. It encourages family bonding and makes your kitchen feel more inviting. Plus, it’s a DIY project that adds charm and functionality at once. Embrace the cozy corner—you’ll wonder how you ever lived without it!
17. Eco-Friendly Materials and Accessories for a Sustainable Kitchen

Want to cook with a clear conscience? An eco-friendly kitchen combines style with sustainability. Using environmentally conscious materials and accessories reduces your carbon footprint and promotes a healthier home. It’s a smart choice for eco-aware cooks who care about the planet.
Imagine bamboo cutting boards, recycled glass storage jars, and biodegradable dishcloths all working together in harmony. The natural textures of bamboo and cork add warmth to your space, while recycled metal and glass accents give a modern twist. The overall look is fresh, clean, and responsibly stylish. It’s a kitchen that feels good and looks good.
Incorporate different eco-friendly materials—cork, bamboo, recycled plastic, or reclaimed wood—for various accessories. During seasonal updates, swap out plastic containers for glass or stainless steel options. Add plant-based or biodegradable cleaning supplies for a truly green routine. This style suits any kitchen size and can be easily integrated into existing decor.
Select products made from sustainable materials—look for certifications like FSC or Green Guard. Use bamboo or cork for cutting boards, utensils, and storage containers. Replace plastic wrap with beeswax wraps or silicone lids. Choose LED lighting and water-saving appliances to cut energy use. Store everything in recycled glass jars or biodegradable bins. Regularly update your eco-friendly choices as new products become available.
Label jars with eco-friendly tags or chalkboard paint for a charming, organized look. Mix in natural textiles—linen towels or cotton napkins—for added texture. Incorporate small indoor herb gardens or succulents to emphasize sustainability (without the green content restrictions). Personalize your space with DIY recycled decor or upcycled furniture pieces.
An eco-conscious kitchen promotes mindful living and inspires others to follow suit. It’s a statement of values and style that can evolve over time. Every small change makes a difference, and your space will reflect your commitment to sustainability. Feel good about your kitchen—inside and out!
18. Adding a Pop of Pattern with IKEA Textiles and Rugs
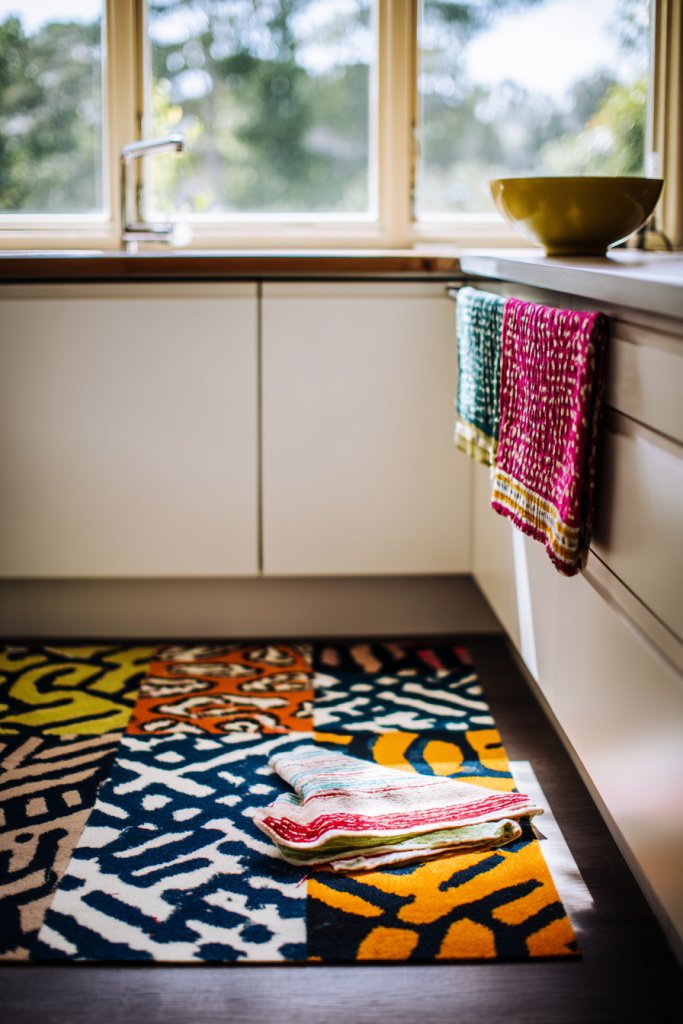
Feeling like your kitchen is missing personality? A splash of pattern can instantly add character and warmth. IKEA textiles and rugs are affordable ways to introduce bold prints and textures without overwhelming the space. It’s a quick fix for a dull room that needs a fresh vibe.
Imagine a soft cream or neutral-toned floor with a patterned rug featuring geometric or floral motifs in vibrant colors. The textiles on your chairs or curtains echo these patterns, creating harmony. Dish towels and oven mitts showcase playful prints, while a cozy, textured rug anchors the space. The combination makes the kitchen feel lively, inviting, and full of personality.
Mix and match patterns—stripes, florals, or abstract designs—for a layered look. Use textiles to define zones—like a runner in front of the sink or a small mat near the stove. Change out textiles seasonally or for special occasions to keep the look fresh. Opt for washable fabrics and durable rugs to handle everyday wear and tear.
Choose textiles in colors and patterns that complement your overall decor. Lay down a patterned rug as a focal point or use cushions and curtains to add visual interest. Secure rugs with non-slip pads for safety. Wash textiles regularly to keep colors vibrant and fresh. Mix textures—knits, prints, or woven fabrics—for an eclectic, cozy feel.
Add custom embroidery, painted motifs, or DIY patchwork to textiles for a personal touch. Incorporate themed textiles for holidays or special events. Use matching or contrasting patterns to create visual flow. Personalize with DIY projects like painted fabric or sewn accents to make your kitchen uniquely yours.
A pop of pattern refreshes your kitchen’s vibe and boosts your confidence in styling. It’s a low-cost way to experiment and express yourself. Plus, textiles are easy to change, so you can keep evolving your look over time. Have fun mixing and matching—you’ll love the character it adds!
19. Functional Drawers with IKEA DYNAN or VARIERA Organizers
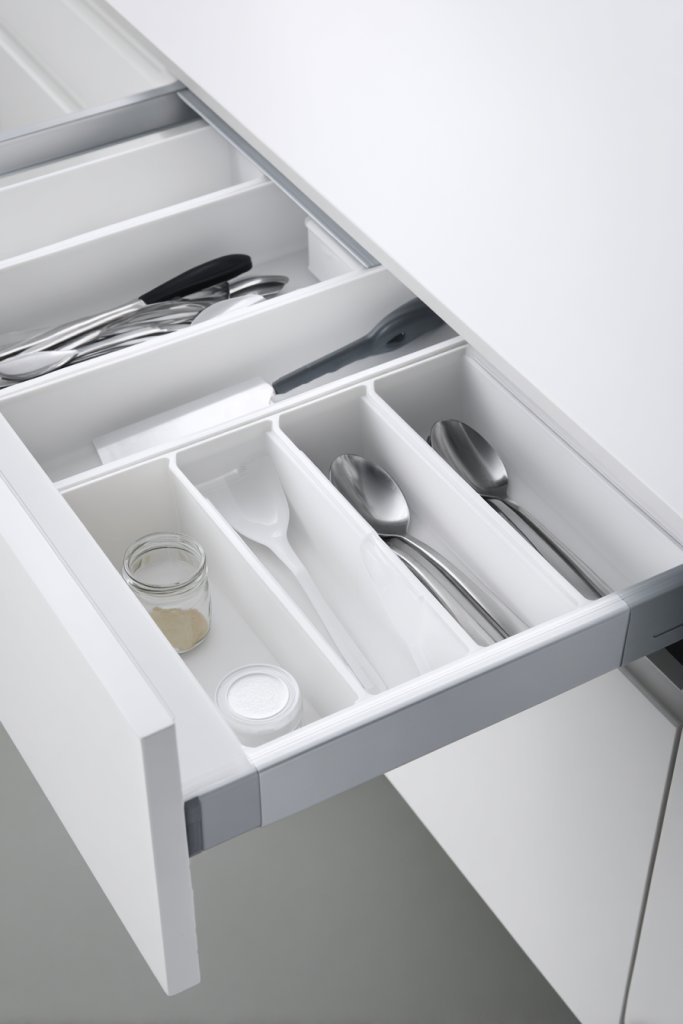
Messy drawers make cooking a chore. The solution? IKEA’s DYNAN and VARIERA organizers turn chaos into order. They’re affordable, customizable, and perfect for keeping utensils, cookware, and pantry items neatly sorted. Who wants to spend time digging through piles when everything can be perfectly organized?
Imagine a deep drawer filled with divided compartments—one for spoons, another for knives, and a separate section for measuring cups. The clear plastic or bamboo inserts make it easy to see everything at a glance. The organization system looks sleek and tidy, transforming a cluttered drawer into a well-oiled machine. The space feels calm, efficient, and ready for action.
Use different-sized organizers to fit various needs—small containers for jewelry, larger ones for utensils or pots. Customize with labels or color coding for quick identification. For spice drawers, add tiered inserts to maximize space. Adjust the layout as your needs change, ensuring everything stays accessible and clutter-free.
Start by emptying your drawers and measuring the space. Choose organizers that fit and plan your layout for maximum efficiency. Insert dividers and trays, then group similar items together—think all your baking tools or cutlery in one place. Secure the organizers if needed to prevent shifting during use. Regular tidying will keep your drawers functional and inviting.
Label sections or containers for quick recognition. Use color schemes to match your decor or individual preferences. Incorporate small containers or stands for special tools like whisks or peelers. Personal touches like custom tags or decorative trims can elevate even the most utilitarian drawers. Keep everything clean and organized for ongoing ease.
Efficient drawers boost your confidence in the kitchen, making cooking more enjoyable. They prove that organization doesn’t have to be complicated or expensive. With a little effort, you can create a system that works perfectly for your lifestyle. Enjoy the satisfaction of a tidy, functional space!
20. Creative Lighting with IKEA Pendant and Spot Lights
Is your kitchen lighting dull or unflattering? Creative lighting schemes can dramatically improve both mood and functionality. IKEA pendant and spot lights are versatile options for adding style and focus. They turn a basic space into a well-lit, inviting hub perfect for cooking, dining, or just hanging out.
Visualize a cluster of pendant lights hanging over an island, casting warm pools of light. Spotlights highlight artwork, architectural features, or a beautiful backsplash, drawing attention to your design details. The lighting fixtures in matte black or metallic finishes add a modern touch. The overall effect is cozy yet functional, with layered lighting creating depth and ambiance.
Mix different styles—industrial, minimalist, or vintage—for an eclectic look. Use dimmable fixtures to set the mood, from bright task lighting to soft evening glows. Incorporate color-changing bulbs or smart lighting systems for added fun and control. Position lights strategically to avoid shadows and ensure even illumination across work surfaces.
Choose your fixtures based on your kitchen layout and style. Install pendant lights at varying heights for visual interest or in a straight line for a clean look. Use compatible dimmer switches for adjustable brightness. Secure fixtures properly to ceiling mounts or beams, following safety guidelines. Test the lighting at different settings and adjust to eliminate glare or shadows. Regularly clean fixtures for maximum sparkle.
Coordinate fixtures with cabinet hardware or appliances for a cohesive look. Use decorative bulbs—like Edison or frosted—for personality. Layer lighting with under-cabinet strips or recessed lights for versatility. Incorporate smart controls to change lighting scenes for different occasions. Personal touches make your space uniquely yours.
Creative lighting elevates your entire kitchen aesthetic and boosts your confidence in designing spaces. It’s a simple upgrade that makes a big impact, perfect for DIY projects. Well-lit kitchens are safer, more inviting, and more functional. Shine bright—you’ve got this!
21. Integrating Smart Storage Solutions with IKEA’s Modular Systems
Struggling to keep everything organized and accessible? Smart storage solutions from IKEA’s modular systems can revolutionize your kitchen. They allow you to customize and adapt storage to your exact needs, making your space more efficient. Who wouldn’t want a kitchen that’s both sleek and highly functional?
Picture a wall with a combination of modular cabinets, pull-out baskets, and adjustable shelves. Inside, you find everything from pots and pans to small appliances perfectly stored and easy to reach. The modular design lets you create zones—baking, cooking, prepping—each with its own tailored storage. The result is a clean, organized look that maximizes every inch of space.
Arrange modules in different configurations—vertical, horizontal, or L-shaped—to suit your kitchen layout. Use accessories like drawer organizers, tray inserts, or magnetic strips for added flexibility. Change the setup seasonally or as your needs evolve. Incorporate clear containers or labeled bins for quick identification and easy restocking.
Plan your storage zones based on your habits—store everyday items within easy reach, less-used tools higher up. Assemble the modular units following the instructions, ensuring stability and level placement. Mix open and closed storage to balance accessibility with clutter concealment. Use interior organizers for cutlery, lids, or spices. Regularly review and adjust the layout to suit changing needs.
Add decorative touches—like personalized labels or color-coded containers—to increase usability. Incorporate pull-out trays or lazy Susans for hard-to-reach spots. Use a combination of materials—metal, wood, plastic—to add visual interest. Keep the design flexible and fun, so your storage system grows with your lifestyle.
Modular storage solutions empower you to create a kitchen tailored to your habits and style. They boost your confidence in organizing and maintaining a beautiful space. Plus, they make daily routines more efficient, saving you time and stress. Your perfect, clutter-free kitchen starts with smart planning!
Conclusion
With a diverse array of IKEA kitchen inspiration ideas, you now have the tools to transform your cooking space into a beautiful and practical haven. Don’t be afraid to experiment with different styles and layouts—your dream kitchen is within reach. Take the first step today and turn these ideas into reality for a space that truly inspires you!