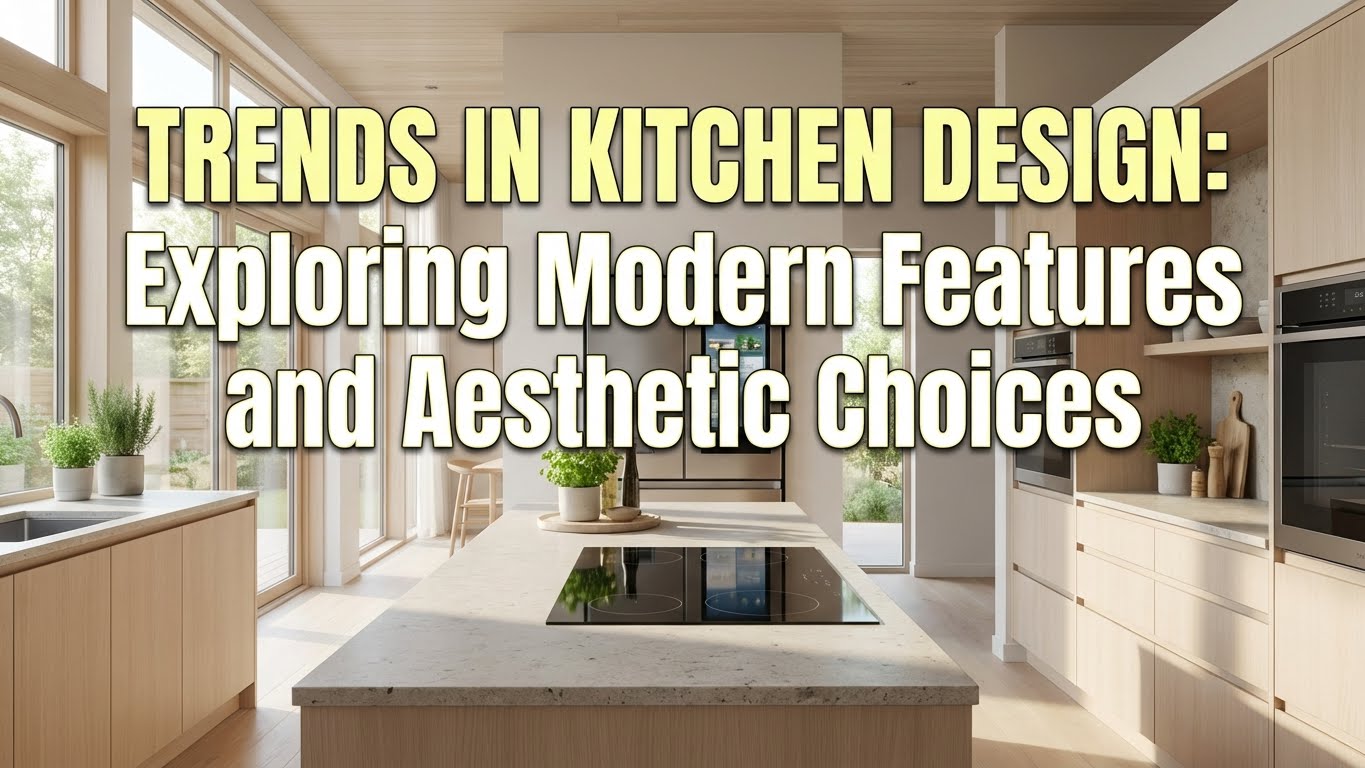
Imagine stepping into a kitchen that seamlessly combines beauty and practicality, a space where every detail sparks joy and inspires culinary creativity. Kitchen interior ideas have gained immense popularity because they not only elevate the aesthetic appeal of one of the most used rooms in your home but also enhance functionality, making daily tasks easier and more enjoyable.
In this article, you’ll uncover a diverse array of ideas that cater to various styles, from cozy and rustic to sleek and modern. Whether you’re looking to refresh your current layout or completely redesign your space, these ideas will inspire you to craft a kitchen that’s as beautiful as it is functional, turning your cooking area into the heart of your home.
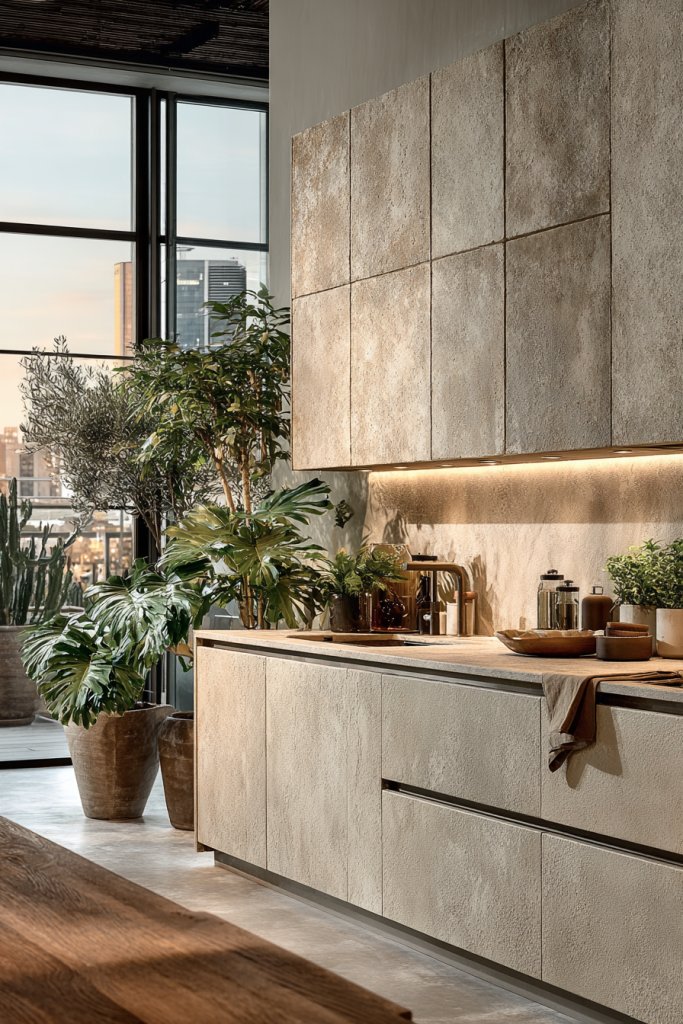
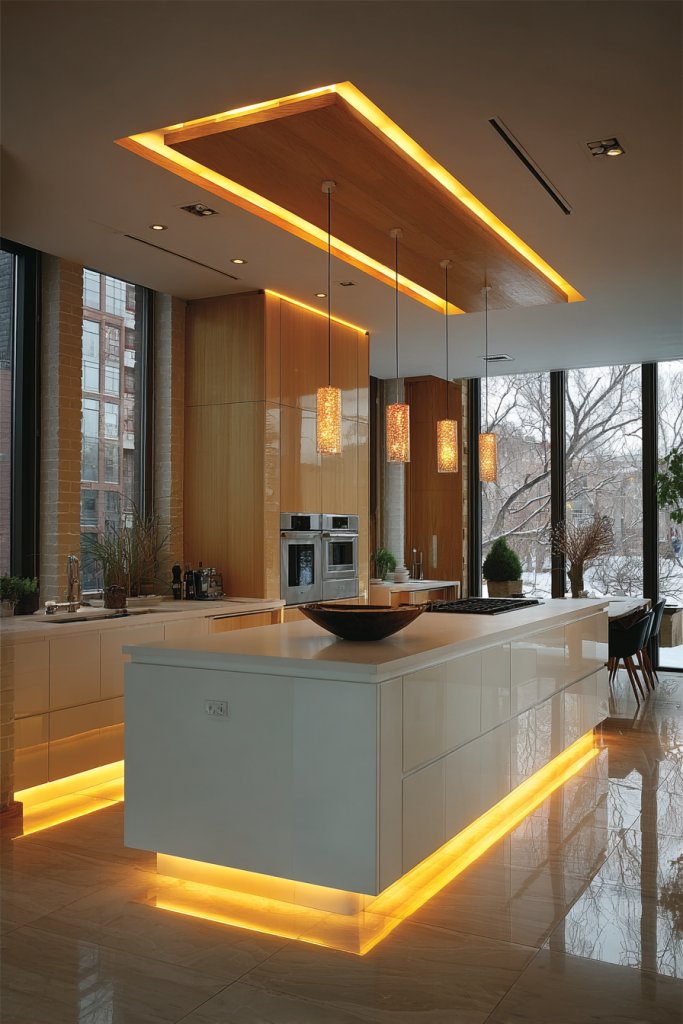
1. Under-Cabinet LED Lighting for Ambiance and Visibility
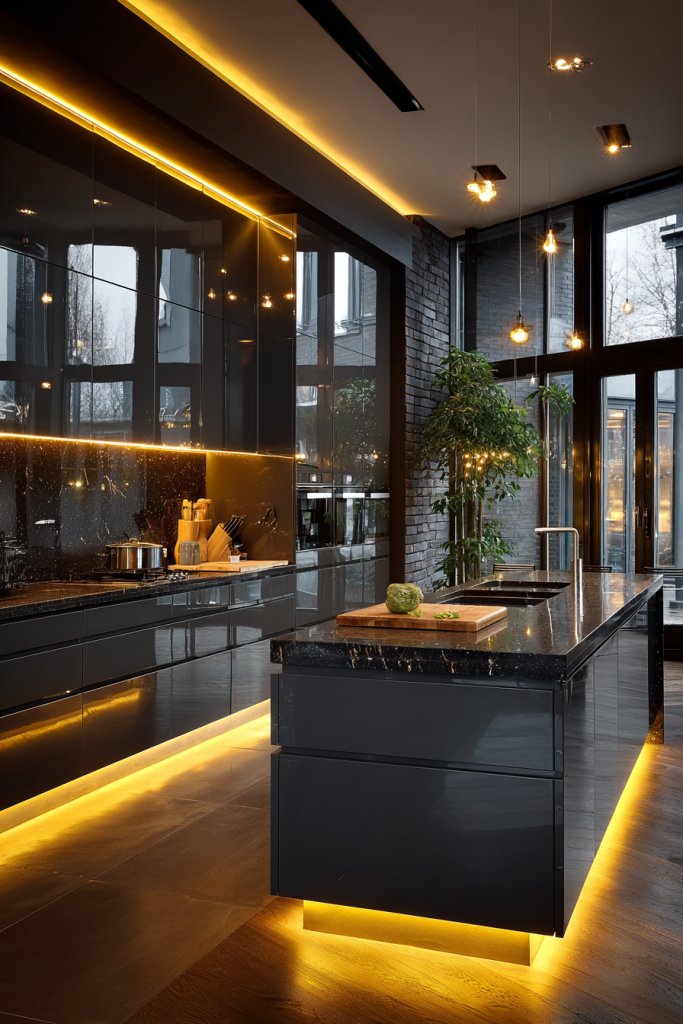
Ever struggled to see what you’re chopping or reading recipes at night? Under-cabinet LED lighting solves that problem, transforming your workspace into a well-lit haven. But it’s not just about function—proper lighting adds warmth and ambiance that can make your kitchen feel cozy or sleek. The challenge is finding a solution that’s both effective and unobtrusive, so your space remains clutter-free.
Picture a row of slim LED strips tucked neatly beneath your upper cabinets, casting a soft glow over your countertops. The light is bright enough to prep food but warm enough to create a welcoming atmosphere. Shadows dance gently on the backsplash, highlighting the clean lines of your cabinetry. During evenings, this subtle illumination makes the space inviting, turning your kitchen into the perfect backdrop for dinner or casual hangouts. It’s like having a private lighting designer without the cost.
Choose between warm white, cool white, or color-changing LEDs depending on your mood or season. For a modern look, opt for sleek, recessed strips that blend seamlessly into the cabinetry. For a more traditional vibe, flexible tape lights can be hidden behind decorative molding. Dimmable options allow you to adjust brightness for different tasks or moods—quiet mornings or lively dinner parties. If you rent, stick-on battery-powered LEDs are a non-permanent alternative.
Start by measuring your cabinet length and selecting LED strips with appropriate wattage and color temperature. Use a quality transformer and ensure your electrical wiring can support the setup safely—consider consulting an electrician for tricky installs. Clean the underside of cabinets thoroughly before attaching adhesive-backed LEDs. Run the wiring discreetly along the cabinet edges or inside molding for a clean look. Test the lights before final installation, and install dimmers if you want extra control.
Use different color temperatures to match your decor style—warm for cozy, cool for modern. Pair with under-shelf glass or acrylic panels to diffuse light further, creating a soft glow. You can also incorporate smart controls, enabling voice commands or app-based adjustments. For a personal touch, sync the lighting with music or set timers for automatic dimming. It’s all about making your lighting as functional as it is stylish.
Under-cabinet LED lighting is a simple upgrade with a big impact—making your kitchen brighter and more inviting. It’s a small investment that improves both safety and ambiance. Once installed, you’ll wonder how you ever cooked without it. Ready to add a touch of modern elegance and practicality? Your kitchen’s new spotlight awaits!
2. Multi-Functional Kitchen Island with Built-In Storage
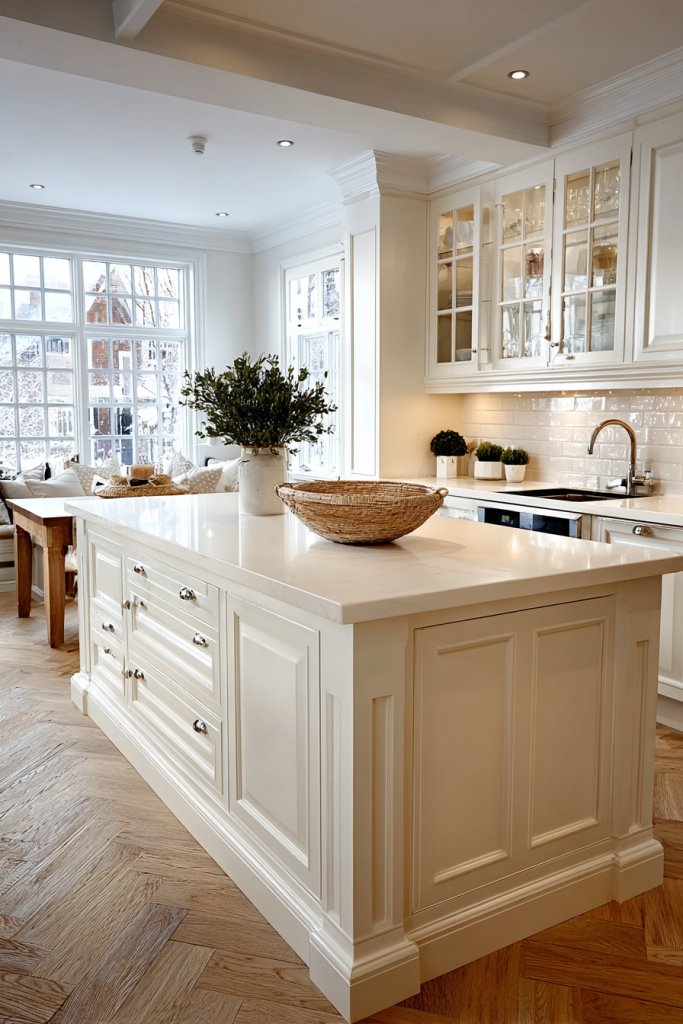
Feeling cramped in your kitchen but craving a dedicated workspace or dining spot? A multi-functional island offers a solution, doubling as prep area, dining table, and storage hub. But designing one that’s practical and stylish can seem daunting—how do you maximize space without clutter? The goal is creating a central feature that’s both versatile and visually appealing.
Imagine a large, sturdy island with a smooth marble top, surrounded by sleek barstools. Below, drawers and cabinets hide away cookware, utensils, and even a few cookbooks. The island’s surface hosts a cutting board, a bowl of fresh fruit, and a decorative vase—no clutter in sight. Underneath, open shelves display neatly stacked plates or decorative baskets. This centerpiece anchors the room, offering a sense of order and multi-use functionality.
Choose materials that match your style—warm wood for rustic charm or glossy lacquer for modern elegance. Incorporate adjustable shelves, pull-out drawers, or hidden compartments for maximum storage. For smaller kitchens, a compact design with fold-away features or extendable surfaces works well. You can also add a wine rack or integrated small appliances like a microwave or wine cooler for extra utility. Seasonal decor can be swapped to keep it fresh.
Start by measuring your available space and considering your primary needs—cooking, dining, or storage. Select a sturdy base with enough drawers and cabinets for your essentials. Use high-quality materials like solid wood or composite for durability. Assemble the pieces carefully, ensuring all hinges and slides operate smoothly. Finish with a countertop surface that’s easy to clean and resistant to moisture. Add organizational inserts inside drawers for utensils and gadgets.
Personalize with a custom paint finish, patterned tiles, or decorative hardware that reflects your style. Incorporate a built-in charging station or a small sink if space allows for added convenience. Use decorative storage containers on open shelves or add a foldable extension for extra prep space when needed. Consider adding a fold-away table attachment for larger gatherings.
A multi-functional kitchen island can transform your space into a hub of activity and style. It’s adaptable to your needs, whether you love entertaining or just want a better workflow. When designed thoughtfully, it becomes a statement piece that elevates your entire kitchen. Ready to make your dream kitchen a reality? This versatile addition is just the start!
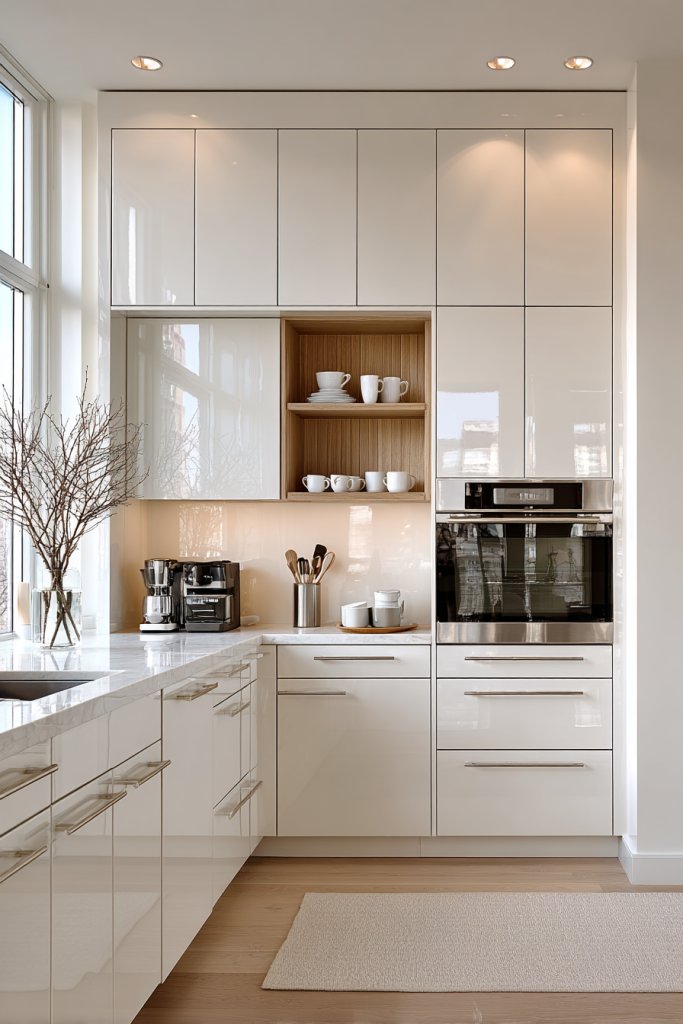
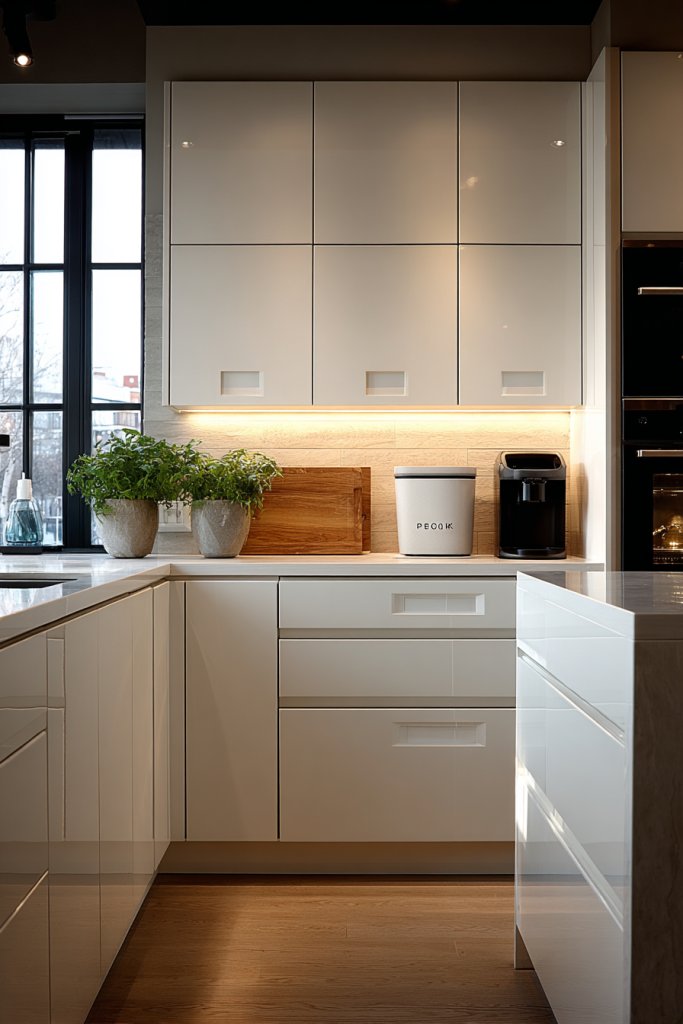
3. Minimalist White Cabinets with Matte Finish
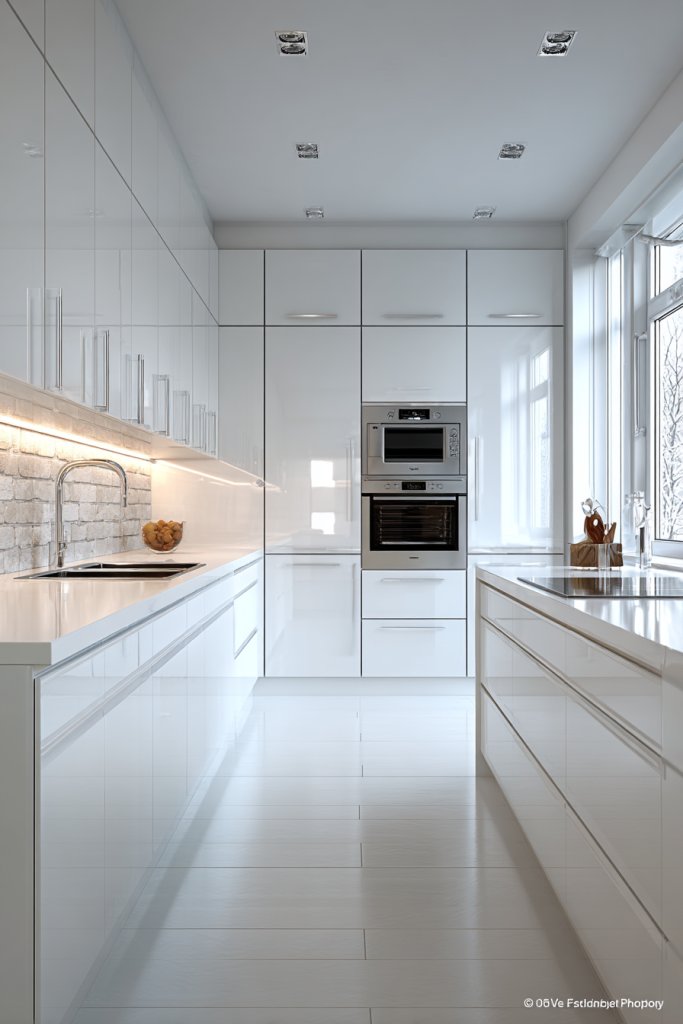
Tired of cluttered, busy-looking kitchens? Minimalist white cabinets with a matte finish offer a sleek, clean look that simplifies your space. But achieving that perfect balance between style and practicality takes some planning—how do you keep it looking fresh and modern? The challenge is creating a timeless design that’s easy to maintain and matches any decor.
Visualize a kitchen with smooth, handleless white cabinets stretching from floor to ceiling. The matte finish absorbs light rather than reflects it, giving a soft, velvety appearance. Subtle shadow lines add depth, while hidden handles keep the surface seamless. The countertops are a contrasting dark stone, emphasizing the crispness of the cabinetry. The overall look is calm, organized, and effortlessly elegant—a blank canvas for personal touches.
Opt for flat-front or shaker-style doors depending on your aesthetic. For a warmer feel, incorporate wood accents or textured finishes on select panels. You can also add under-cabinet lighting or decorative hardware for subtle contrast. In smaller spaces, choose vertical storage solutions and maximize cabinet height for extra storage. Seasonal accents like colorful dishware or textiles can be layered for variety.
Select high-quality MDF or plywood finished with a durable matte coating. Ensure precise measurements to avoid gaps and misalignments. Use soft-close hinges and push-to-open mechanisms for a handleless look. For a seamless appearance, install integrated appliances and hide hardware behind the doors. Regularly clean with gentle, non-abrasive cleaners to preserve the matte finish. Consider professional installation for perfect alignment.
Add warmth with textured or patterned backsplashes, or introduce natural materials like stone or wood countertops. Use open shelving or glass-front cabinets to display curated dishware. Incorporate accessories like minimalist bar carts or decorative trays for functional elegance. Keep clutter hidden inside spacious cabinets for a tidy look that always feels fresh.
White matte cabinets create a calm, sophisticated kitchen that ages gracefully. They serve as a backdrop for any style, from Scandinavian to industrial. Once installed, they offer endless opportunities for customization through accessories and decor. Embrace the simplicity—your kitchen’s sleek, timeless charm is within reach!
4. Vertical Pot Racks for Efficient Space Use
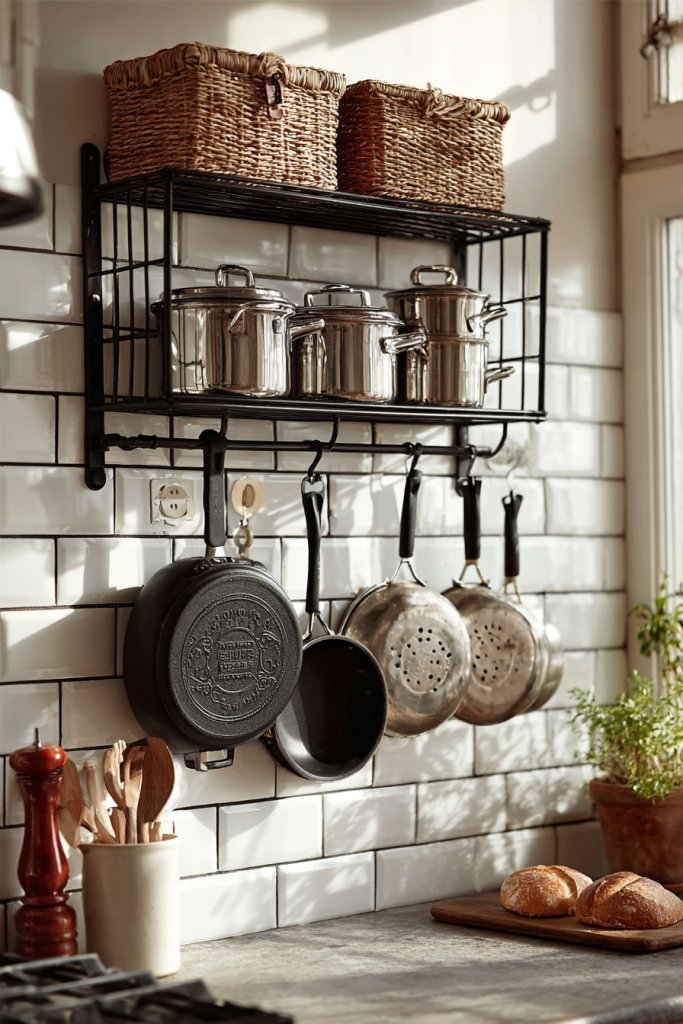
Are your pots and pans cluttering your cabinets or taking up too much drawer space? Vertical pot racks offer a stylish, practical solution to keep essentials within easy reach. But how do you incorporate them without sacrificing style or making your kitchen look busy? The key is using vertical space smartly to maximize efficiency.
Picture a sleek metal rack mounted on an empty section of wall, with shiny pots hanging in a cascading pattern. The pots’ reflective surfaces catch the light, adding a bit of shine to the space. The open display keeps everything accessible, and the organized arrangement creates a sense of order. Decorative hooks or minimalist mounting hardware blend into the background, emphasizing function without clutter. It’s both functional and a cool visual feature.
Choose from wall-mounted racks, ceiling-mounted rails, or freestanding towers depending on your space. For a rustic look, opt for wrought iron or reclaimed wood racks; for a modern vibe, go with sleek stainless steel. Consider adding hooks for utensils or small tools to keep everything in one place. Adjust the height and spacing to accommodate larger or specialty pots. Seasonal swaps can include decorative elements like string lights or decorative chains.
Identify a sturdy wall or ceiling support point and measure the available space. Use appropriate mounting hardware—anchors, screws, or hooks—to secure the rack firmly. Organize your pots by size or frequency of use, hanging the most used ones at eye level. Regularly check the hardware for wear or looseness. For portable options, consider a rolling cart with hanging racks. Keep your pots clean and shiny for maximum visual appeal.
Decorate the rack with colorful silicone grips or decorative chains for a pop of personality. Use matching or contrasting pots to match your kitchen’s color scheme. Incorporate a few hanging utensils or spatulas for added convenience. You can also add a small chalkboard label for inventory or cooking notes. Keep the display uncluttered for maximum impact and efficiency.
Vertical pot racks free up cabinet space and add a professional chef vibe to your kitchen. They’re easy to install and adapt, perfect for any kitchen size. Once organized, you’ll enjoy cooking more with everything right at your fingertips. Ready to ditch the clutter and embrace the organized chef look? Your pots and pans will thank you!
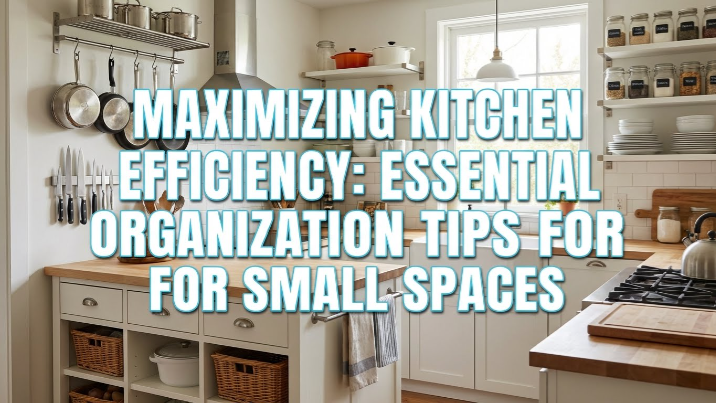
5. Pull-Out Pantry Shelves for Easy Access
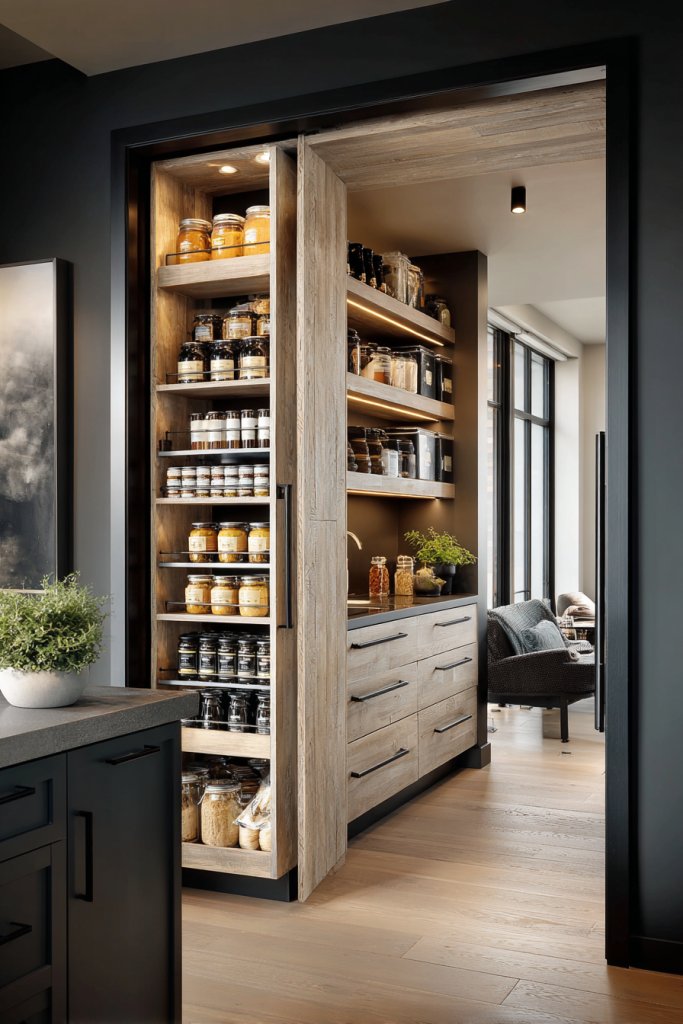
Stumbling over cluttered pantry shelves or digging through stacks of cans? Pull-out pantry shelves make accessing ingredients quick and stress-free. But designing an efficient pull-out system can be tricky—how do you keep everything visible and organized? The goal is to create a space that’s both user-friendly and keeps your pantry tidy.
Visualize a tall cabinet with sleek, chrome-trimmed pull-out shelves filled with labeled jars, cans, and snack boxes. As you slide the shelves out, everything becomes instantly visible—no more reaching or rummaging. The shelves are adjustable, allowing you to customize heights for different items. The system glides smoothly, feeling more like a luxury feature than a mundane storage solution. The organized chaos of your pantry now looks like a curated store display.
Choose from wire, solid wood, or composite materials depending on your aesthetic and budget. For small spaces, narrow, stacking shelves optimize vertical storage. For larger pantries, incorporate multiple tiers or corner units for maximum efficiency. Labeling each shelf or bin keeps things even tidier. Use clear containers or color-coded bins to add visual order and quick identification.
Start by measuring your cabinet dimensions and selecting a compatible pull-out system. Install sturdy runners and brackets into the cabinet frame—consider professional help for complex setups. Use adjustable shelves for flexibility. Organize your items based on frequency of use—everyday staples at the front, occasional items in the back. Regularly clean and declutter to maintain order. Make sure the hardware glides smoothly and securely.
Personalize your pantry with decorative labels or color-coded bins for different food groups. Add a small LED light inside for easier visibility in low light. Incorporate pull-out drawers or spice racks for specific categories. Use airtight containers to keep food fresh and add a uniform look. Seasonal or themed labels can add a fun or sophisticated touch.
Pull-out pantry shelves turn a chaotic space into an organized, accessible haven. They’re a smart investment that makes cooking and shopping easier. Once set up, your pantry becomes a joy to browse and update. Ready to take control of your storage? This upgrade could be the best thing you do for your kitchen this year!
6. Chalkboard Wall for Notes and Recipes
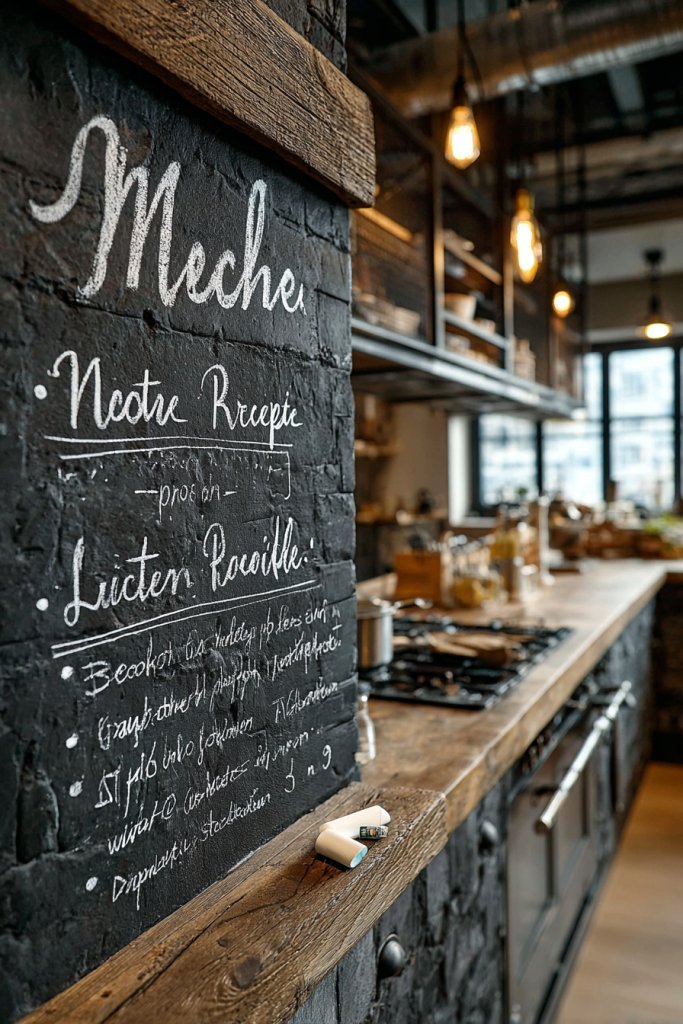
Forgetful moments when you can’t remember that perfect spice blend or last night’s dinner recipe? A chalkboard wall combines practicality with personality, turning a blank space into a functional canvas. But how do you keep it stylish and clutter-free? The aim is creating a dedicated spot that enhances your kitchen’s charm while keeping notes at arm’s reach.
Imagine a large section of wall painted with chalkboard paint, framed with sleek molding or left unframed for a casual vibe. Notes, grocery lists, or recipes are scribbled in colorful chalk, adding a playful splash of color. The surface is smooth and easy to clean, with occasional doodles or motivational quotes that change with your mood. Nearby, a small ledge holds chalk and erasers, keeping everything tidy and accessible. It’s both practical and personal—a daily inspiration.
Choose different shapes or sizes—large panels for extensive notes or small sections for quick reminders. Frame the chalkboard with wood, metal, or decorative trim to match your decor. For a less permanent look, use removable adhesive chalkboard paint or decals. Change the chalk color to match seasons or themes—pastels for spring or dark hues for a moody vibe. You can also integrate magnetic paint for added versatility.
Clean the wall thoroughly before applying chalkboard paint or decals. Use painter’s tape to create clean edges and avoid messes. Once dry, season the surface with chalk to prevent ghosting—rub chalk over the entire surface and wipe clean. Keep chalk and erasers in a nearby container or small shelf. Use the space consistently for notes, shopping lists, or meal plans, and update regularly to stay organized.
Decorate the frame or surrounding wall with decorative trim or colorful borders for extra flair. Incorporate themed chalks or markers that match your kitchen’s color scheme. Use the space for family messages, motivational quotes, or daily gratitude notes. You can also add small magnets or hooks for keys or small tools—making it multifunctional.
A chalkboard wall turns a blank canvas into a practical art piece that keeps your kitchen lively and organized. It’s easy to update and adds a personal touch that evolves with your family’s needs. Once set up, it becomes a favorite feature that sparks creativity and keeps everyone on the same page. Ready to turn your wall into a colorful command center?
7. Compact Fold-Down Breakfast Bar
Limited space in your kitchen making breakfast a challenge? A fold-down breakfast bar offers a space-saving, versatile solution that transforms a blank wall or corner into a functional dining area. But how do you ensure it’s sturdy enough for everyday use? The secret is in clever design and quality hardware that combines stability with simplicity.
Visualize a sleek, wall-mounted panel that folds down to reveal a compact countertop with two or three stools tucked underneath. When not in use, it folds flush against the wall, disappearing completely. The surface is smooth, made of durable material like butcher block or laminate, perfect for quick meals or coffee breaks. With a simple latch or hinge mechanism, it’s ready to go in seconds, saving space without sacrificing style.
Choose finishes that complement your decor—natural wood for a warm rustic look or glossy laminate for a modern vibe. For small kitchens, opt for a narrow, extendable design that can seat two to four people. If you want extra flair, add decorative hardware or a colorful backsplash behind the fold-down surface. Seasonal accessories like a small plant or decorative placemat can be swapped in for a personalized touch.
Start by selecting a sturdy wall with enough clearance for the table when folded down. Use a level to mark hinge placements, and secure the mounting brackets into wall studs for maximum strength. Attach the fold-down panel, ensuring it locks securely in both the down and up positions. Use waterproof or stain-resistant materials for easy cleaning. Keep the hardware lubricated and check regularly for stability.
Personalize with colorful hardware, patterned tablecloths, or decorative edge trims. Add a small shelf or hooks nearby for utensils or napkins. Incorporate a fold-out extension for extra seating or prep space during gatherings. Use cushions or decorative seats to add comfort and style. Keep a small storage bin underneath for quick access to table accessories.
A fold-down breakfast bar makes your kitchen more functional without taking up permanent space. It’s perfect for small homes, apartments, or studio setups where every inch counts. Once installed, it’s like having a mini dining room at your fingertips—ready for breakfast or a quick snack. Embrace space-saving solutions and enjoy your new multifunctional kitchen feature!
8. Integrated Appliance Garages
Cluttered countertops with small appliances can make your kitchen look chaotic and cramped. An integrated appliance garage hides these gadgets away when not in use, keeping your counters clean and your space sleek. But how do you make it work seamlessly without sacrificing easy access? The trick is thoughtful design and smart storage options.
Imagine a set of custom-built cabinets with dedicated doors that open to reveal neatly arranged appliances—blenders, toasters, coffee makers—all tucked away behind sleek panels. When closed, the space looks uniform and clutter-free, with only smooth cabinet fronts visible. When open, appliances are instantly accessible, organized on dedicated shelves or pull-out trays. The design blends seamlessly with your cabinetry, creating a tidy, high-end look.
Choose from various finishes—matching cabinet colors for a seamless look or contrasting tones for visual interest. Incorporate adjustable shelves or pull-out trays to fit different-sized appliances. For a more minimal aesthetic, opt for push-to-open mechanisms that hide hardware. Consider adding soft-close doors or quiet hinges for a smooth, luxurious feel. This setup works well in both traditional and modern kitchens.
Start by measuring your appliances and determining the size of the garage doors and shelves needed. Use high-quality cabinetry with sturdy hinges and hardware designed to hold weight. Install the cabinets at a comfortable height for easy access, and align the doors properly for a flush finish. Inside, add adjustable shelves or pull-out trays for versatility. Regularly clean and check hardware for smooth operation.
Customize with decorative hardware, contrasting cabinet finishes, or even lighting inside the garage for visibility. Use labeled bins or containers to keep cords, accessories, or small gadgets organized. Incorporate soft-close hinges or push-to-open features for a sleek, modern look. Consider integrating a small charging station or a built-in spice drawer nearby for added convenience.
Integrated appliance garages keep your countertops clean and your kitchen looking polished. They’re a smart, stylish way to hide clutter without sacrificing accessibility. Once organized, your kitchen will look more spacious and professional. Ready to ditch the mess and enjoy a clutter-free counter? This upgrade makes a noticeable difference!
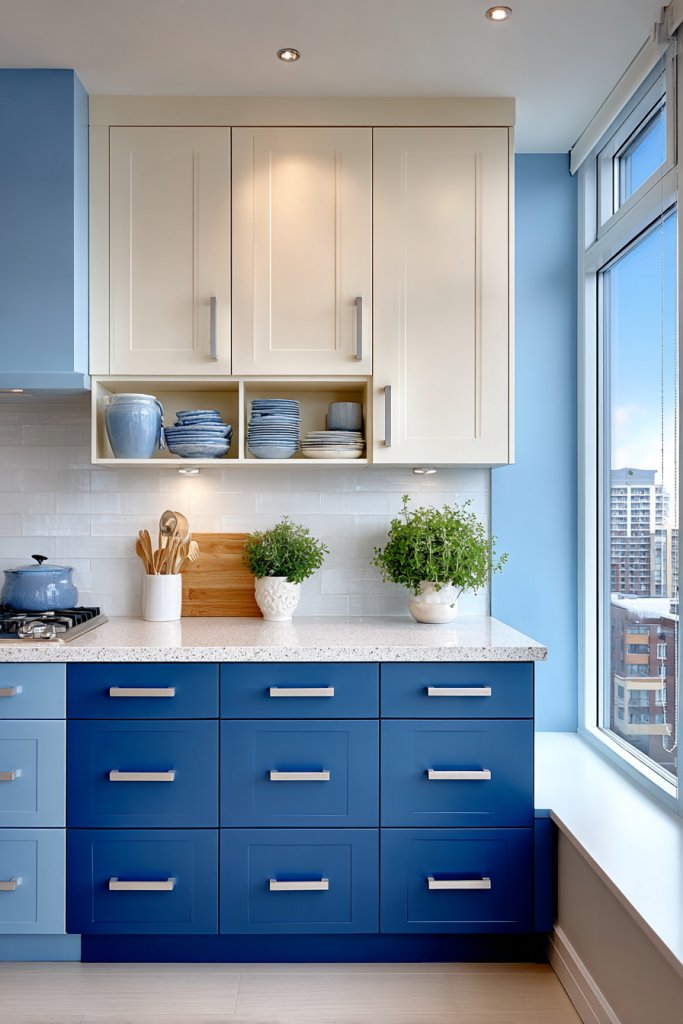
9. Two-Tone Cabinet Color Scheme
Bored with all one color in your kitchen? A two-tone cabinet scheme adds instant visual interest and depth without overwhelming the space. But how do you choose contrasting colors that complement your decor? The goal is balancing boldness with harmony to create a cohesive yet lively environment.
Picture upper cabinets painted in crisp white, while the lower cabinets are a deep navy or charcoal. The contrast highlights architectural details and adds dimension to the room. The different finishes—matte, gloss, or textured—add further richness. The combination creates a layered look that feels modern and inviting. Accentuate with matching hardware or subtle trim for a polished finish.
Try pairing light-colored upper cabinets with darker bases for a classic look, or go bold with vibrant hues like emerald green or deep burgundy. For small kitchens, light upper cabinets can make the space appear larger, while darker lower cabinets ground the design. Experiment with different textures—matte, gloss, or wood veneer—to suit your style. Seasonal accessories or textiles can also be layered in for added personality.
Select high-quality paint or veneer finishes suitable for cabinetry. Use painter’s tape for clean separation lines, and apply multiple coats for even coverage. Ensure the hardware complements both colors—either matching or contrasting for effect. Consider adding a contrasting island or open shelving in one of the colors for extra flair. Regular cleaning and touch-ups will keep the scheme vibrant over time. Professional finishing may be worth it for sharp lines.
Incorporate decorative hardware or trim that ties both shades together. Use open shelving or glass fronts in the accent color to showcase dishware or decorative pieces. Layer in textured textiles or rugs that pick up both hues for a cohesive look. Personalize with artwork or accent lighting that highlights the contrasting cabinetry.
A two-tone kitchen design adds sophistication and personality without overwhelming your senses. It’s a flexible approach that works in both traditional and modern styles. Once styled, it creates a balanced, inviting space you’ll love to spend time in. Ready for a bold yet harmonious update? This color combo can redefine your entire kitchen aesthetic!
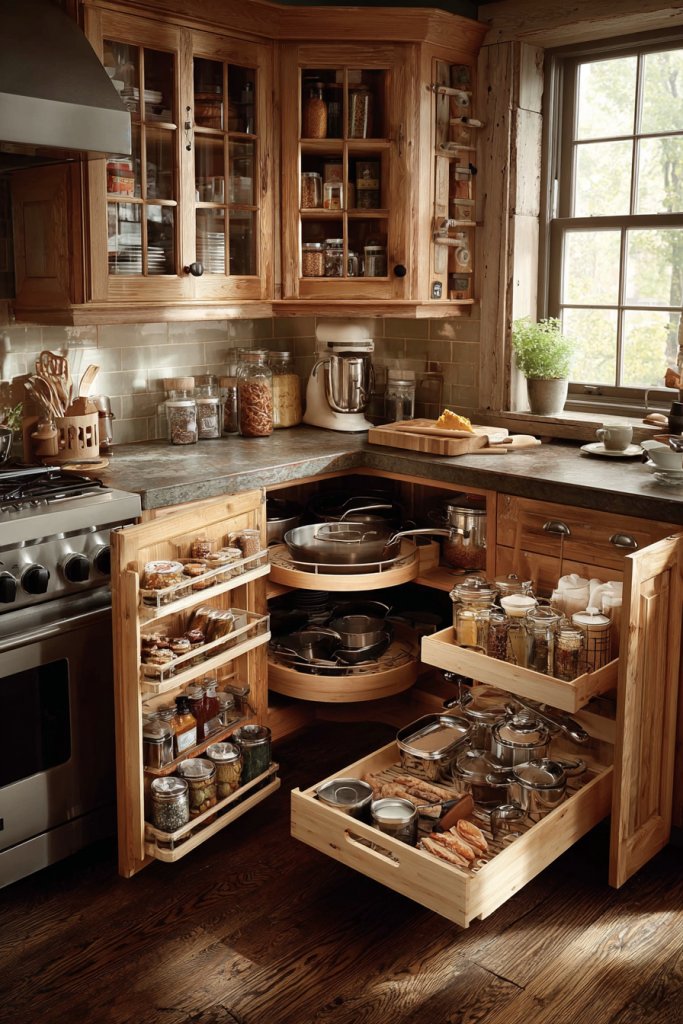
10. Smart Storage in Corner Cabinets with Lazy Susans
Corner cabinets are notorious for being tricky to access and often turn into black holes for cookware and gadgets. Lazy Susans turn these awkward spaces into efficient storage zones, making everything reachable with a simple spin. But how do you install and organize them effectively? The challenge is maximizing space while keeping things organized and easy to find.
Imagine turning the corner cabinet door and revealing a rotating carousel filled with matching pots, lids, and baking trays—everything at your fingertips. The shelves are divided into sections, so items stay upright and don’t fall over. The smooth spinning mechanism makes retrieving even the most tucked-away items effortless. The entire cabinet looks tidy, with no wasted space or cluttered piles.
Choose from different sizes and configurations—single or double-tier lazy Susans, or even those with removable trays. For a seamless look, match the finish of the carousel with your cabinetry—metal, wood, or plastic. Incorporate adjustable dividers or bins for smaller items like spices or utensils. For tight spaces, corner drawers or sliding trays can also work well as alternatives.
Measure your corner cabinet’s dimensions and select a lazy Susan that fits snugly inside. Install the rotating base securely to the cabinet floor, ensuring it can handle the weight of your stored items. Use adjustable dividers inside to prevent clutter and keep things organized. Regularly clean the mechanism and check for wobbling or squeaking. Label sections if needed for quick identification.
Add decorative liners or mats that match your kitchen decor, and use labeled containers for small items. Incorporate a small LED light or reflective backing to enhance visibility. Mix and match with open shelving or pull-out trays for a layered storage approach. Keep frequently used items at the front for faster access.
Lazy Susans turn wasted corner space into a functional, organized area. They’re easy to install and adapt to your needs, making your kitchen more efficient. Once organized, you’ll love how much easier meal prep becomes. Ready to make your kitchen smarter and more accessible? It’s a small upgrade with big benefits!
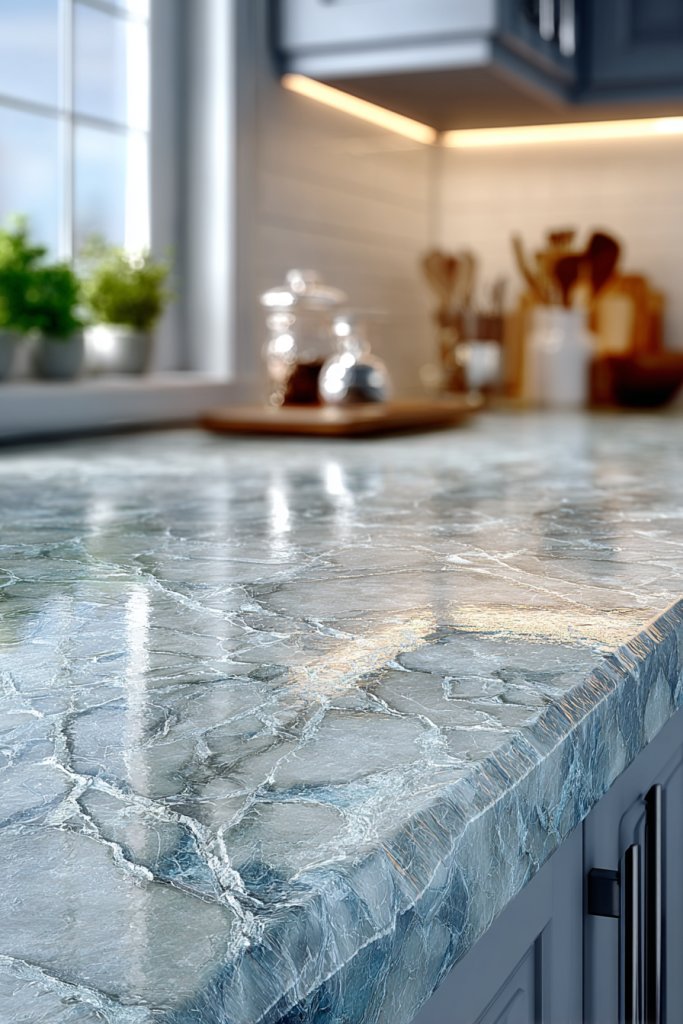
11. Durable Quartz or Solid Surface Countertops
Countertops take a beating in any active kitchen—scratches, stains, and heat can quickly ruin beauty and function. Quartz and solid surface materials promise durability and ease of maintenance, but choosing the right one can be confusing. The goal is a surface that’s resilient, stylish, and long-lasting without breaking the bank.
Visualize a smooth, seamless countertop in a soft gray quartz, subtly speckled with darker flecks that hide minor stains. The surface is matte yet resilient, resisting scratches and heat. Its sleek, consistent appearance enhances the modern aesthetic of your kitchen. The edges are smoothly finished, and the surface invites you to cook, prep, and entertain without worry. It’s the perfect blend of beauty and toughness.
Choose from various colors and patterns—marble-like veining, solid hues, or speckled textures—to match your style. For a high-end look, opt for thicker slabs or waterfall edges. Consider contrasting or matching backsplashes for a cohesive appearance. For budget-friendly options, look for engineered quartz or composite surfaces that mimic natural stone. Seasonal accents or decorative accessories can add personal flair.
Select high-quality quartz or solid surface material from reputable suppliers. Measure your space precisely and choose slabs with the right thickness—typically 1.2 to 2 centimeters. Hire experienced installers to ensure seamless joints and proper support. Seal the surface if required, and avoid cutting directly on the countertop—use a cutting board. Regular cleaning with gentle, non-abrasive cleaners keeps it looking new. Address any chips or scratches promptly to preserve its pristine appearance.
Add decorative edge details or inlays for a custom look. Use matching or contrasting colors for backsplashes to enhance the visual impact. Incorporate integrated sinks or subtle insets for a sleek aesthetic. Keep accessories minimal—think a soft cloth or small decorative tray—to maintain a clean, uncluttered surface. Periodic sealing or polishing can extend the lifespan.
Quartz and solid surface countertops are a smart investment that combines style with resilience. They elevate your kitchen’s look and make daily routines smoother. Once installed, they require minimal upkeep and last for decades. Ready to upgrade your workspace with a surface that’s both beautiful and durable? The perfect countertop is within your reach!
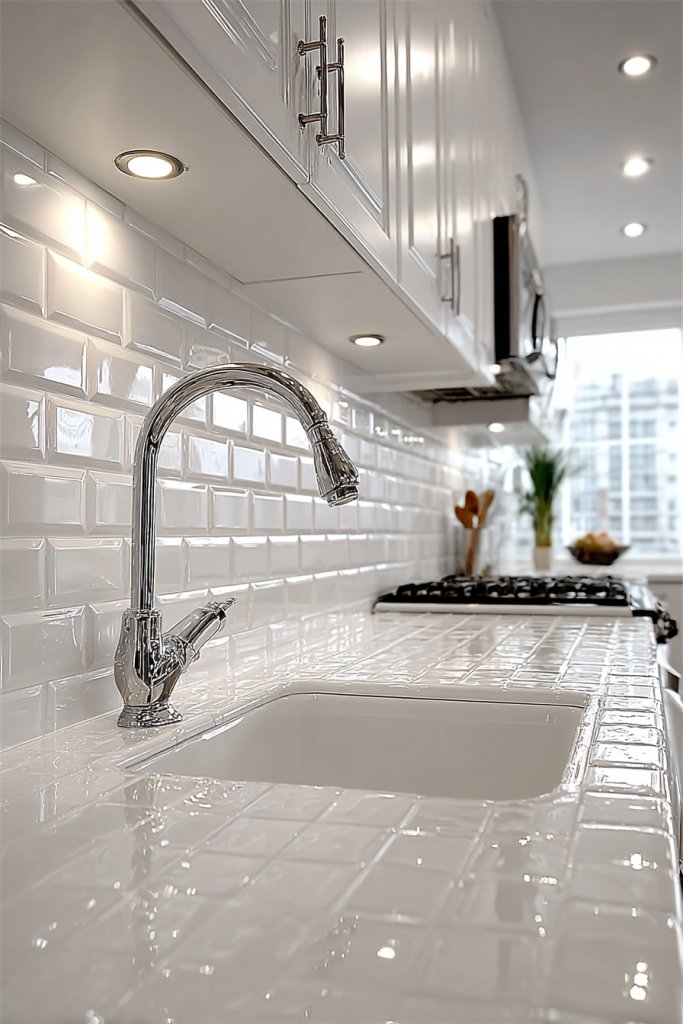
12. Stylish Backsplash with Practical Function
A backsplash is more than just a pretty wall—it’s a practical barrier that protects your walls from splatters and stains. But how do you choose a material that’s both eye-catching and easy to clean? The trick is balancing style with function, so your backsplash enhances your kitchen’s personality without adding cleaning headaches.
Imagine a sleek subway tile in classic white, arranged in a herringbone pattern, reflecting light and adding texture. Or perhaps a bold, colorful mosaic that becomes a focal point. The surface is smooth and easy to wipe clean, with grout lines that add character. The backsplash seamlessly runs behind your stove and sink, protecting the wall while elevating the overall aesthetic. It’s a perfect combination of beauty and utility.
Choose from classic ceramic, glass, metal, or natural stone depending on your style. For a modern look, opt for large-format tiles with minimal grout lines; for a rustic vibe, go for textured stone or brick. Consider heat-resistant or stain-proof materials for high-traffic areas. Seasonal or themed tile patterns can add fun or sophistication, making your kitchen uniquely yours.
Start by measuring the wall area and selecting a backsplash material suited for your kitchen’s use. Prepare the surface by cleaning and leveling it. Use high-quality adhesive and grout, and lay tiles carefully, leaving even gaps for grout lines. Seal natural stone or porous materials for extra protection. Regularly clean with non-abrasive cleaners to maintain its appearance. DIY installation can work for simple designs, but professional help ensures precision.
Add decorative accents like metallic trims, contrasting grout colors, or patterned tiles for a personalized touch. Incorporate small ledges or corner shelves for practical storage or display. Use peel-and-stick tiles for quick updates or seasonal changes. Keep your grout lines clean and re-seal periodically to preserve the look and prevent stains.
A stylish backsplash elevates your kitchen’s look while protecting your walls. It’s easy to customize and maintain, offering a perfect blend of form and function. Once complete, it becomes a statement feature that enhances your entire space. Ready to choose a backsplash that reflects your style and practical needs? Your kitchen transformation starts here!
13. Floating Shelves for Frequently Used Items
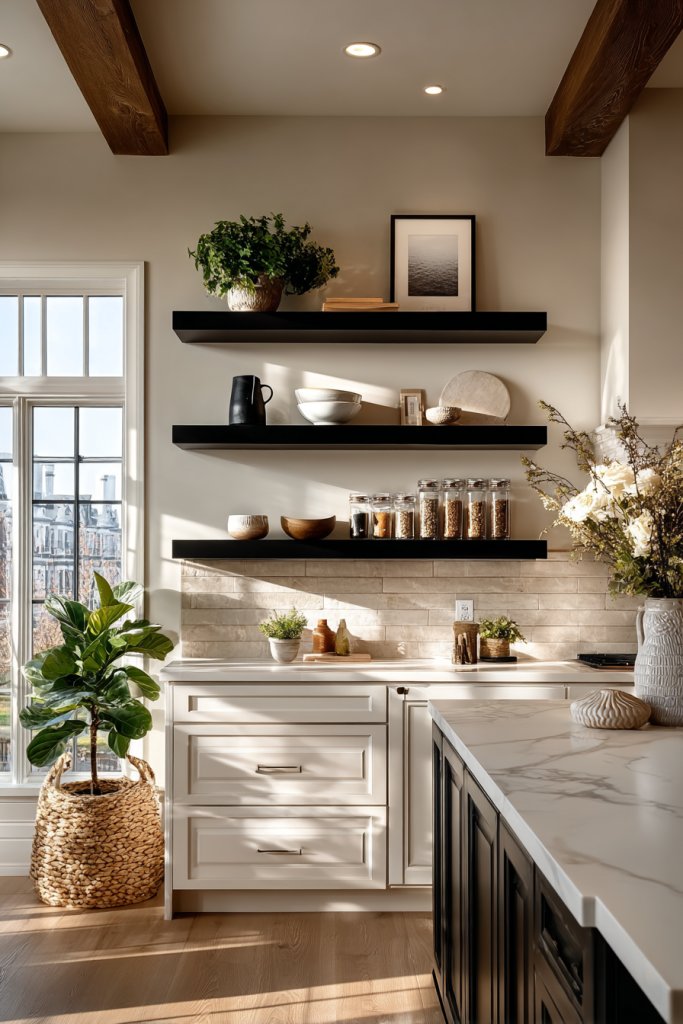
Cluttered counters and inaccessible cabinets can make your kitchen feel chaotic. Floating shelves provide a simple, stylish way to keep everyday essentials within reach. But how do you style them to look intentional rather than cluttered? The secret is in thoughtful placement and curated displays that blend function with aesthetic appeal.
Visualize a set of sleek, minimalist wood or metal shelves mounted on a wall, holding neatly stacked dishes, glassware, and a few decorative items. The open design makes everything accessible, reducing the need to dig through cabinets. The shelves cast subtle shadows, adding depth and interest to the wall. A soft glow from nearby lighting highlights their clean lines and keeps the space feeling airy.
Use different materials—natural wood for warmth, black metal for industrial chic, or glass for a modern touch. Vary the shelf lengths and heights to create visual interest. Incorporate decorative storage boxes or baskets to organize small items. For seasonal updates, swap out accessories or add decorative accents like jars or artwork—just keep it uncluttered for maximum impact.
Mount shelves into wall studs using appropriate anchors and screws for stability. Measure carefully to ensure level installation and even spacing. Use brackets if extra support is needed, or opt for hidden mounting hardware for a sleek look. Arrange items thoughtfully, balancing height, color, and purpose. Regularly dust and reorganize to keep the display fresh and functional.
Personalize shelves with decorative touches like colorful containers, patterned dish towels, or themed accessories. Use lighting—LED strips or puck lights—to showcase your display. Mix in a few heirlooms or modern pieces to reflect your style. Keep frequently used items at the front for convenience, and reserve the back for decorative or seasonal pieces.
Floating shelves are a versatile, stylish way to keep your kitchen organized and inviting. The open display fosters a sense of space and personality. Once styled well, they can become a focal point that showcases your unique taste. Ready to transform your kitchen walls into a functional art display? Let’s hang those shelves!
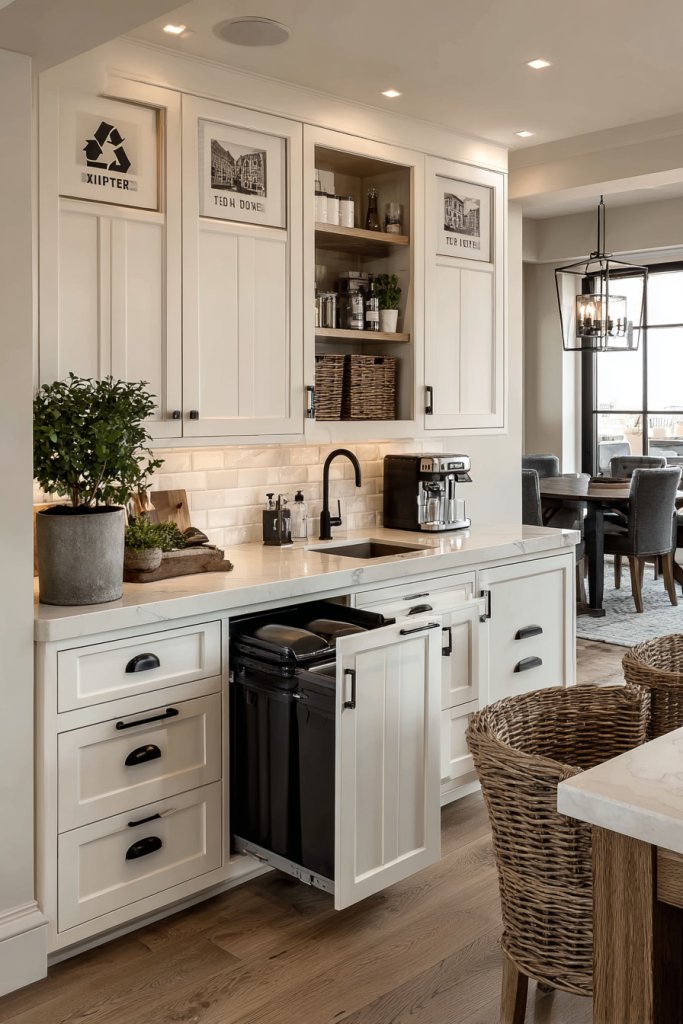
14. Hidden Trash and Recycling Centers
Trash bins and recycling containers are often eyesores that clutter your kitchen’s sleek look. Hidden centers hide away waste while keeping everything accessible. But integrating these hidden bins without sacrificing convenience can be tricky. Your aim is a tidy, clutter-free space that still makes waste disposal easy and hygienic.
Imagine a custom cabinet tucked under the sink or beside the pantry, with pull-out drawers that conceal trash and recycling bins. The doors close seamlessly, maintaining the clean lines of your cabinetry. When needed, you slide out the bins, which are neatly lined up in durable, odor-sealing containers. The design ensures the waste area remains out of sight, yet within reach for quick disposal.
Opt for integrated cabinetry with dual compartments—one for trash, one for recyclables. Select materials that match your kitchen decor—painted wood, laminate, or metal. Incorporate odor filters or sealing lids to contain smells and spills. For small spaces, consider slim, vertical pull-out units, or under-sink solutions with adjustable bins. Seasonal or themed cabinet fronts can make the setup more personalized.
Design your cabinet to fit the size of your existing bins, with smooth sliding mechanisms for easy access. Install sturdy slides into the cabinet frame, ensuring they can handle the weight and frequent use. Seal the edges to prevent leaks or spills. Label compartments if necessary, and maintain cleanliness by regularly emptying and sanitizing the bins. Keep the hardware lubricated for smooth operation.
Add decorative hardware, or paint the cabinet doors in your favorite color to match your kitchen. Incorporate odor-control features like charcoal filters or sealed lids. Use removable bins for easy cleaning and replacement. You can also add small hooks or shelves nearby for trash bags, gloves, or cleaning supplies—keeping everything organized.
Hidden trash and recycling centers keep your kitchen looking pristine and organized. They’re a smart, hygienic upgrade that blends seamlessly into your cabinetry. Once set up, you’ll appreciate how much tidier your space feels. Ready to hide your waste and reclaim your counters? It’s easier than you think!
15. Modular Drawer Organizers for Utensils and Tools
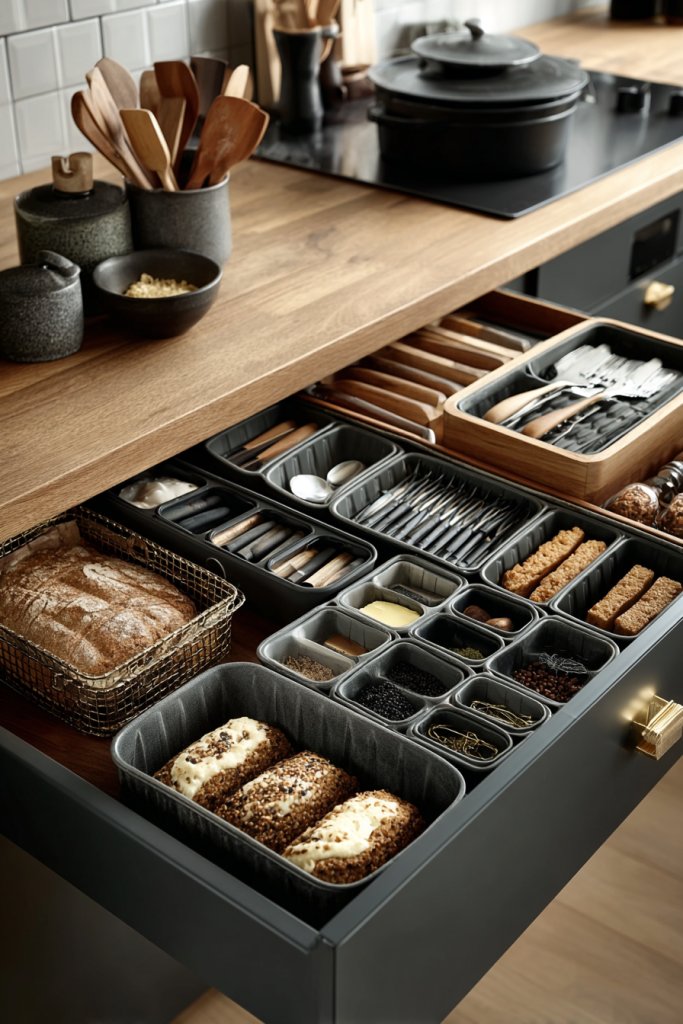
Messy drawers filled with utensils, gadgets, and tools slow down your cooking groove. Modular drawer organizers help you tame the chaos, making everything easy to find and access. But how do you customize a system that fits your unique collection? The secret is adjustable, versatile dividers that grow with your needs.
Picture a wide drawer filled with neatly separated sections—spoons, knives, spatulas, and gadgets—all in their designated spots. The dividers are adjustable to fit different sizes and shapes, so everything feels organized and contained. The materials—plastic, bamboo, or metal—are chosen to match your decor and withstand daily use. The overall effect is a calm, clutter-free drawer that makes cooking more enjoyable.
Opt for modular sets that snap together or slide apart, allowing you to customize tray sizes. Use color-coded dividers or containers to differentiate categories—think red for utensils, blue for gadgets. Consider different finishes—natural bamboo for warmth or sleek plastic for a modern look. For deeper drawers, add stacking or tiered organizers to maximize space. Seasonal or special occasion tools can be stored separately for quick access.
Measure your drawers carefully and select modular systems that fit snugly. Install the dividers securely, ensuring they won’t shift during use. Group similar items together—knives in one section, measuring spoons in another. Use labels or color-coding for quick identification. Regularly declutter and reorganize to keep the system functional. Clean the dividers periodically for longevity and hygiene.
Personalize with custom labels or decorative tape for categories. Incorporate small trays or bowls for tiny items like clips or peelers. Use matching or contrasting colors to add visual interest. Add a small magnetic strip nearby for metal tools or knives for extra organization. Keep a bin for used or dirty utensils, ready for quick cleaning.
Modular drawer organizers turn chaos into harmony, making your kitchen more efficient. They’re customizable and grow with your collection, saving you time and frustration. Once organized, you’ll enjoy cooking and cleaning more—no more digging through piles. Ready to upgrade your drawers into perfectly organized compartments? It’s a small change with big results!
16. Compact Dish Drying Rack Over the Sink
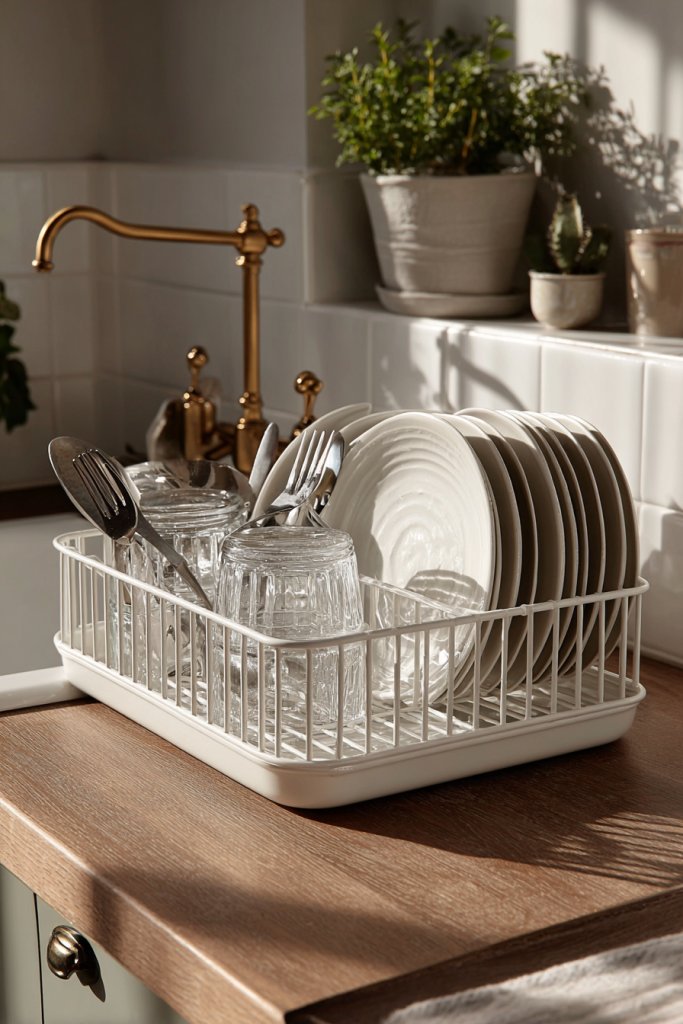
Wet dishes, utensils, and glasses piling up on your countertop can make your kitchen look messy and feel cluttered. A compact over-the-sink drying rack offers a smart, space-saving solution. But how do you choose one that’s sturdy, functional, and easy to clean? The goal is a tidy, efficient drying station that frees up counter space.
Imagine a sleek, foldable rack that stretches across your sink, with slots for plates, cups, and utensils. It’s made of stainless steel or plastic, designed to drain directly into the sink. When not in use, it folds away neatly, leaving your countertop clear. The design is simple yet effective, turning your sink area into a dedicated drying zone that looks organized and modern. The sound of water draining and dishes gently clinking adds a cozy kitchen ambiance.
Choose from adjustable, extendable, or fixed models depending on your space and needs. Opt for rust-resistant materials for durability. For a minimalist look, go for slim profiles with integrated drip trays. For larger households, select racks with multiple tiers or extra slots. Seasonal or color-themed racks can add a fun or sophisticated touch to your decor.
Measure your sink width and depth to ensure a proper fit. Install the rack securely over the sink, ensuring it doesn’t slide or wobble during use. Use models with non-slip grips or suction cups if needed. Load dishes systematically—heaviest at the back and lighter at the front for stability. Regularly clean and dry the rack to prevent mold or rust. Fold and store when not in use to save space.
Add silicone or rubber grips to prevent slipping. Incorporate a small tray or utensil holder for extra organization. Coordinate with your kitchen color scheme—metallic, white, or bright hues. Use a decorative dish towel or mat underneath to add a pop of color. Keep your sink area tidy with a small caddy for sponges and cleaning supplies.
A compact over-the-sink drying rack is a practical upgrade that keeps your kitchen clean and organized. It’s easy to install and adapt to your household size. Once in place, it makes dish drying faster and less cluttered. Ready to reclaim your countertop and make dishwashing a breeze? Your sink area will thank you!
17. Neutral Tones with Textured Finishes
Bright, busy kitchens can sometimes feel overwhelming or cluttered. Neutral tones with textured finishes create a calming, sophisticated environment that’s easy on the eyes. But how do you add texture without sacrificing the clean look? The secret is choosing subtle patterns and finishes that bring depth and interest.
Imagine cabinets in soft, matte beige with a subtle linen or brushed finish, adding tactile dimension. The textured surface catches the light differently depending on the angle, creating shadows and depth. Countertops in natural stone or matte quartz complement the cabinetry, while a textured backsplash adds a layer of visual intrigue. The overall atmosphere is serene, warm, and inviting—a perfect backdrop for any style.
Opt for textured wood, concrete, or plaster finishes for warmth and natural appeal. Combine with smooth surfaces in accents or hardware for contrast. Use neutral textiles like linen or cotton for curtains and mats to soften the look. Seasonal accents in muted or pastel shades can be layered in to keep the space feeling fresh. Match with metallic or matte hardware for a modern twist.
Choose paints, veneers, or materials with textured finishes from reputable suppliers. Use proper preparation techniques—sanding, priming, and sealing—to ensure durability. Install hardware that complements the textured surfaces—brushed nickel, matte black, or bronze. Regularly clean with gentle cloths to preserve the texture, avoiding abrasive cleaners. Consider professional installation for intricate finishes.
Layer in textiles with textured fabrics—cushions, rugs, or towels—in neutral shades. Incorporate natural materials like woven baskets or ceramic accessories for added tactile interest. Use matte or textured hardware, and add decorative trims or edges to cabinetry for a custom touch. Personalize the space with subtle color pops in accessories or artwork.
Neutral tones with textured finishes create a timeless, elegant kitchen that feels warm and inviting. They serve as a versatile backdrop for any decor style, from contemporary to rustic. Once styled, the space exudes calm and sophistication, making everyday routines more enjoyable. Ready to embrace understated luxury? Textured neutrals are your new best friend!
18. Corner Drawer Units for Maximum Storage

Corner spaces are often wasted or underutilized, leaving valuable storage potential on the table. Corner drawer units turn awkward corners into practical storage zones, making your kitchen more efficient. But how do you maximize accessibility and organization in these tricky spots? The goal is to turn wasted space into an asset.
Imagine a deep, smooth drawer that pulls out to reveal a neatly organized interior—divided into sections for pots, pans, or baking sheets. The drawer glides effortlessly on high-quality tracks, offering full access to the entire corner. The interior is customizable, with adjustable dividers or trays to fit your needs. The result is a clutter-free, easily accessible corner that feels like a dedicated storage closet.
Choose from full-extension or soft-close drawers for a sleek, modern look. Use materials that match your cabinetry—wood, laminate, or painted finishes. For very tight corners, consider diagonal or curved drawers that follow the space’s shape. Incorporate organizational inserts or stacking trays for maximum efficiency. Seasonal or infrequently used items can be stored in less accessible parts of the drawer.
Measure the corner space precisely, including depth and width, then select compatible drawer units. Install sturdy, high-quality slides and ensure the drawer opens smoothly without obstruction. Organize items by size and frequency of use—place everyday essentials at the front. Regularly check for debris or wear to keep the mechanism functioning flawlessly. Use labels if you want quick identification.
Add decorative hardware or paint the drawer fronts to match your cabinetry. Incorporate dividers or modular trays for utensils or baking tools. Use clear containers inside for small items like clips or measuring spoons. Keep the interior clean and organized with periodic tidying—your corner storage will stay efficient and attractive.
Corner drawer units unlock hidden potential in your kitchen, making storage more accessible and organized. They’re a practical upgrade that maximizes every inch of space. Once installed, you’ll wonder how you ever managed without them. Ready to turn those awkward corners into efficient storage zones? Your kitchen will thank you!
19. Floating Kitchen Cart with Storage
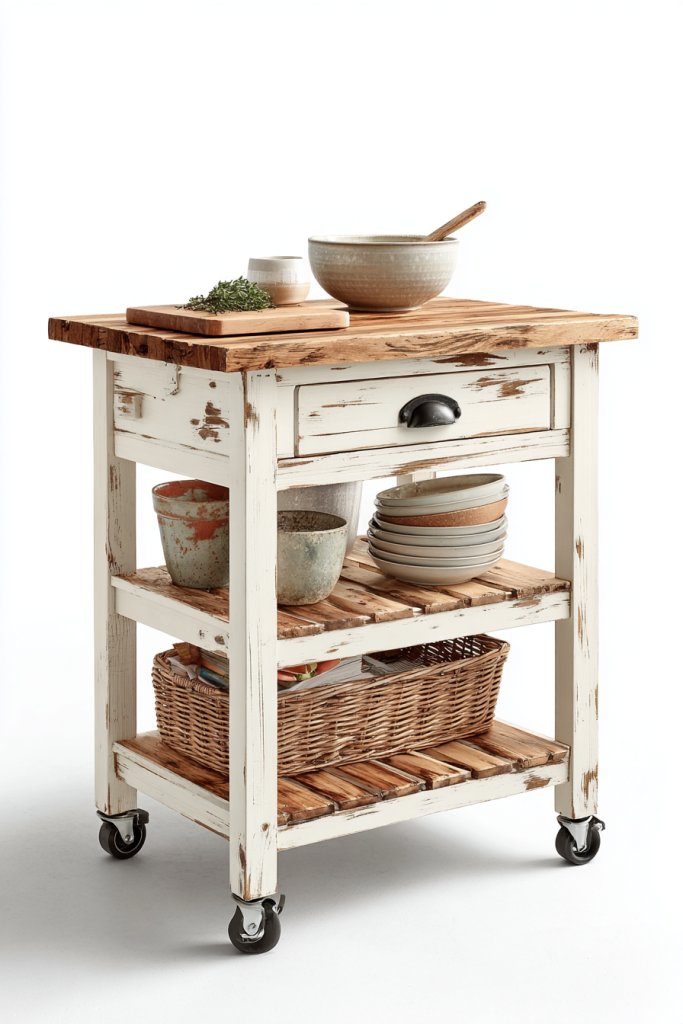
Need extra workspace and storage but limited by space? A floating kitchen cart offers movable, versatile storage that can be tucked away or brought out as needed. But how do you choose one that’s both stylish and functional? The secret is selecting a design that complements your decor and suits your lifestyle.
Imagine a sleek, wheeled cart with open shelves and a sturdy top surface, painted in a neutral tone or natural wood finish. It’s positioned near your main workspace, ready to hold utensils, ingredients, or small appliances. When not in use, it can be moved to another corner or stored away. The cart adds an industrial-chic touch, blending practicality with aesthetic appeal, and enhances your kitchen’s flexibility.
Choose from materials like stainless steel, reclaimed wood, or painted MDF depending on your style. Incorporate open shelving, drawers, or closed cabinets for varied storage needs. Add a butcher block top for a rustic feel, or a smooth laminate surface for easy cleaning. Wheels with locking mechanisms provide stability when stationary. Seasonal accessories or decorative items can be swapped in to match your decor.
Select a cart that fits your space and storage needs. Ensure the wheels are sturdy and lock securely. Assemble the cart according to manufacturer instructions, paying attention to weight limits. Use the shelves for frequently used items—preferably within arm’s reach—and organize smaller tools or containers in drawers or baskets. Regularly clean and inspect wheels for smooth operation. You can also paint or customize the finish for a personalized look.
Add decorative touches like colorful containers, a small chalkboard label, or a patterned cloth to the cart. Incorporate hooks or pegs for hanging utensils or towels. Use matching or contrasting colors to enhance visual interest. Place a small plant or decorative item on top for a personal touch, keeping it functional yet inviting.
A floating kitchen cart boosts your space’s versatility, offering extra storage and prep area on demand. It’s a stylish, movable feature that adapts to your needs, whether for everyday cooking or entertaining. Once you see how much easier your workflow becomes, you’ll wonder how you managed before. Ready to add a functional, flexible centerpiece to your kitchen?
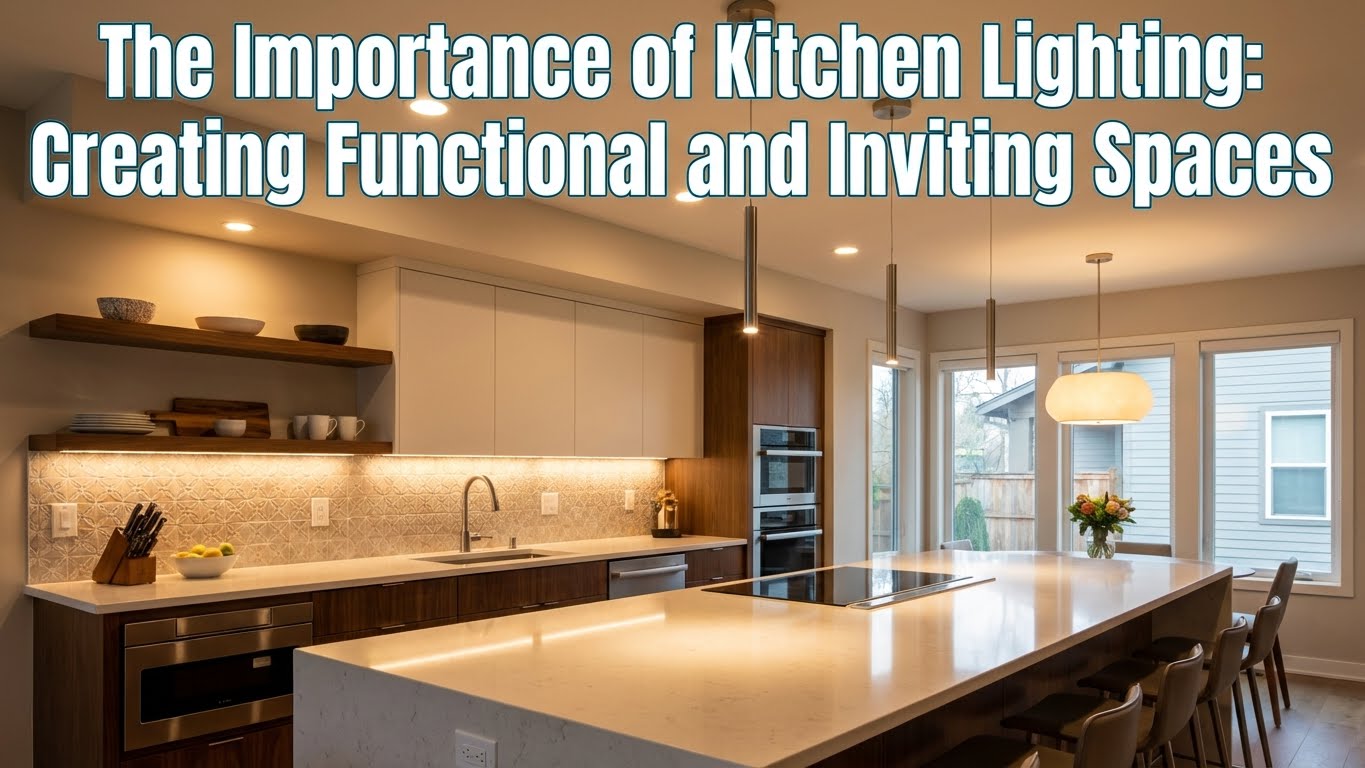
20. Recessed Lighting in Ceiling for Even Illumination
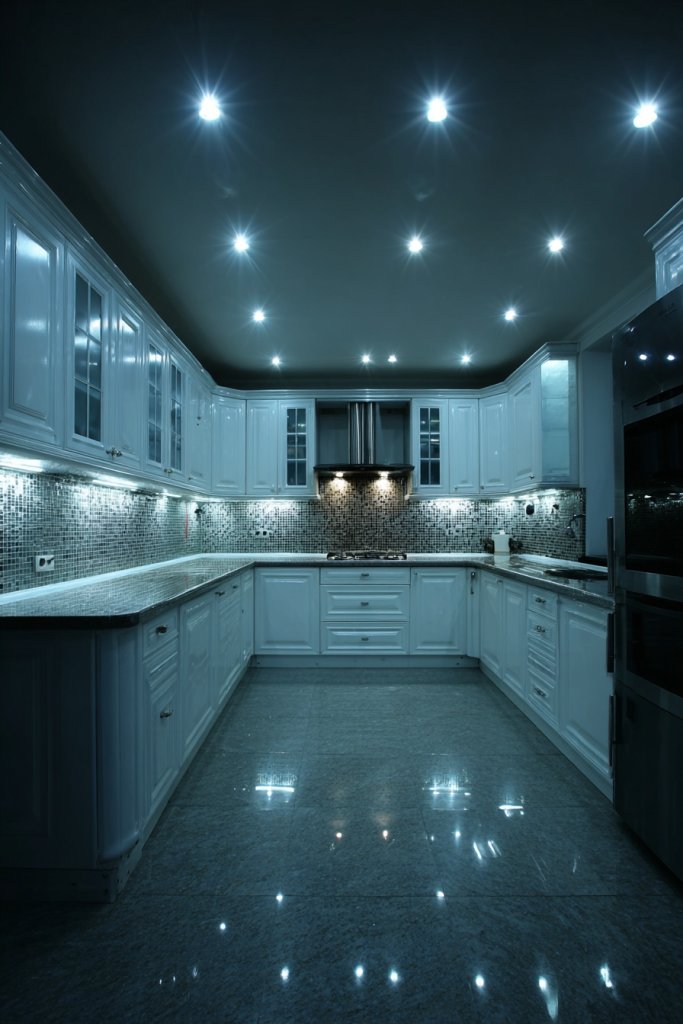
Uneven kitchen lighting can cast shadows and make tasks more difficult. Recessed ceiling lights provide a uniform, clean look that brightens every corner without cluttering the space. But how do you plan a lighting scheme that’s both effective and stylish? The goal is to achieve balanced illumination that enhances your kitchen’s ambiance.
Imagine a ceiling dotted with sleek, flush-mounted LED cans, casting a soft, even glow across the entire room. The lights are positioned strategically over work zones, highlighting countertops, islands, and sinks. The minimal design blends into the ceiling, creating a modern, uncluttered look. Shadows are minimized, and every surface feels bright and inviting—a perfect environment for cooking, cleaning, or relaxing.
Use adjustable or dimmable recessed lights to tailor brightness for different times or activities. Combine with accent lighting, like under-cabinet LEDs or pendant fixtures, to create layered, dynamic illumination. For a warm, cozy atmosphere, select warm white bulbs; for task-oriented lighting, opt for cooler tones. The layout can be customized based on ceiling height and room shape—triangles, grids, or linear arrangements work well.
Plan your lighting layout carefully, considering the kitchen’s size and key work areas. Hire a licensed electrician to install the fixtures, ensuring proper wiring and compliance with electrical codes. Use high-quality, energy-efficient LED bulbs for long-lasting, low-heat lighting. Install dimmers or smart controls for adjustable ambiance. Test the lighting in different settings to find the perfect balance between task and mood lighting.
Add a few accent fixtures or color-changing LEDs to customize the atmosphere for parties or cozy evenings. Highlight architectural features or cabinetry with targeted lighting. Use diffusers or trims to soften the light and reduce glare. Incorporate motion sensors or timers for energy efficiency and convenience. Layered lighting turns your kitchen into a versatile, inviting space.
Recessed lighting provides a sleek, unobtrusive way to illuminate your kitchen evenly. It enhances safety, functionality, and style, making your space more enjoyable to use. Once installed, you’ll appreciate how much brighter and welcoming your kitchen feels. Ready to upgrade your lighting game? It’s a small change with a big impact.
21. Practical Pull-Out Trash and Recycling Bins
Trash bins and recyclables often dominate your kitchen’s visual space, making it look cluttered and unorganized. Pull-out waste bins hide away the mess, keeping your space tidy and hygienic. But how do you incorporate them seamlessly into your cabinetry? The trick is smart design that balances accessibility with aesthetics.
Picture a sleek cabinet with a hidden pull-out drawer, seamlessly integrated into your cabinetry front. When you need to toss something, you slide out a sturdy container designed for trash or recyclables. The bin is lined with odor-sealing bags, and the whole system glides smoothly on quality tracks. When closed, the cabinet looks flawless—no bins, no clutter, just a clean, unified front. It’s a tidy, professional look that hides the mess.
Choose from single or dual-compartment systems, depending on your waste and recycling needs. Materials can match your cabinetry—wood, laminate, or metal—for a cohesive look. For small spaces, slim, vertical models fit into narrow cabinets. For larger kitchens, full-height pull-outs with multiple bins maximize capacity. Label compartments for quick sorting, and consider odor filters for freshness.
Measure your cabinet opening and select a system that fits snugly. Install high-quality slides or tracks, ensuring smooth operation under daily use. Attach the bins securely, and line them with trash or recycling bags. Regularly clean and sanitize the bins to prevent odors and pests. Keep the cabinet interior dry and check hardware periodically for wear. Make sure the system is easy to use for all household members.
Add decorative hardware or paint the cabinet front to match your kitchen decor. Use labels or color-coded bags for sorting efficiency. Incorporate a small shelf or hooks nearby to hold extra bags or cleaning tools. Consider integrating a small odor-absorbing element or air freshener for freshness. Keep the system maintained for long-term cleanliness and functionality.
Pull-out trash and recycling bins are a brilliant way to keep your kitchen clutter-free and hygienic. They’re easy to install and adapt to your needs, making waste management effortless. Once in place, you’ll appreciate how much tidier and more organized your space feels. Ready to hide the mess and keep your kitchen looking fresh? This upgrade is a game-changer.
22. Layered Lighting with Pendant and Task Lights
A well-lit kitchen is more inviting and functional, but many spaces rely on a single overhead light. Layered lighting with pendant and task lights creates a dynamic environment, perfect for cooking, dining, and entertaining. But how do you balance ambient, task, and accent lighting without cluttering the ceiling? The secret is strategic placement and selection of fixtures.
Imagine pendant lights hanging above a kitchen island, casting a warm glow on prep work and socializing areas. Meanwhile, adjustable task lights focus directly on countertops and stove, providing bright, focused illumination. Soft ambient lighting fills in shadows, creating a layered, cozy atmosphere. The combination of different fixtures and light intensities adds depth, making the space feel more vibrant and welcoming.
Choose pendant styles that match your decor—industrial metal, glass globes, or colorful ceramic shades. Incorporate dimmable switches to control light levels for different activities. Combine different heights and shapes for visual interest. Use under-cabinet lighting for task areas or wall-mounted sconces for accent lighting. Seasonal or special decorative fixtures can add personality.
Plan your lighting layout considering work zones, seating areas, and aesthetic focal points. Hire an electrician to install fixtures securely and wire controls properly. Use high-quality, energy-efficient bulbs—preferably LEDs—for longevity and low heat emission. Install dimmers or smart switches for flexible ambiance control. Test all fixtures at different levels to ensure balanced lighting and adjust as needed.
Add decorative fixtures or colored bulbs to match seasonal decor or mood. Incorporate strip lighting under cabinets or inside niches for subtle effects. Use matching or contrasting hardware for fixtures to tie into your overall decor scheme. Keep cords and switches discreet for a clean look. Personal touches like vintage or statement pendants can elevate the space.
Layered lighting transforms your kitchen into a versatile, mood-enhancing space. It’s functional for cooking and warm for relaxing or entertaining. Once set up, it’s easy to adjust for any occasion, making your space more inviting and practical. Ready to light up your kitchen in style? The perfect layered plan awaits!
23. Use of Durable, Easy-to-Clean Flooring Materials
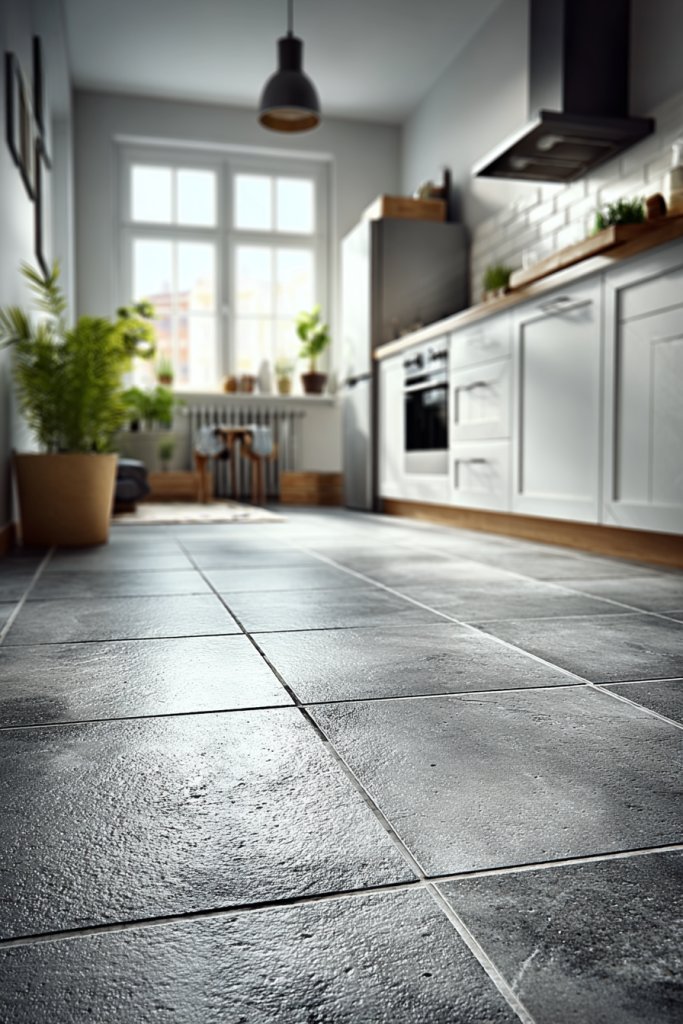
Kitchen floors endure daily spills, stains, and heavy foot traffic. Choosing durable, easy-to-clean flooring materials keeps your space looking fresh and minimizes maintenance. But with so many options—ceramic, vinyl, hardwood—how do you pick the right one? The goal is a practical, resilient surface that supports your lifestyle.
Picture a kitchen with large-format ceramic tiles in a matte finish, laid in a subtle pattern. The surface is resistant to scratches and stains, with grout lines that are easy to clean. Alternatively, a seamless vinyl plank mimics wood with added durability, while a sealed hardwood offers warmth and classic appeal. The flooring complements your cabinets and countertops, creating a cohesive, inviting environment that withstands daily wear.
Opt for slip-resistant finishes for safety, especially in kitchens prone to spills. Choose patterns or textures that hide dirt and scratches—like textured tiles or mixed shades in vinyl. For a contemporary look, large tiles or planks reduce grout lines; for rustic charm, distressed wood or textured concrete work well. Seasonal rugs or mats can add warmth and color, but keep them washable and non-slip.
Prepare the subfloor by cleaning, leveling, and sealing if needed. Install the chosen flooring according to manufacturer instructions—adhesive, floating, or nailed-down methods. Use spacers and grout properly to ensure even joints, and seal natural materials to prevent stains. Regular sweeping and gentle cleaning prolong the life and appearance. Repair or replace damaged sections promptly to maintain safety and aesthetics.
Layer with decorative rugs or mats in coordinating colors or patterns. Incorporate heating mats under tiles for added comfort during colder months. Use contrasting or matching trim to frame the flooring seamlessly. Maintain the surface with appropriate cleaners to preserve finish and prevent scratches. Add personal touches like decorative borders or insets for a custom look.
Durable, easy-to-clean flooring ensures your kitchen stays beautiful and functional over years of heavy use. It minimizes effort and expense in maintenance while supporting your daily routines. Once installed, you can enjoy a safe, stylish foundation for all your culinary adventures. Ready to upgrade your kitchen’s foundation? The perfect flooring is just a choice away.
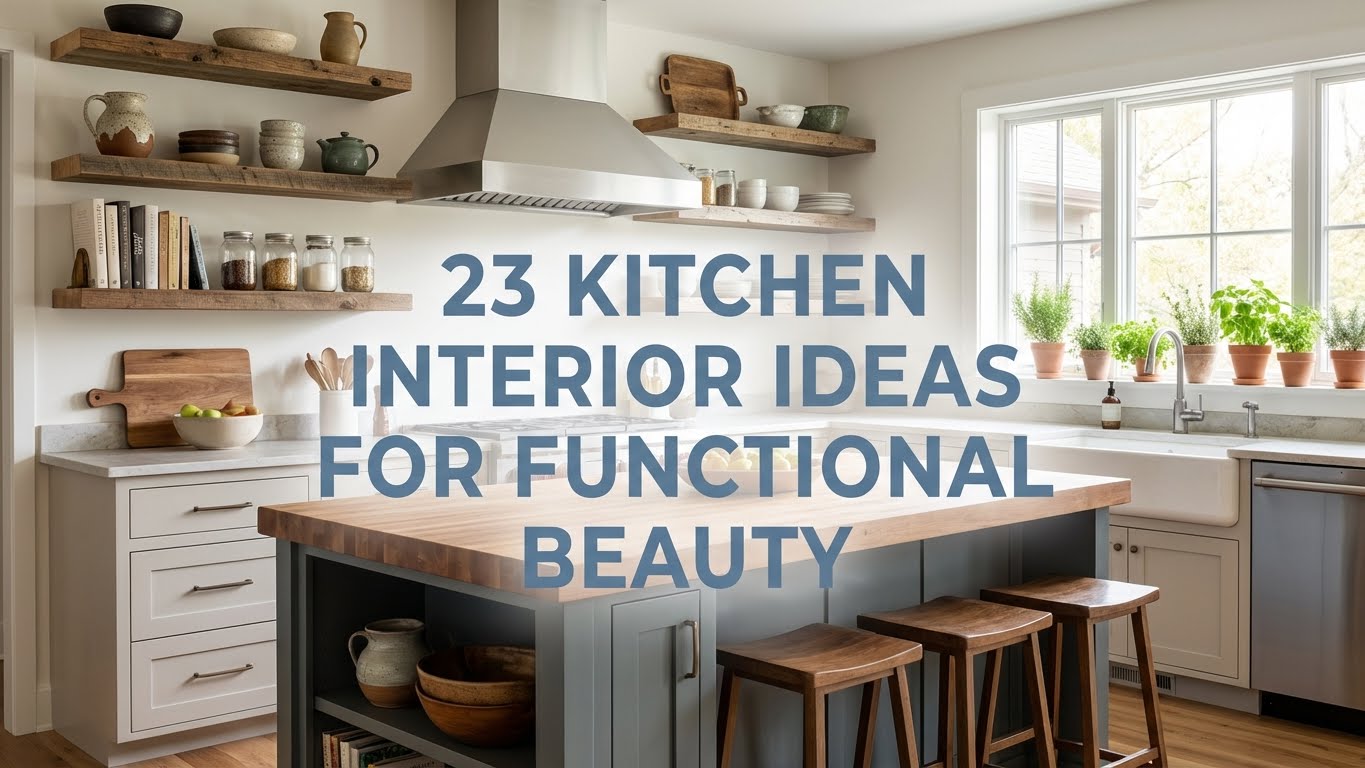
Conclusion
This collection of kitchen interior ideas showcases a wide range of styles and solutions to transform your space into a beautiful, functional haven. Embrace these creative concepts and tailor them to suit your unique taste and lifestyle. Don’t wait — start experimenting today and watch your kitchen become a stunning centerpiece that truly works for you!