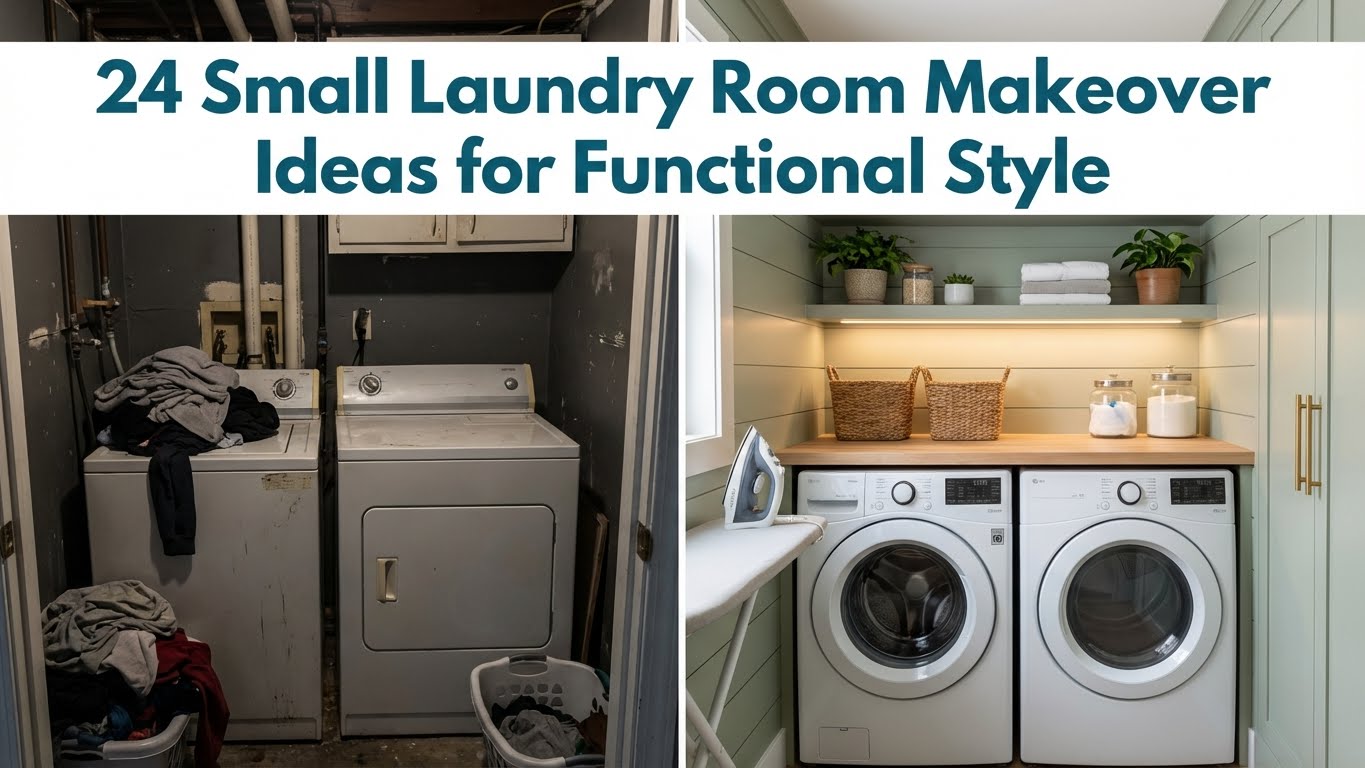
Ever feel like your laundry room could use a little love and a lot more function? Small laundry rooms are often overlooked, but with the right makeover ideas, they can become surprisingly stylish and efficient spaces that make laundry day less of a chore. The charm of a well-designed small laundry area lies in its ability to maximize every inch while adding a touch of personality.
In this article, you’ll find a diverse array of ideas to transform your tiny laundry nook into a functional haven. Whether you’re craving clever storage solutions, space-saving layouts, or charming decor touches, there’s something here for every laundry space—big or small. Get ready to turn your laundry room into a practical and stylish retreat!
1. Maximize Vertical Storage with Open Shelving
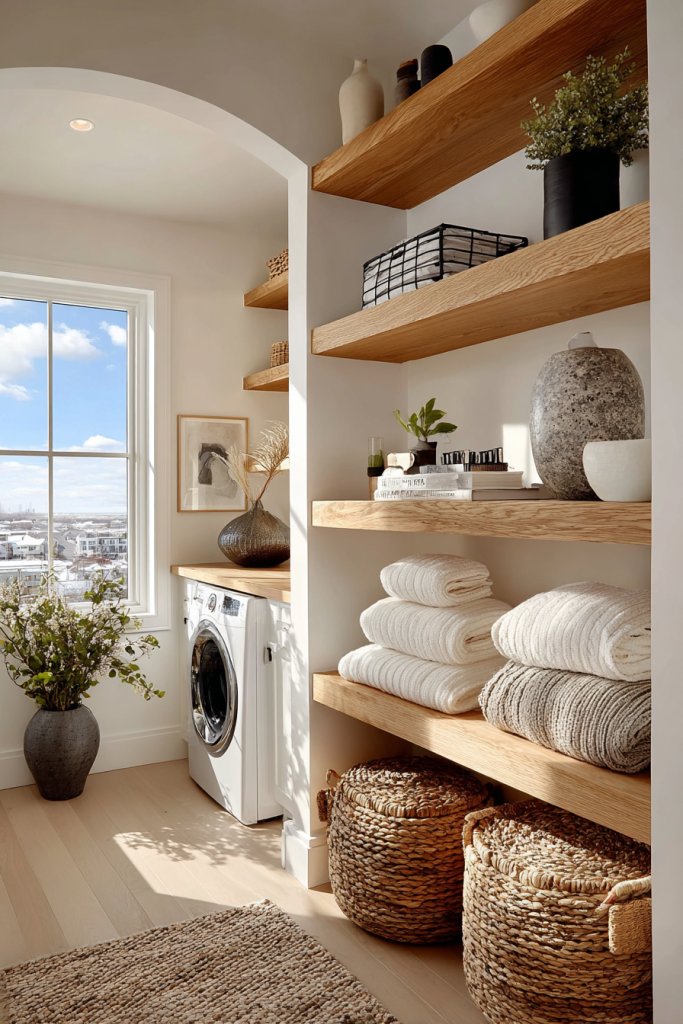
Small laundry rooms often feel cluttered and cramped, making it tough to find space for everyday essentials. Ever wished for a way to keep everything organized without sacrificing precious floor space? Open shelving offers a simple fix that transforms chaos into order. It’s the perfect solution for maximizing storage while keeping your laundry area visually light.
Imagine wall-mounted wooden shelves painted in soft neutral tones, neatly stacked with detergent bottles, folded towels, and baskets. The open design allows you to see everything at a glance, reducing clutter and frustration. Bright LED strip lights underneath the shelves cast a warm glow, highlighting your organized space. The shelves create a clean, airy vibe that makes the room feel larger and more inviting.
You can customize open shelving to match your style—go rustic with reclaimed wood, sleek with glass, or minimalist with painted MDF. Use colorful baskets or decorative boxes to add personality, or keep it monochrome for a modern look. Adjustable shelves make it easy to accommodate taller bottles or bulky items. Seasonal decor, like a cozy throw blanket or decorative storage jars, can refresh the space anytime.
Start by measuring your wall space to determine the shelf length. Choose sturdy brackets and durable shelves that can handle the weight of your supplies. Install the brackets at appropriate heights for easy access, ensuring level placement. Secure the shelves into wall studs for safety and longevity. Organize items from frequently used detergents to lesser-needed supplies, arranging them for quick grab-and-go access. Finish with a coat of paint or stain to match your decor.
Add small labels to baskets or bins for quick identification, or incorporate decorative stickers for a playful touch. Integrate a few sculptural elements like ceramic jars or textured storage boxes to elevate the aesthetic. Use magnets or hooks on the sides of shelves for hanging small tools or accessories. Personal touches like a soft fabric liner on the shelves can also add a cozy, refined feel.
Open shelving not only boosts functionality but also gives your laundry room a fresh, modern vibe. It’s an easy upgrade that anyone can do—no fancy skills required. With a little planning, you’ll create an organized oasis that makes laundry day less of a chore and more of a breeze.
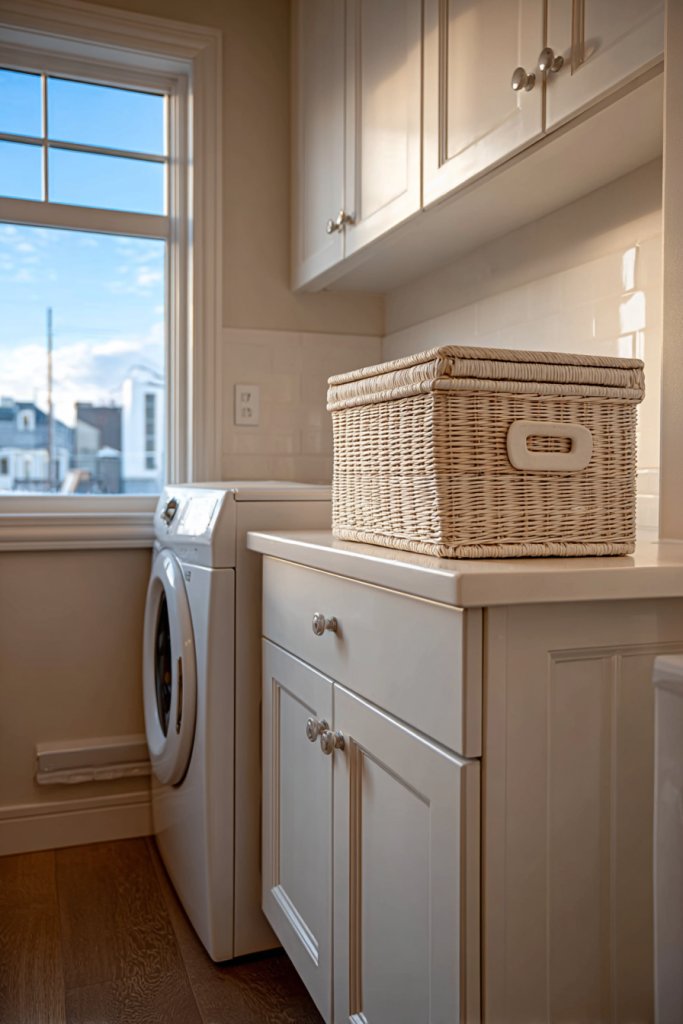
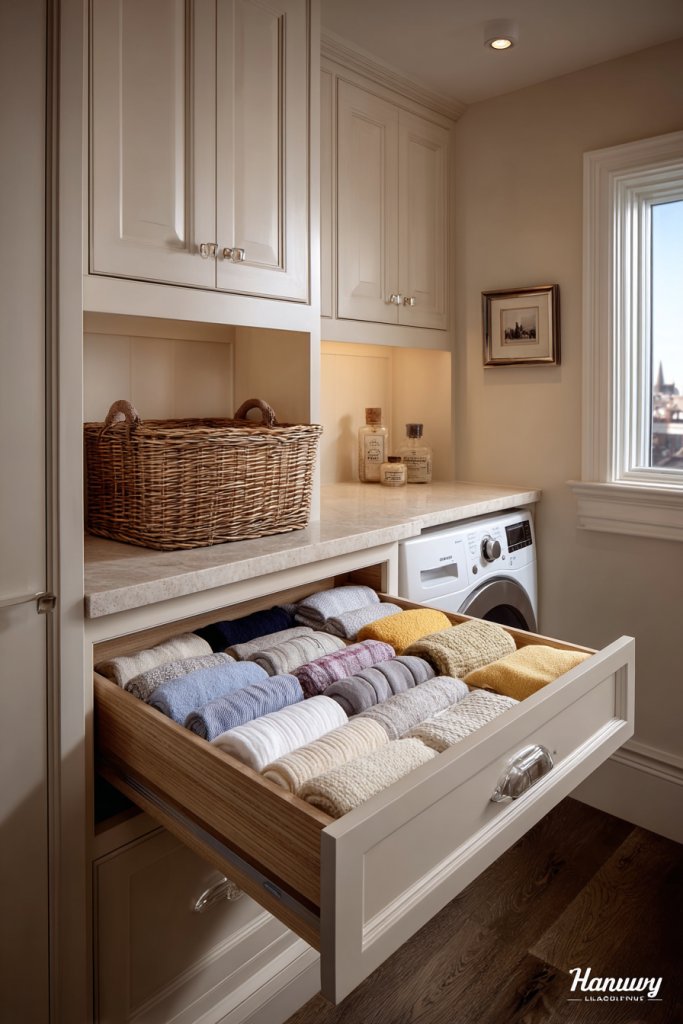
2. Install a Compact Fold-Down Countertop
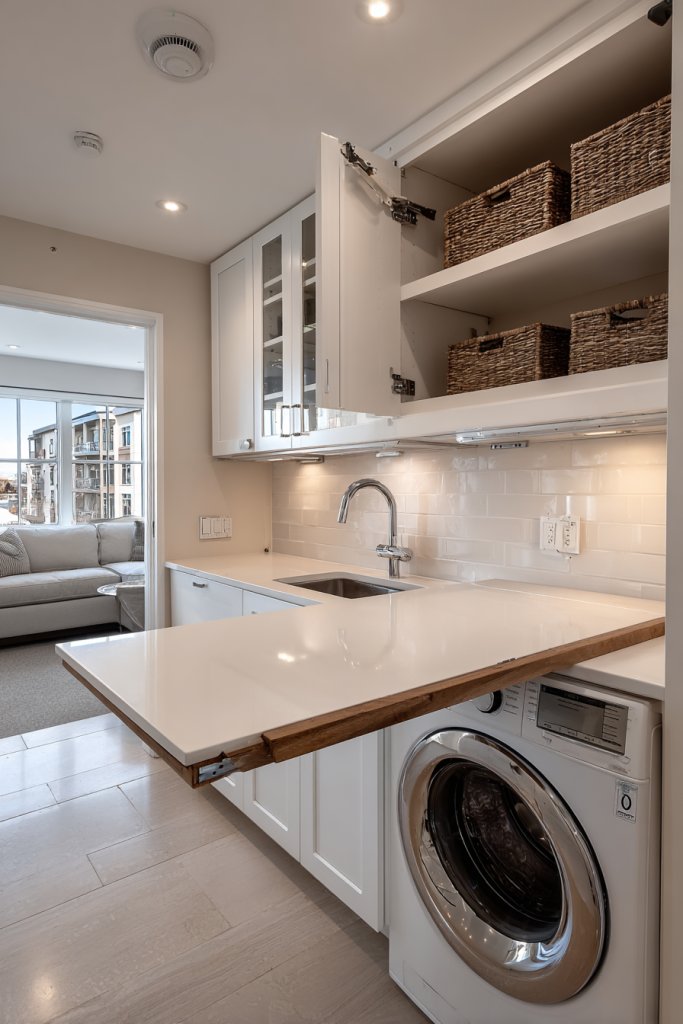
Limited space in small laundry rooms often leaves you craving a dedicated spot for folding clothes or sorting laundry. The struggle is real when you’re balancing appliances and storage with no surface to work on. A fold-down countertop offers a smart, space-saving solution that instantly adds a functional workspace without sacrificing room.
Picture a sleek countertop folded against the wall, made of durable laminate or wood, blending seamlessly into your decor. When needed, it folds down to reveal a sturdy surface perfect for folding shirts or organizing tiny socks. When not in use, it folds away neatly, leaving the room open and uncluttered. Soft lighting casts gentle shadows over the surface, making it inviting and practical.
Choose a finish that complements your overall aesthetic—think matte black metal brackets with a walnut top for a rustic vibe, or glossy white for a minimalist look. Smaller fold-down models are perfect for tight spaces, while larger versions can handle bulkier tasks. You can also incorporate a fold-out drying rack or extendable surface for additional utility during busy laundry days.
Begin by selecting a durable, easy-clean material like laminate or sealed wood for the countertop. Mount heavy-duty hinges on a sturdy wall bracket system, ensuring it can support the weight of folded laundry or a stack of towels. Install the hinges at a height that allows comfortable use, typically around waist level. Test the mechanism for smooth operation and stability before use. When open, the surface provides a reliable workspace; when closed, it vanishes into the wall, freeing up space.
Add a small edge lip or guard to prevent items from slipping off. Decorate the fold-down surface with a patterned placemat or a textured cloth to make folding more enjoyable. Consider integrating a magnetic strip or hooks nearby for hanging small accessories or clothespins. Personalize the space further with decals or labels that make the fold-away surface feel custom and welcoming.
A fold-down countertop turns a tiny laundry nook into a versatile workspace, helping you stay organized and efficient. It’s a practical project that adds value without cluttering your room. Once installed, it becomes a go-to feature that simplifies laundry routines and boosts your room’s overall functionality.
3. Use Slim Rolling Carts for Flexible Storage
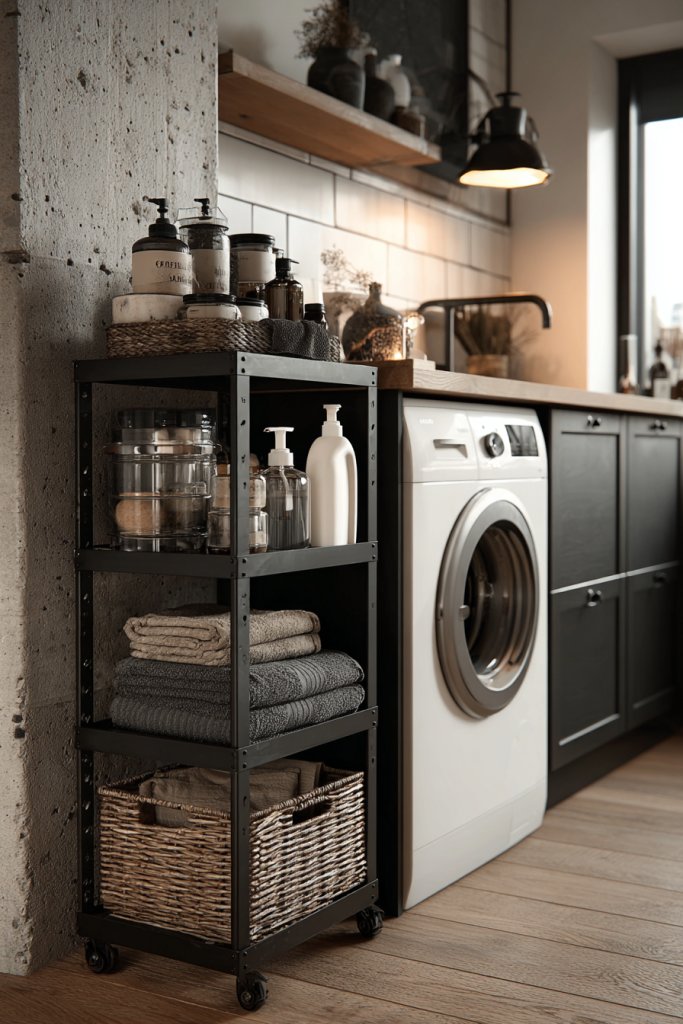
Ever wish you had extra storage that moves with you? Small laundry rooms often lack space for bulky cabinets, but a slim rolling cart can be your secret weapon. It’s perfect for storing cleaning supplies, linens, or even laundry essentials that need to be easily accessible. Plus, the mobility means you can move it to where you need it most—no heavy lifting required.
Visualize a narrow metal or plastic cart with three or four tiers, tucked into a corner or beside your washer. The wheels glide smoothly over tile or wood floors, making reorganization a breeze. The cart is filled with colorful bottles, soft cloths, and small cleaning tools, all neatly arranged. Its sleek profile fits snugly into tight spaces, freeing up your main area for other tasks.
Select a cart in a finish that complements your decor—metal with a matte finish for an industrial vibe, or pastel-colored plastic for a fun, fresh look. Use stacking bins or baskets for different categories of supplies. During holidays or seasons, switch out the contents or colors for a personalized touch. If space allows, add hooks or clips for hanging mop heads or reusable bags.
Start by measuring the available space to choose a cart that fits comfortably. Opt for a lightweight, durable model with lockable wheels for stability. Fill each tier with specific items—detergents on one, tools on another, and fresh linens in the middle. Keep frequently used items at the top for quick access. Regularly clean and reorganize to maintain efficiency, and consider stacking smaller units for added storage.
Label each basket or shelf to help everyone in the household find what they need fast. Dress up the cart with colorful contact paper or decals for a fun look. Attach small hooks or clips for extra hanging storage. Personal touches like a mini chalkboard for notes or a small tray for spare clothespins make it both functional and charming.
A slim rolling cart adds flexibility and efficiency without cluttering your tiny laundry space. It’s a simple, affordable upgrade that can be tailored to your needs. Once in place, it’ll become your go-to for quick cleanups or organizing during laundry marathons, making the whole process smoother and more enjoyable.
4. Incorporate Wall-Mounted Hampers
Cluttering the floor with overflowing hampers makes small laundry rooms feel chaotic and cramped. If you’re tired of tripping over laundry baskets or hiding them behind doors, a wall-mounted hamper is your answer. It keeps dirty clothes neatly contained and out of sight, freeing up precious floor space.
Imagine a sleek, wall-mounted unit with multiple compartments, made of wood or painted MDF, positioned near your laundry machines. The hampers hang vertically, with soft fabric liners or rigid bins in neutral shades. When filled, they look tidy and intentionally designed; when empty, they fold flat against the wall, almost invisible. The setup creates a streamlined, organized look that feels modern and calm.
Choose a style that matches your decor—minimalist with clean lines, rustic with distressed wood, or colorful with bright fabrics. For larger families, opt for multiple compartments to separate whites, colors, and delicates. Install the hampers at comfortable heights to avoid bending or awkward lifting. During different seasons, swap liners or add decorative touches to keep the look fresh.
Select a wall sturdy enough to support the weight of multiple hampers. Use anchors and secure brackets designed for your wall type—drywall, brick, or wood. Mount the units at a height that allows easy access for all users, typically waist-level. Attach fabric liners or baskets, and label compartments if needed. Regularly empty and clean the hampers to maintain hygiene and prevent odors.
Add color-coordinated liners or patterned fabrics to match your laundry room decor. Incorporate small hooks or clips nearby for hanging reusable bags or laundry accessories. Use decorative labels or chalkboard tags to identify each compartment. Personal touches like monogrammed liners or custom paint can make your wall-mounted hampers uniquely yours.
Wall-mounted hampers turn a cluttered mess into a sleek, functional feature. They are easy to install and maintain, making laundry chores less of a hassle. With a little creativity, you’ll keep your laundry space neat and stylish, boosting your motivation to tackle laundry day every week.
5. Choose Light, Bright Paint Colors to Enhance Space
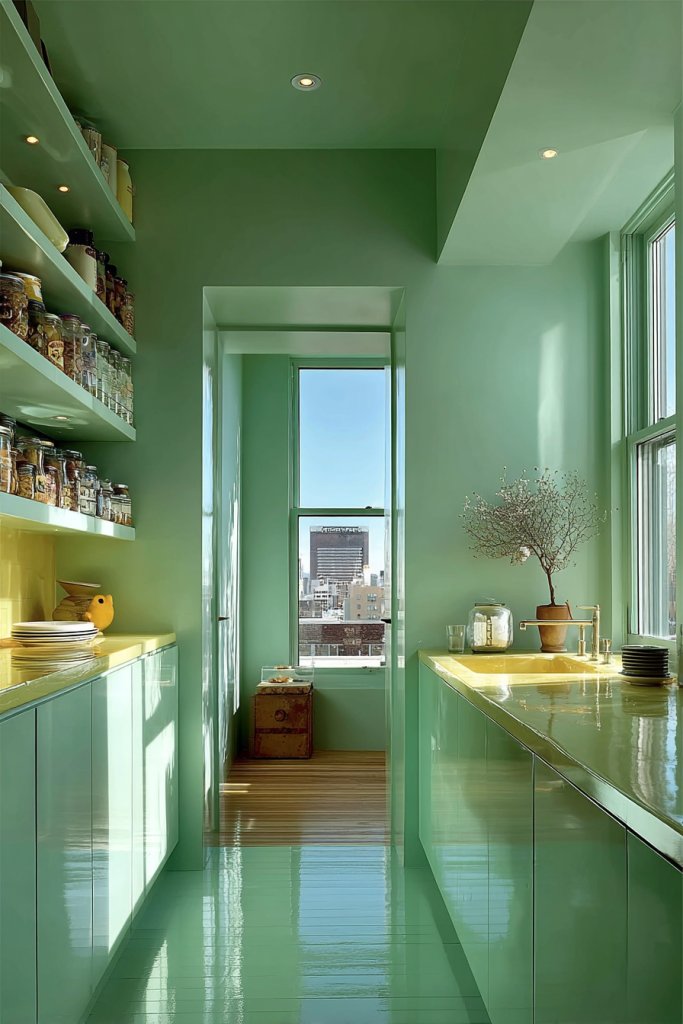
Dark, dull walls can make even the biggest rooms feel tiny and uninviting. In small laundry spaces, color choice is crucial for creating an open, airy vibe. Light and bright paint colors reflect more light, instantly making your laundry room feel larger and more welcoming. It’s an easy fix that can dramatically change your mood every laundry day.
Picture walls painted in soft shades of ivory, blush, or pale blue, bouncing sunlight around the room. The painted surfaces are smooth and matte, reducing glare while enhancing the sense of space. Bright walls are complemented by minimalistic shelving and sleek appliances, creating a fresh, clean look. The room feels more expansive, almost like a breath of fresh air every time you step inside.
Opt for popular neutrals like warm beiges or cool pastels, depending on your style. For a more energetic look, incorporate subtle accent walls or painted stripes. If your laundry room receives little natural light, consider high-gloss or semi-gloss finishes to reflect even more light. Seasonal decor, like cozy textiles or bright accessories, can add personality without overwhelming the space.
Choose high-quality paint with low VOCs for a healthier environment. Prepare your walls by cleaning and patching any imperfections. Use painter’s tape to create crisp lines and protect adjacent areas. Apply two coats for even coverage, allowing proper drying time between coats. Finish with a semi-gloss or eggshell top coat to balance durability and appearance. Repaint as needed to keep the space fresh.
Add colorful organizational bins or textured textiles to complement the wall color. Incorporate a wall-mounted message board or a small chalkboard for notes, which pops against the bright background. Use removable decals or stencils for playful patterns that can be changed seasonally. Personal touches like a framed quote or motivational phrase can boost your laundry mood.
Light, bright walls are a simple way to make your laundry room feel more spacious and cheerful. They reflect your personality and style, making chores less of a bore. With a fresh coat of paint, you can turn a dull space into your favorite corner of the house—who knew a little color could go so far?
6. Add Under-Cabinet Lighting for Task Visibility

Struggling to see what you’re doing in a dim laundry room? Poor lighting can turn simple tasks into frustrating guessing games. Better illumination is key to efficiency and safety, especially when sorting or folding. Under-cabinet lighting provides focused light exactly where you need it, making laundry chores quicker and less stressful.
Imagine sleek LED strips installed beneath your upper cabinets, casting bright, even light onto your countertop. The glow highlights your workspace and reduces shadows, creating a well-lit zone for folding and sorting. The lighting is unobtrusive but powerful, transforming a dark corner into a functional hub. The soft, white light adds a modern touch and enhances the overall ambiance.
Choose from different lighting options—warm white for a cozy feel or cool white for a crisp, professional look. Flexible LED strips with dimmable features let you adjust brightness based on your needs. For a more decorative approach, consider color-changing LED options for special occasions. Mount them under cabinets, shelves, or along the wall edge for a customized setup.
Start by measuring the length of your cabinets to select compatible LED strips. Use a power supply with sufficient wattage and secure the strips firmly with adhesive backing. Connect the wiring neatly along the cabinet underside, hiding cords behind molding or trim. Test the lights before final installation to ensure even coverage. Consider adding a switch or remote control for convenience.
Pair with reflective surfaces like glossy cabinets or metallic hardware to amplify the light. Incorporate smart lighting controls for voice activation or app-based adjustments. Use diffusers or frosted covers to soften the glow and reduce glare. Personalize with color options or preset lighting scenes for different laundry tasks.
Adding under-cabinet lighting elevates your laundry space into a bright, efficient station. It’s an upgrade that costs little but yields big results. You’ll feel more confident tackling laundry chores, knowing every fold and sort is well-lit and clear—no more squinting or accidental spills.
7. Use Stylish Baskets and Bins for Organization
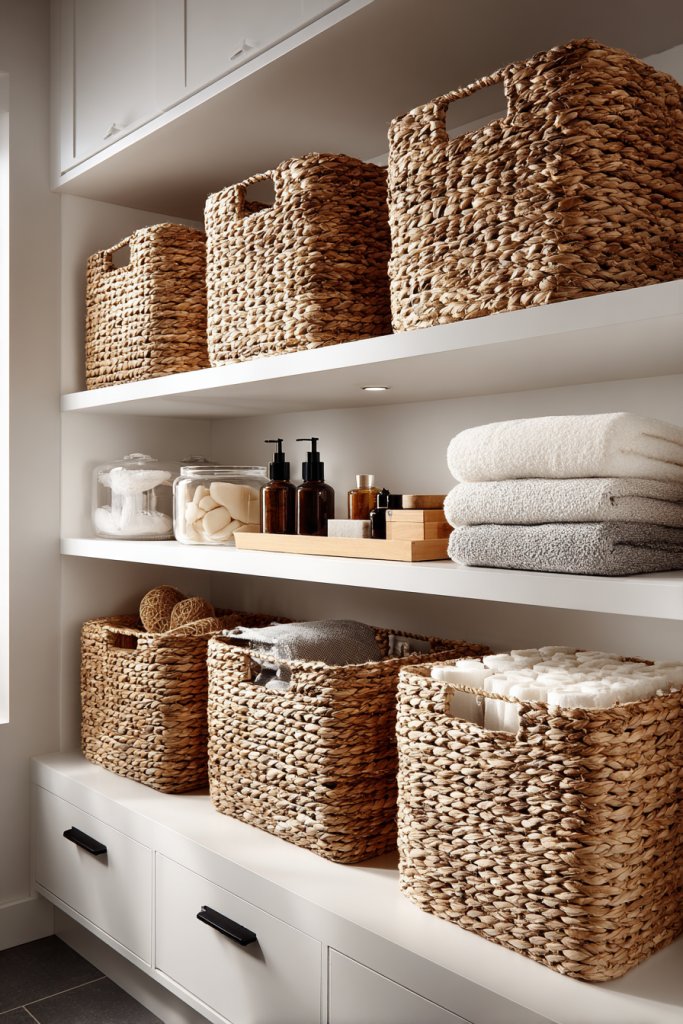
Cluttered laundry rooms can quickly turn into chaos, especially when supplies and clothes are tossed in haphazardly. Stylish baskets and bins offer a practical way to corral clutter while adding a decorative touch. They keep everything in its place and make your laundry space look intentional and tidy.
Picture uniform woven baskets in natural tones, stacked neatly on open shelves or placed beside the machines. Each basket is labeled with categories like ‘delicates,’ ‘clean,’ or ‘dirty,’ making organization intuitive. The textured surface adds warmth and visual interest, contrasting with sleek appliances. When filled, these baskets create a cohesive, curated look that’s both functional and stylish.
Choose baskets in materials that suit your decor—rattan, wire, fabric, or plastic. Use color coding or patterns to match your theme, whether boho, modern, or farmhouse. For small spaces, stackable or collapsible bins work best, saving space when not in use. Seasonal liners or decorative fabric covers can also refresh the look throughout the year.
Select durable, easy-to-clean baskets with handles for portability. Organize by purpose—one for laundry, another for accessories or cleaning tools. Place them on open shelves, inside cabinets, or on top of washer/dryer units. Label each container with tags or stickers for quick identification. Regularly sort and refresh contents to maintain order and style.
Customize baskets with fabric liners, paint, or decorative stickers. Incorporate small decorative charms or tags to add personality. Coordinate basket colors with wall paint or accessories for a harmonious look. Use a combination of open and concealed storage to keep the space looking neat yet accessible.
Stylish baskets turn clutter into curated decor, making laundry chores more pleasant. They’re versatile, affordable, and easy to change as your style evolves. Once you see how a few coordinated bins can elevate the entire room, you’ll wonder why you didn’t do it sooner.
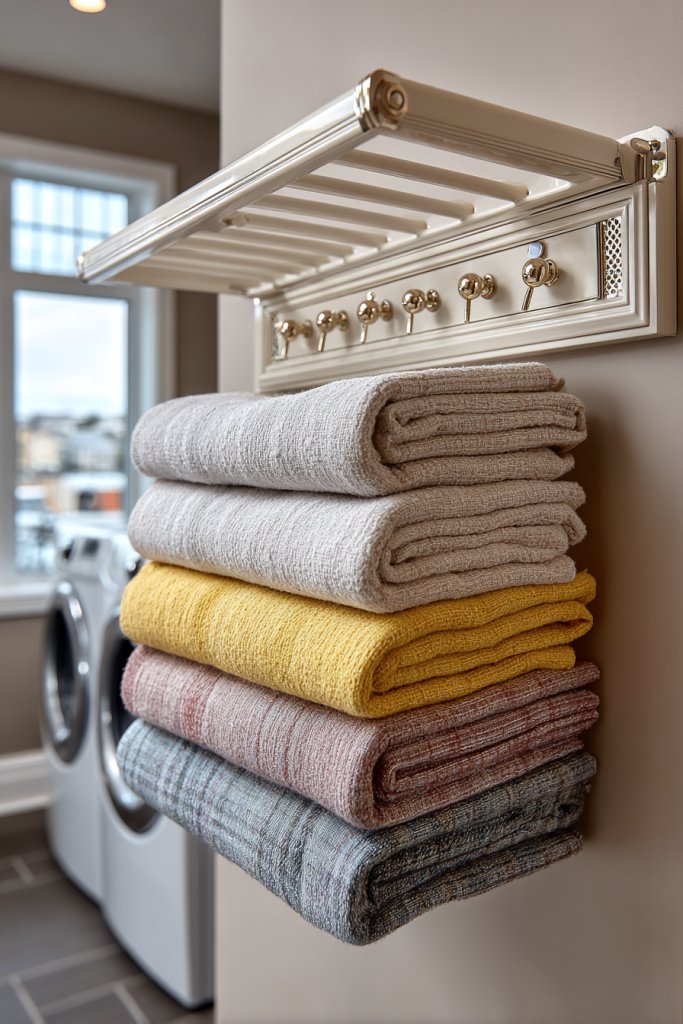
8. Incorporate a Slimline Hanging Rod for Delicates
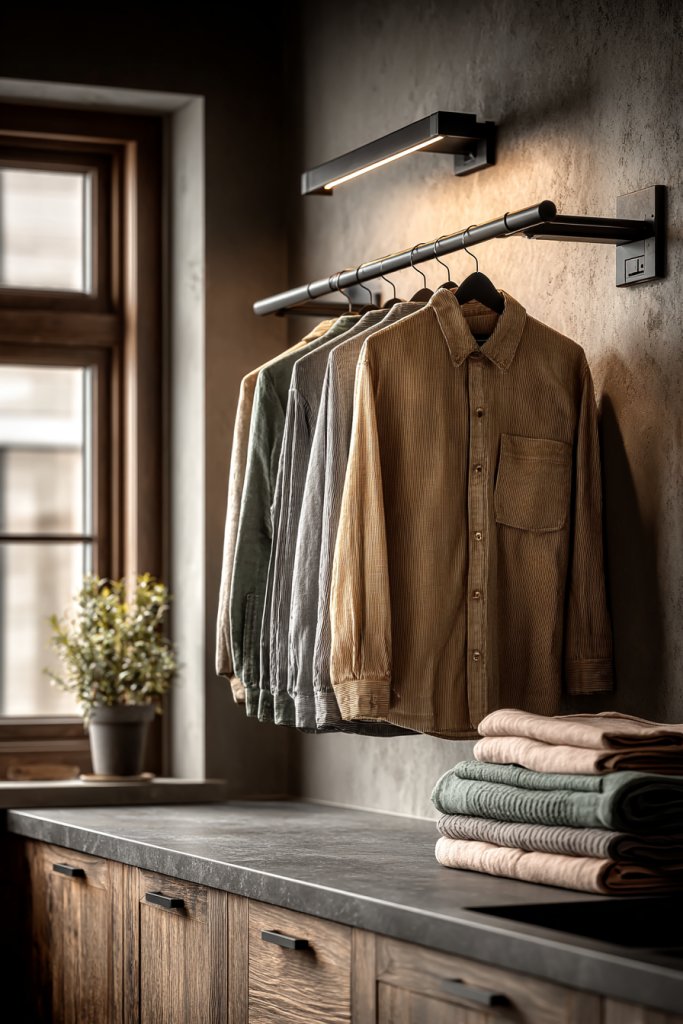
Draping delicate clothes over chairs or shower rods isn’t just inefficient—it’s also damaging to fabrics. Small laundry rooms need a dedicated space for air-drying without cluttering the main area. A slimline hanging rod offers an elegant, space-saving solution for drying or hanging garments that require special care.
Visualize a discreet, metal or wooden rod mounted just below cabinets or along a wall corner. Lightweight, delicate items like silk blouses or lace underwear hang gently from clips or thin hangers. The rod takes up minimal space but makes a big difference in functionality. The soft fabric of clothes sways gently in the breeze, adding a peaceful, organized vibe.
Opt for a sleek, stainless steel rod for a modern look, or a painted wooden dowel for a cozy feel. Adjustable or extendable rods fit various spaces, from tight corners to wider areas. Install with brackets or hooks that blend into your wall color, keeping the look clean. During different seasons, switch between hanging delicate garments or lightweight towels.
Measure your available space and choose a rod length that fits comfortably without crowding. Mount brackets into wall studs or use wall anchors for stability. Ensure the height allows easy access and prevents clothes from dragging on the floor. Use clips or hangers suited for delicate fabrics to prevent stretching or damage. Regularly clean the rod and check brackets for safety.
Incorporate decorative touches like a painted or patterned rod to match your decor. Add small hooks or clips for accessories or additional hanging options. Use colorful or textured hangers to bring a playful element. Label the space for dedicated drying or airing, making it simple to maintain.
A slim hanging rod is a simple, effective upgrade that elevates your laundry routine. It’s a space-efficient way to care for delicate items properly. With minimal effort, you create a functional, organized laundry nook that makes every task feel more manageable.
9. Create a Dedicated Spot for Drying Clothes
Air-drying clothes inside a small laundry room often feels like a cluttered afterthought. Without a designated area, clothes can end up draped over furniture or stuffed into corners. Creating a dedicated drying space keeps your laundry routine neat and prevents your room from feeling overwhelmed.
Imagine a retractable clothesline installed along the ceiling or a wall-mounted drying rack that folds flat when not in use. Delicate garments hang gently, swaying in the breeze, while neatly folded laundry waits nearby. The space stays organized, with everything having its place, and the room feels more open and functional. The drying area blends seamlessly into the room’s design while serving a critical purpose.
Choose retractable lines that can extend across the room or a wall-mounted rack with multiple bars for different types of clothing. Use moisture-resistant materials that withstand humidity, and incorporate colorful or patterned clothespins for fun accents. Seasonal adjustments, like adding a fold-out drying rack or portable clothesline, make the space adaptable to changing needs.
Identify a wall or ceiling spot with enough clearance for hanging clothes without blocking access. Mount retractable lines or racks securely to wall studs or ceiling joists. Test the weight capacity before hanging heavy items. Keep the area well-ventilated and consider adding a small fan or dehumidifier nearby for faster drying. Regularly clean the lines and hardware to prevent mold or mildew.
Decorate the drying space with colorful hooks or clips, and add a small, decorative shelf nearby for supplies. Use patterned or bright clothespins to add a cheerful touch. Label the drying zone for different clothing types or special garments. Incorporate a foldable or portable drying rack that can be stored away when not needed.
Designating a specific drying spot keeps your laundry space clean and efficient. It eliminates clutter and makes air-drying a natural part of your routine. Once set up, you’ll enjoy the simplicity and effectiveness of a dedicated drying zone—making laundry day feel less like a chore and more like a breeze.
10. Opt for Multi-Purpose Fixtures
Limited space calls for clever solutions that do more with less. Multi-purpose fixtures combine functions to save space and add convenience. Imagine a washer-dryer combo with built-in storage or a countertop that doubles as a folding station—these are game changers for small laundry rooms. They keep clutter at bay while maximizing utility.
Envision a sleek all-in-one washer-dryer unit nestled into a custom cabinet with hidden compartments. A fold-over countertop extends from the unit, providing a workspace for folding or sorting. The entire setup maintains a minimalist aesthetic, with clean lines and integrated handles. The seamless design makes the room feel uncluttered and efficient, perfect for compact spaces.
Choose combo units with modern finishes—matte black, white, or stainless steel—to match your decor. Incorporate a pull-out drying rack or a fold-down ironing board within the cabinetry for added versatility. Modular storage solutions can be integrated to keep detergents and accessories organized nearby. Adapt the layout to your specific space constraints, whether it’s a tight corner or a narrow wall.
Select a compact, energy-efficient combo unit suitable for your space and household needs. Measure carefully to ensure proper fit and ventilation. Install the unit on a level, reinforced surface, and connect it to water and electrical supplies following manufacturer instructions. Incorporate a sturdy countertop or foldable surface for folding clothes, and add storage drawers or cabinets underneath for supplies. Test all functions before regular use.
Decorate the cabinetry with hardware that complements your style—brushed nickel, matte black, or colorful handles. Install pull-out shelves or baskets inside for easy access to detergents and cleaning tools. Use labels or color-coded containers to streamline your laundry routine. Add a small fold-out table or extendable surface for extra work space during busy days.
Multi-purpose fixtures bring efficiency and style together in small laundry spaces. They reduce the need for multiple appliances and furniture, keeping your room open and functional. Once you see how these fixtures streamline your chores, laundry day becomes less of a hassle and more of a manageable task.
11. Install a Magnetic or Pegboard Wall for Tools
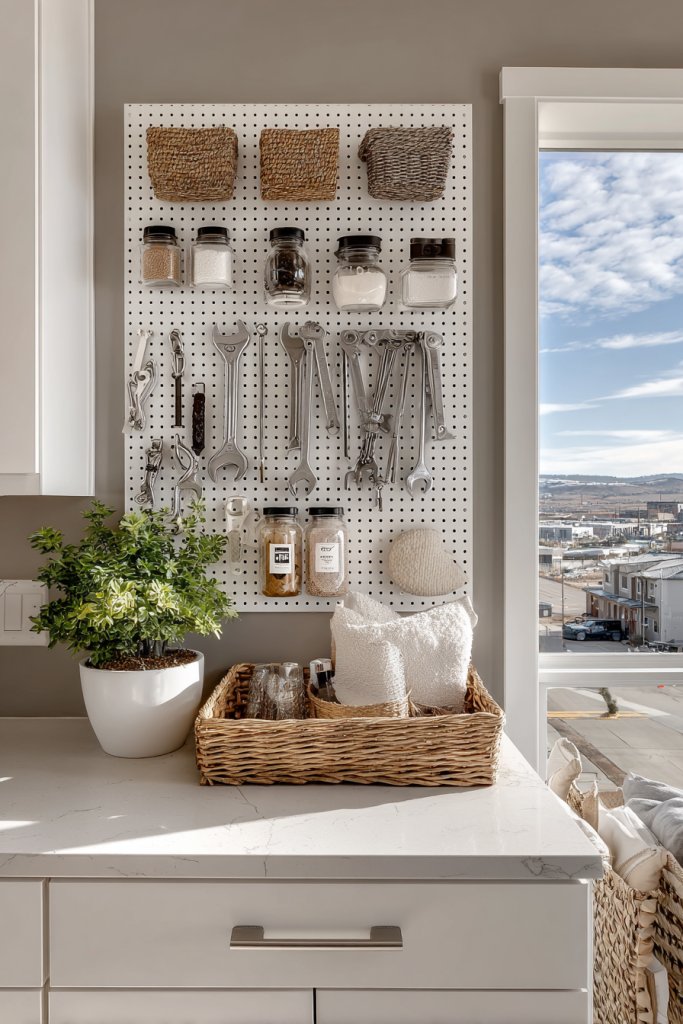
Cluttered countertops and drawers filled with small laundry tools can slow you down and create chaos. A dedicated wall space for tools and accessories keeps everything visible and within reach. Magnetic boards or pegboards are perfect for organizing clothespins, brushes, and small cleaning supplies—saving space and time.
Picture a sturdy metal magnetic strip or a perforated pegboard mounted above your work area. Small hooks hold brushes, spray bottles, and clothespins, all neatly arranged. The surface is painted in a bright, cheerful color to add a pop of personality. Everything has a designated spot, and nothing is buried in drawers or cluttered on counters. The space looks tidy, functional, and thoughtfully designed.
Choose between a classic pegboard for a versatile look or a sleek magnetic board for a modern aesthetic. Customize with colorful hooks, clips, or containers that match your decor. For added style, incorporate decorative elements like patterned washi tape or painted frames around the board. Adjust the layout seasonally or when new tools are added for a fresh look.
Mount the board securely into wall studs or anchors, ensuring it can hold the weight of your tools. Arrange hooks or containers for different categories—detergents, clothespins, brushes, etc. Keep frequently used items at eye level for quick access. Regularly check and reorganize to maintain efficiency. Use labels or color coding to help everyone in the household find what they need.
Decorate the board with colorful stickers, labels, or small decorative elements to match your style. Add a small shelf or tray for spare clothespins or small accessories. Incorporate a magnetic strip for metal tools or clips. Personal touches like custom paint or decals make the organization system uniquely yours.
A magnetic or pegboard wall keeps small tools organized and visible, reducing clutter and saving time. It’s an inexpensive, customizable upgrade that boosts your laundry room’s functionality. Once in place, you’ll find laundry tasks easier, faster, and more enjoyable—making chores less of a chore.
12. Use Light-Reflecting Mirrors to Open Up the Room
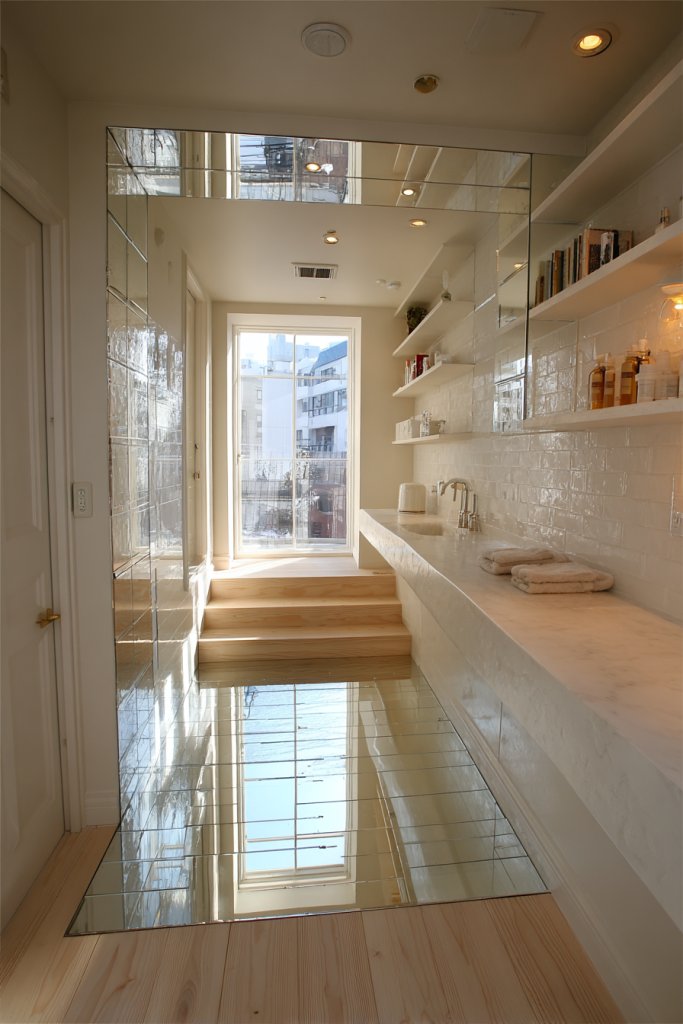
Small laundry rooms often feel cramped and confined, making the space seem even smaller. Mirrors are a simple trick to create the illusion of more space and reflect light to brighten the room. They’re an affordable, stylish way to instantly open up your laundry area and boost its visual appeal.
Envision a sleek, framed mirror mounted on the wall opposite the entrance. It reflects the entire room, doubling the visual depth and bouncing natural or artificial light around. The mirror’s surface is spotless, creating a clean, modern look that complements your decor. Small details like a textured frame or decorative edging add personality while enhancing the room’s perceived size.
Choose a mirror in a size that fits your space—full-length for a dramatic effect or a smaller, decorative piece for subtle enhancement. Use frames that match your style—metal, wood, or minimalist frameless designs. Place the mirror strategically near the door or above your folding station to maximize its impact. Change up the placement seasonally for fresh visual interest.
Select a sturdy wall location that can support the weight of the mirror. Secure the mirror with appropriate wall anchors or brackets, ensuring it’s level and stable. Clean the mirror’s surface regularly for a clear reflection. Pair with adequate lighting to amplify the reflective effect. Avoid placing the mirror where it might be prone to damage or obstructed view.
Decorate the frame with paint, decals, or metallic accents to match your room’s style. Use LED or accent lighting nearby to enhance reflection and brightness. Combine with other reflective surfaces like glass jars or glossy cabinets for a layered look. Personalize with decorative stickers or etchings on the mirror’s edge for a unique touch.
Mirrors are an effortless way to make your laundry room appear larger and more inviting. They add a touch of elegance and practicality, making daily chores feel less overwhelming. With a well-placed mirror, your laundry space becomes brighter, more open, and definitely more stylish—no renovation needed.
13. Incorporate a Fold-Out Ironing Board
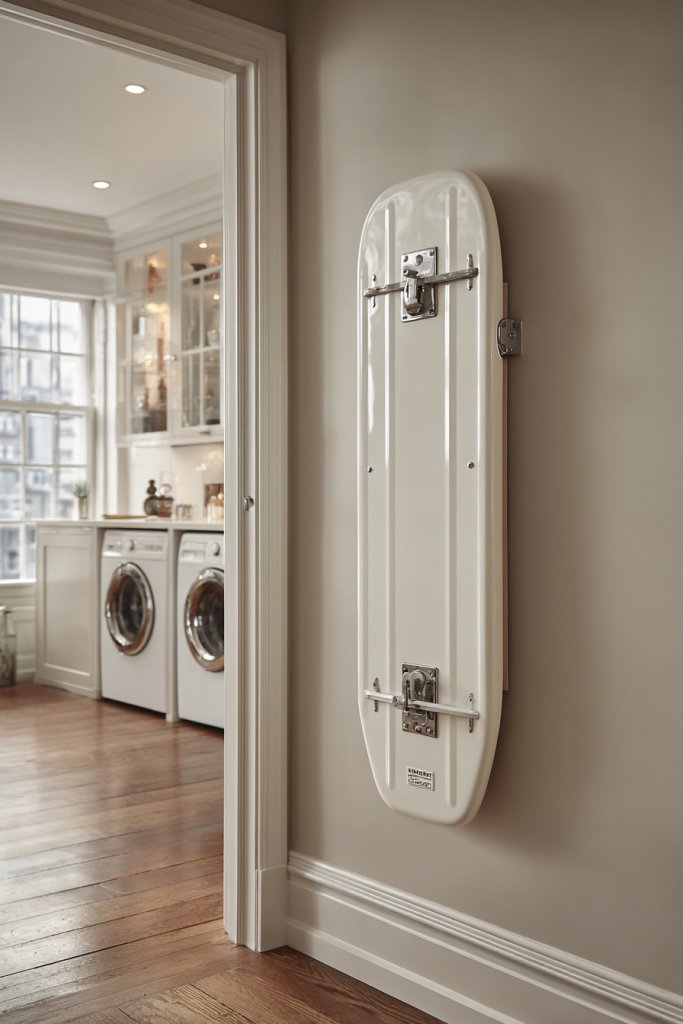
Cluttering up your laundry space with a bulky ironing board can make chores feel overwhelming. Small rooms need smart solutions that hide away when not in use. A fold-out ironing board offers a space-saving, convenient way to keep your ironing station tidy and accessible, all without sacrificing precious space.
Imagine a sleek, wall-mounted panel that unfolds to reveal a sturdy ironing surface when needed. It’s tucked into a cabinet or closet, blending seamlessly with your decor. When not in use, it folds neatly back, almost invisible. The smooth, matte finish of the panel complements your wall color, creating a minimalist, clutter-free look. Ironing becomes a quick, hassle-free task in a clean, organized space.
Choose a fold-out board with a durable, heat-resistant surface—metal, wood, or composite. Opt for a design that matches your room’s style—sleek and modern or more traditional with decorative accents. Install with sturdy hinges and lock mechanisms to ensure safety and stability. For added convenience, include a small nearby shelf or hook for pressing accessories.
Measure the available wall space and select a fold-out model that fits comfortably. Mount the unit into wall studs or use heavy-duty anchors for stability. Test the unfolding mechanism to ensure smooth operation and safety. Keep the surrounding area clear of obstacles. Regularly clean and inspect the hinges and surface for wear or damage.
Decorate the panel with a fresh coat of paint or decorative decals that match your room’s style. Add a small, magnetic or adhesive strip nearby for pressing cloths or small tools. Use a cover or padded surface for added comfort and aesthetic appeal. Personal touches like a decorative trim or custom hardware make it uniquely yours.
A fold-out ironing board turns a cluttered, hidden chore into a sleek, efficient task. It saves space and keeps your laundry room looking clean and modern. Once installed, ironing becomes a quick, seamless part of your routine, making laundry day less of a hassle.
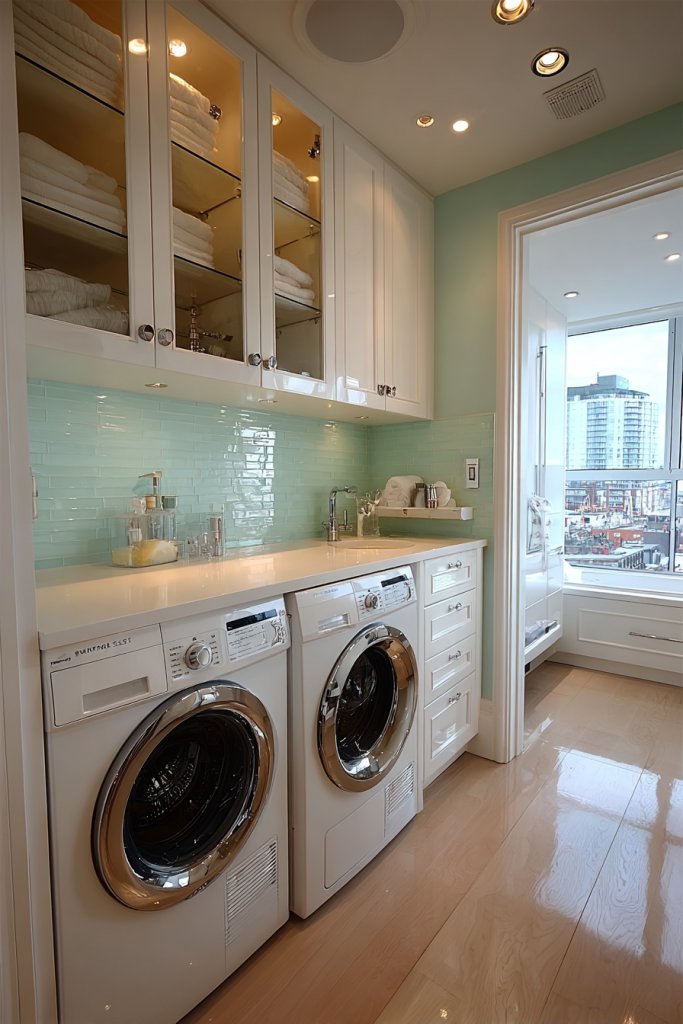
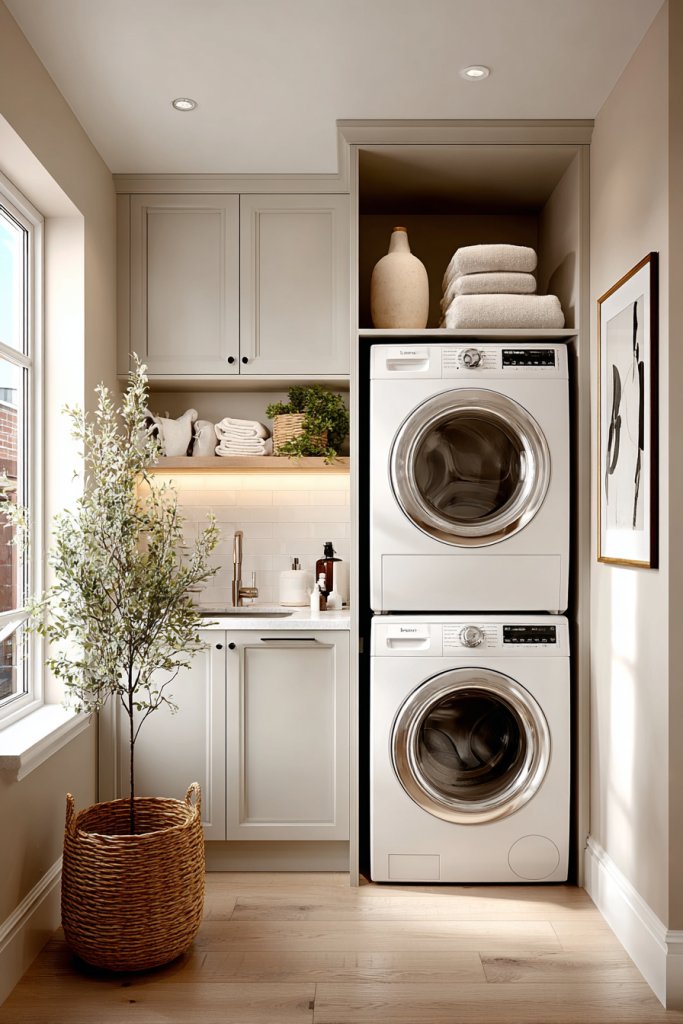
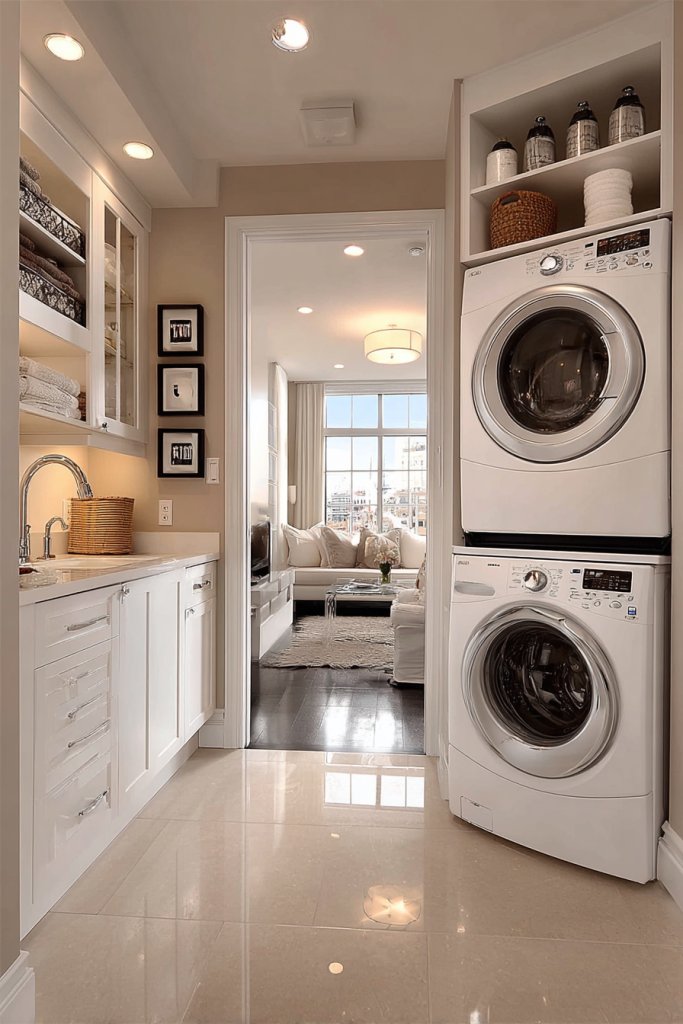
14. Choose Compact, Front-Loading Appliances
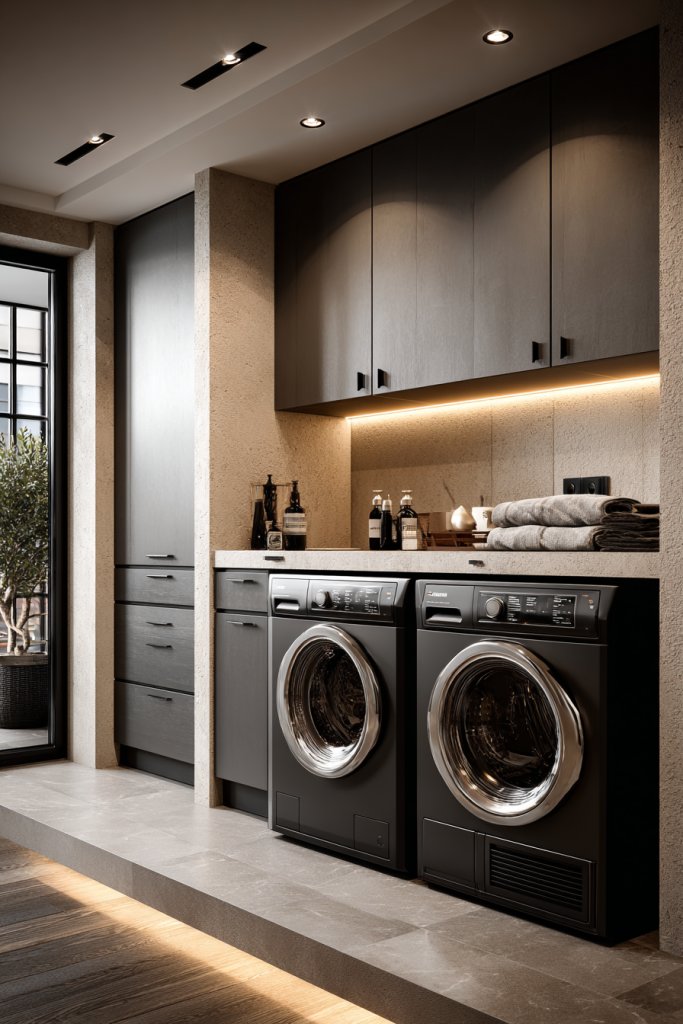
Big, bulky appliances can dominate a tiny laundry room, making the space feel even smaller. Compact, front-loading washers and dryers are the perfect solution for maximizing utility without sacrificing style or space. They’re energy-efficient, modern, and designed to fit into tight spots, transforming your laundry routine.
Visualize sleek, stacked laundry machines with a modern finish—stainless steel or matte black—fitting snugly into a custom-built cabinet. The front-loading doors are large and transparent, making it easy to see inside. The compact size frees up space for additional storage, a folding station, or even a small seating nook. The overall look is streamlined, minimal, and space-smart.
Select appliances with matching finishes and energy ratings to optimize performance. For tight spaces, opt for stacked units or slim models specifically designed for small laundry rooms. Pair with built-in cabinetry or open shelving above for a cohesive look. Use fold-down countertops or fold-away drying racks to extend functionality.
Measure your space carefully and choose appliances with dimensions suited to your room. Ensure proper ventilation and plumbing connections before installation. Secure the units to prevent movement during use. Consider stacking kits or pedestals for easier loading and unloading. Adhere to manufacturer instructions for safe, optimal operation, and test thoroughly before regular use.
Coordinate appliance colors with your cabinetry or wall paint for a harmonious look. Add custom hardware or decals for a personalized touch. Use small, decorative mats or pads underneath to prevent slipping. Incorporate nearby storage solutions for detergents and accessories to keep everything organized.
Compact front-load appliances upgrade your laundry space into a sleek, efficient zone. They save space, cut down on noise, and improve energy use—all while making laundry less of a chore. Once you see how much more functional your room becomes, you’ll wonder why you waited so long to make the switch.
15. Add a Layer of Peel-and-Stick Backsplash

Small laundry rooms can feel dull or uninspired, especially with plain walls and little personality. A peel-and-stick backsplash adds instant color, texture, and style—without the mess or expense of traditional tiling. It’s a simple way to elevate your space and protect walls from water splashes.
Picture a vibrant, patterned tile or textured mosaic applied behind your washing machine or along a splash zone. The peel-and-stick material features intricate designs or bold colors that brighten the room. It’s easy to install, aligning with your existing wall surface, and creates a striking focal point. The textured surface adds depth, making the small room feel more layered and dynamic.
Choose from a wide range of styles—geometric patterns, floral motifs, or minimalist textures—to match your decor. Opt for waterproof, heat-resistant options for durability. You can even mix and match patterns for a custom look. Seasonal or removable decals allow for quick updates or seasonal refreshes, keeping your space lively.
Clean and dry the wall thoroughly before application. Carefully measure and cut the tiles to fit your space, leaving a small gap for expansion. Peel off the backing and press firmly into place, smoothing out air bubbles with a squeegee or credit card. Seal edges with clear caulk if needed for water resistance. Regularly clean the surface with gentle, non-abrasive cleaners.
Coordinate the backsplash with your wall paint or storage containers for a cohesive look. Use decorative trims or molding to frame the area for a polished finish. Incorporate small labels or decals for a playful touch. Personalize further by choosing patterns that reflect your style—modern, vintage, or eclectic.
A peel-and-stick backsplash is an affordable, DIY-friendly upgrade that instantly transforms your laundry room. It adds personality and protects your walls, making cleaning easier. Once installed, you’ll enjoy a fresh, stylish space that feels more like a home than just a utility room.
16. Use Wall Hooks for Hanging Supplies

Cluttered countertops and overflowing drawers make small laundry rooms feel chaotic and inefficient. Wall hooks are an easy, inexpensive way to keep tools, reusable bags, and accessories off surfaces and within arm’s reach. They’re perfect for keeping your space tidy and ensuring everything has a designated spot.
Imagine a series of sturdy hooks mounted above your work area, each holding mops, brooms, or reusable shopping bags. The hooks are arranged in a clean, organized pattern, painted to blend with your wall color or in a contrasting pop of hue. Items hang neatly, with handles aligned, making it easy to grab and go. The space looks uncluttered and functional, with everything visible and accessible.
Choose from simple metal hooks, decorative ceramic hooks, or colorful plastic options to match your decor. Use different hook sizes and shapes for various items—long hooks for brooms, shorter ones for brushes or towels. Install hooks at different heights to accommodate different tools comfortably. Seasonal or thematic hooks can refresh the look throughout the year.
Identify a sturdy wall or panel where hooks can be securely mounted into studs or wall anchors. Space hooks evenly for balanced weight distribution. Use a level to ensure straight installation. Regularly check the hooks for stability and tighten any loose screws. Keep frequently used tools close by for quick access, and organize items by category for maximum efficiency.
Decorate hooks with colorful grips or paint to add visual interest. Label sections with tags or stickers for different tools or supplies. Add decorative elements like small signs or motifs that match your laundry room theme. Personal touches like a small fabric pouch for loose items or a hanging organizer nearby enhance usability.
Wall hooks are a simple yet effective upgrade that declutters your laundry room instantly. They turn everyday tools into part of your decor while making chores faster and more organized. With everything in its place, laundry day becomes less stressful—more fun, even!
17. Incorporate a Small Wall-Mounted Sink
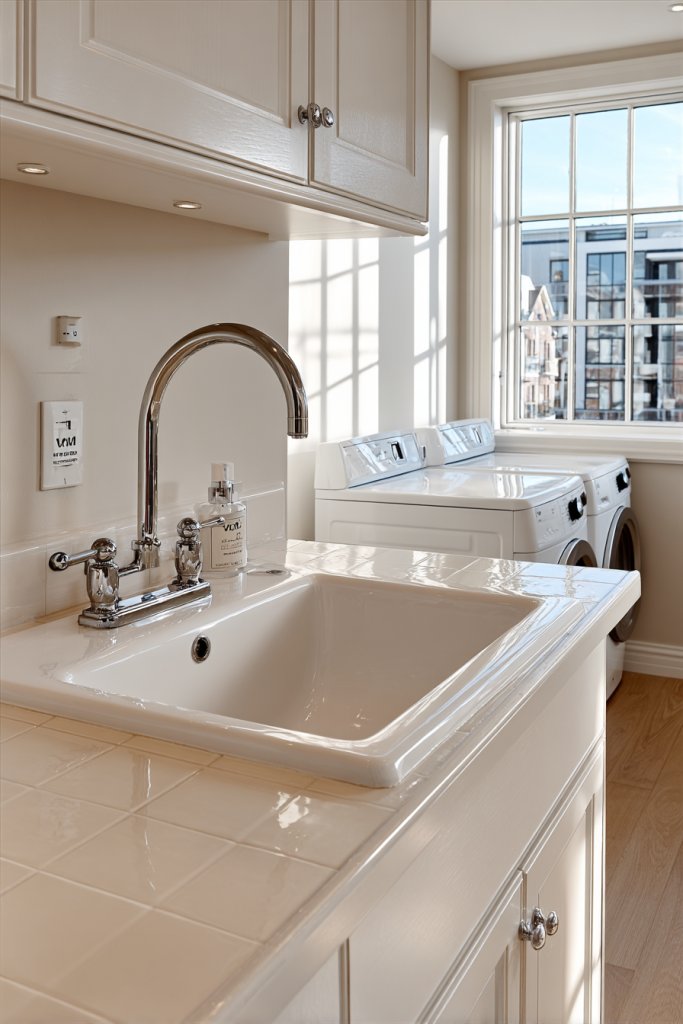
Trying to pre-treat stains or wash delicate items in a tiny laundry room often feels like a hassle. Without a proper sink, you end up making a mess or wasting time running to the kitchen or bathroom. A small wall-mounted sink provides a dedicated space for hand-washing, saving you time and keeping your laundry area tidy.
Imagine a compact, white ceramic or stainless steel sink mounted neatly into a corner or between cabinets. A small faucet with a flexible hose makes rinsing easy, while a compact basin minimizes space usage. The wall behind the sink is protected with a peel-and-stick backsplash or tiles, adding both style and practicality. The sink becomes a functional focal point that enhances your laundry routine.
Choose a wall-mounted sink with integrated storage or a sleek, minimalist design for a modern look. Select materials like porcelain or stainless steel for durability. Pair with a small faucet with a pull-down spray for versatility. Install near existing plumbing or consider portable units if permanent installation isn’t feasible. Use stylish accessories like soap dispensers or small shelves for essentials.
Determine the best wall location with access to plumbing and enough clearance for use. Mount the sink securely into wall studs or anchors, ensuring stability. Connect water supply lines and drainage following manufacturer instructions. Seal around the edges with waterproof sealant or caulk. Regularly clean the sink to prevent buildup and check for leaks or damage.
Add decorative or functional accessories like a soap pump, small towel rack, or organizer nearby. Choose finishes that match your room’s style—matte black, chrome, or white. Use labels or small baskets for supplies stored underneath or nearby. Personalize with decals or paint to match your decor theme, making the sink feel integrated and intentional.
A small wall-mounted sink elevates your laundry space into a more functional, organized zone. It reduces trips to the kitchen or bathroom, streamlining chores. Once installed, it’s a simple upgrade that boosts confidence and makes laundry tasks easier and more enjoyable.
18. Choose Neutral-Tone Cabinets with Hidden Handles
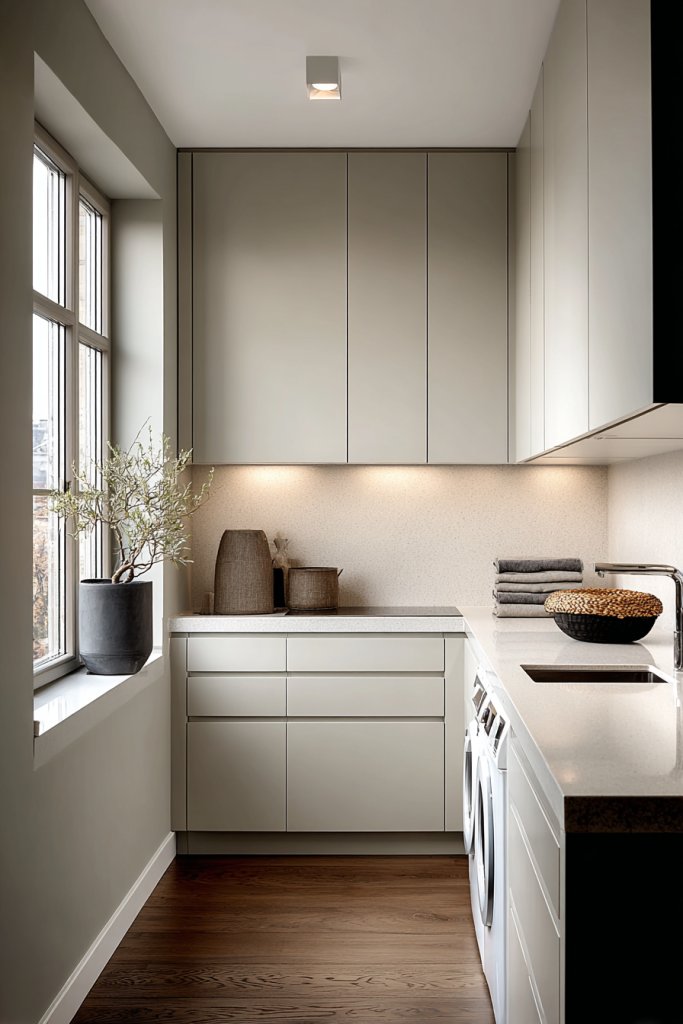
Cluttered, outdated cabinets can make even the smallest laundry room look chaotic. Opting for neutral tones and hidden handles creates a sleek, minimalist look that visually declutters the space. It’s an easy way to update your laundry room, making it feel modern and more spacious.
Imagine smooth, matte-finish cabinets in shades of beige, grey, or white, with push-to-open mechanisms eliminating visible hardware. The seamless fronts reflect light, making the room appear larger. Subtle handleless pulls or touch-latch systems maintain a clean line, while a soft-close feature adds a touch of luxury. The result is a calm, clutter-free aesthetic that feels open and inviting.
Choose cabinets in different sizes and configurations to suit your storage needs. For a cohesive look, match the cabinet color to your wall paint or countertop. Incorporate glass-front doors or open shelving for a touch of visual interest. For seasonal updates, swap out accessories or add decorative trims that complement the neutral tones.
Select high-quality cabinetry with soft-close hinges and durable finishes. Install the units into wall studs or secure with appropriate anchors, ensuring level and sturdy placement. Use a level and proper tools for precise alignment. Seal all edges with caulk or trim for a finished look. Regularly clean and maintain hardware-free surfaces for a sleek appearance.
Add subtle decorative accents like textured cabinet fronts or contrasting countertops. Use labels or small, discrete organizers inside for small items. Incorporate subtle lighting under cabinets to brighten the workspace. Personal touches like a small, decorative mirror or a textured backsplash enhance the minimalist aesthetic.
Neutral, handleless cabinets give your laundry room a modern, clutter-free look that’s easy to maintain. They boost the room’s brightness and create a sense of calm. With a sleek design and smart storage, laundry chores become more efficient and enjoyable—proof that small upgrades make a big difference.
19. Install a Pull-Out Laundry Sorter
Sorting laundry can be a messy, time-consuming task, especially in tiny spaces where everything feels cramped and chaotic. A pull-out laundry sorter offers a sleek, discreet way to categorize clothes right at the source. It keeps your space tidy and simplifies the entire process, making laundry day less of a hassle.
Picture a slim cabinet integrated into your laundry setup, with multiple pull-out compartments labeled for whites, colors, and delicates. When in use, the drawers glide smoothly out, revealing organized sections ready for sorting. When not needed, they tuck neatly away, maintaining a clean, minimalist look. The system blends into your cabinetry for a seamless, clutter-free appearance.
Choose from different configurations—two or three compartments, or even more—depending on your needs. Use durable, easy-to-clean materials like plastic or coated wood. Match the cabinet finish with your existing decor—beige, white, or woodgrain. Consider adding labels or color coding for quick identification. You can also adapt the system for dirty laundry or pre-sorted items.
Measure your available space to select a cabinet width and depth that fit comfortably. Install it into a wall recess or as part of your cabinetry. Use sturdy slides and handles for smooth operation. Label each compartment clearly for efficiency. Regularly empty and clean the bins to prevent odors and maintain organization. Ensure easy access for all household members.
Decorate the front with paint, decals, or textured finishes to match your room’s style. Add small labels or icons for clarity. Incorporate interior dividers or removable bins for flexibility. Personalize with decorative hardware or a contrasting trim around the system. Keep supplies nearby for effortless sorting.
A pull-out sorter streamlines laundry routines and keeps your space looking sharp. It’s an elegant solution that minimizes clutter and maximizes efficiency. Once you see how organized and quick laundry becomes, you’ll wonder why you didn’t add one earlier—small change, big impact.
20. Use Clear Acrylic Containers for Detergents

Messy bottles and containers cluttering your laundry space can make it feel chaotic and uninviting. Clear acrylic containers offer a modern, clean solution that keeps your supplies organized and visible. They’re perfect for reducing clutter and adding a sleek, uniform look to your laundry room.
Visualize a row of transparent containers on open shelves or countertop, filled with powder, liquid detergent, and softener. Their uniform shape and size create a streamlined, cohesive appearance. The clear material allows you to see exactly how much product is left, preventing unexpected runs to the store. The simple, minimalist look complements many decor styles, from industrial to Scandinavian.
Choose containers with airtight lids to keep contents fresh and prevent spills. Mix and match sizes for different products—small for softener, larger for bulk detergent. Decorate the lids with labels or paint for added personality. Store with other organizational tools like scoops, measuring cups, or small brushes to keep everything tidy.
Select durable, shatterproof acrylic containers designed for liquids or powders. Clean the containers thoroughly before filling, and label each with waterproof stickers or paint pens. Arrange them on shelves or a dedicated countertop for easy access. Regularly check and refill to maintain a neat, efficient setup. Wipe down exterior surfaces to keep the look sleek.
Add decorative touches such as colored lids or custom labels for a personalized look. Incorporate small chalkboard or label tags for quick identification. Use stacking or nesting containers to save space and keep the area organized. Coordinate with your room’s color scheme for a harmonious appearance.
Clear acrylic containers make your laundry supplies accessible and stylish, transforming clutter into curated decor. They’re a simple upgrade that improves both function and aesthetics. Once you see how organized and visually appealing your laundry space becomes, laundry chores might just become a little more enjoyable.
21. Incorporate a Small Seating Area
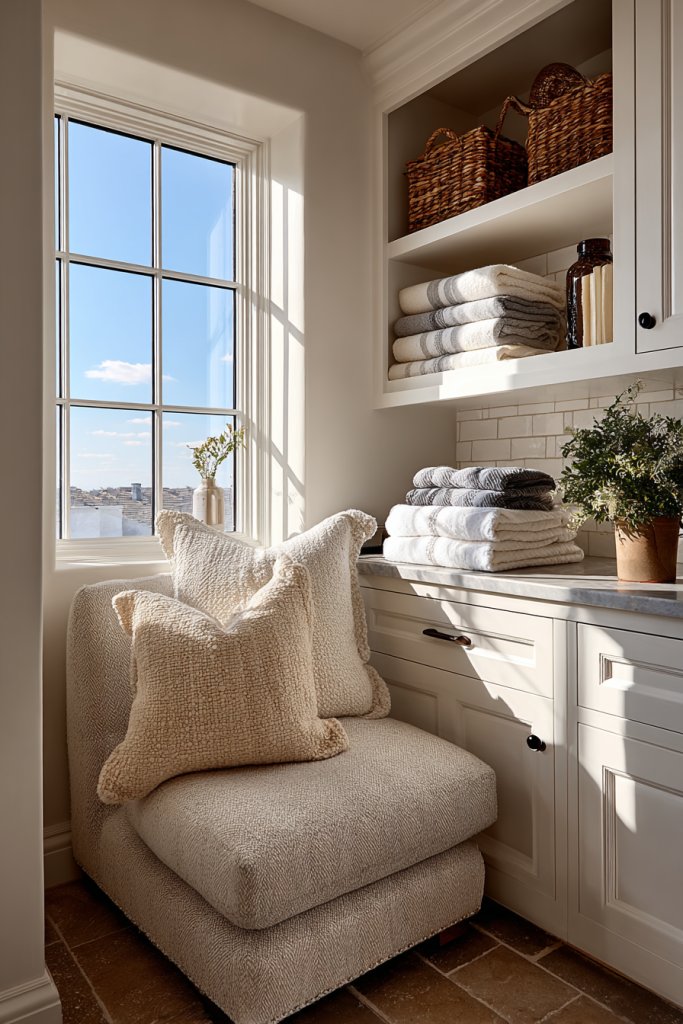
Standing for long periods while folding clothes or waiting for loads to finish can be tiring, especially in tiny laundry rooms. A small seating area provides a comfortable spot to sit, fold, or take a break. It’s an unexpected upgrade that adds comfort and practicality, turning laundry chores into a more relaxing experience.
Imagine a compact bench or stool tucked into a corner or beneath a window, with a soft cushion or textured fabric cover. The seating area is complemented by a small basket or storage ottoman underneath for extra supplies. The space feels cozy and inviting, encouraging you to sit down and take your time. It’s a simple addition that makes a big difference in your laundry routine.
Choose furniture that matches your decor—wooden stools, upholstered benches, or a foldable chair. For small spaces, opt for multi-functional pieces with hidden storage. Decorate with a cozy throw or decorative pillows that add personality. During different seasons, switch up cushions or covers for a fresh look.
Select a lightweight, sturdy piece that fits comfortably within your room’s layout. Position it near your folding station or laundry machines. Secure or attach it if it’s a movable piece to prevent slipping. Incorporate a small side table or tray for placing laundry supplies or a cup of coffee. Regularly clean and maintain for continued comfort.
Add decorative pillows or throws that match your room’s color scheme. Use storage baskets or bins underneath for laundry accessories or cleaning supplies. Personalize with small decorative accents like a textured cover or a faux fur throw. Make it inviting enough to encourage you to sit and relax amidst chores.
A cozy seating nook turns a mundane laundry space into a mini retreat. It’s a small change that promotes comfort and makes chores feel less like a burden. Once you create a dedicated spot to sit, you might even look forward to folding or sorting—seriously!
22. Use Removable Wall Decals for a Pop of Color
Plain walls in small laundry rooms feel uninspiring and dull, draining motivation. Removable wall decals add instant personality and color without permanence or damage. They’re perfect for expressing your style and making your laundry space a cheerful, inviting zone. Plus, they’re easy to change whenever you get bored.
Imagine vibrant decals in playful patterns or inspiring quotes, applied to an empty wall or above storage units. The decals cling gently but securely, creating a dynamic visual focal point. They come in various shapes, sizes, and themes—geometric, floral, or whimsical—adding depth and character. The room transforms from basic to beautiful with just a peel and stick.
Choose decals that match your decor style—modern, vintage, or eclectic. Mix and match shapes or create a custom mural for a more personalized look. Change decals seasonally or for special occasions to keep the space lively. Pair with coordinating wall colors or borders for a cohesive aesthetic.
Clean the wall thoroughly before applying decals to ensure good adhesion. Plan your layout by arranging decals on the floor first, then peel and stick carefully. Smooth out air bubbles with a squeegee or credit card. Avoid applying decals in high-humidity areas or where they might peel prematurely. Regularly clean to maintain their appearance.
Decorate with decals that reflect your personality—motivational phrases, floral motifs, or abstract designs. Add small, matching accessories or borders for a layered effect. Use decals as a backdrop for shelves or storage units, tying the room’s theme together. Personal touches like monogram initials can make the space uniquely yours.
Removable decals are a fun, affordable way to refresh your laundry room’s look anytime. They make decorating simple and damage-free, encouraging creativity. Once you see how a pop of color changes the vibe, you’ll be inspired to keep experimenting and making your space truly yours.
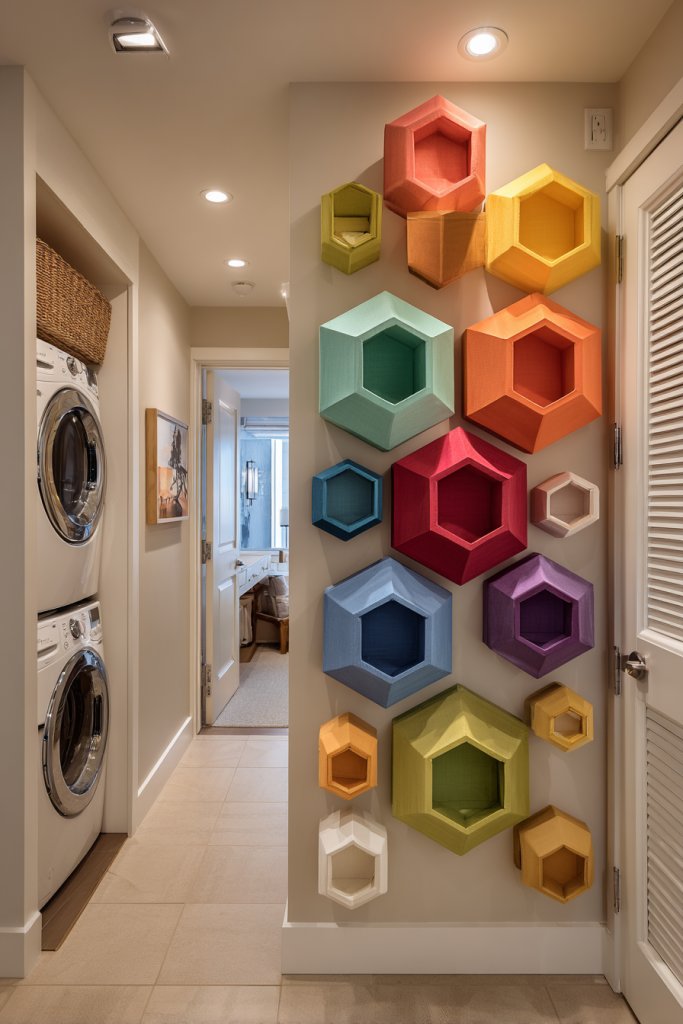
23. Choose Modular Storage Units for Flexibility
Small laundry rooms often need adaptable storage to keep up with changing needs. Fixed cabinets and shelves can limit your options and cause clutter. Modular storage units offer a versatile, customizable solution that grows with your laundry space, ensuring everything stays organized and accessible.
Imagine a set of stackable, cube-shaped units made of plastic, wood, or metal, arranged to fit your layout perfectly. Each module can serve as a bin, shelf, or drawer—whatever best suits your needs. When filled with detergents, fabric softeners, or folded clothes, the units create a tidy, geometric aesthetic. Their modular nature allows you to reconfigure as your storage needs evolve.
Select units in neutral or matching colors for a seamless look, or go bold with contrasting hues. Use different sizes and configurations—stack vertically, line up side by side, or create a combination of open and closed storage. Incorporate wheels or handles for easy reorganization. Adapt the setup seasonally or as your laundry routine changes.
Choose sturdy, durable units that can handle moisture and frequent use. Assemble according to manufacturer instructions, ensuring stability and safety. Arrange the modules to optimize space—place heavier items at the bottom, store frequently used supplies at eye level. Secure units to the wall if needed for safety. Regularly tidy and reassess storage needs.
Decorate with labels or stickers to identify contents easily. Add decorative touches like patterned contact paper or fabric wraps for a personalized look. Incorporate baskets or small containers inside modules to further organize small items. Mix and match styles to reflect your personality and decor scheme.
Modular storage units transform a cluttered laundry room into a sleek, adaptable space. They’re a smart investment that offers flexibility for future needs. Once you see how organized and efficient your laundry routine becomes, you’ll be motivated to keep improving your space—one module at a time.
24. Keep the Floor Clear with Under-Storage Solutions
Cluttered floors in small laundry rooms make the space feel cramped and chaotic. Under-storage solutions help maximize every inch by utilizing the space beneath appliances or shelves. They keep your floor clear, improve safety, and give your laundry area a tidy, open appearance—making chores less stressful.
Picture a set of shallow storage bins or drawers tucked under your washer and dryer, neatly organized with detergents, cleaning brushes, or spare bags. The bins are made of plastic or woven materials, fitting snugly into tight spots. The clean, organized floor creates a sense of calm and order, making your laundry room look more spacious and inviting. It’s a simple but impactful upgrade.
Select low-profile, stackable bins or rolling carts that slide easily beneath appliances. Use labels or color coding for quick identification of contents. For added style, pick containers that match your room’s color scheme or decor theme. Adapt the size based on your appliances and available space, ensuring easy access for maintenance or cleaning.
Measure the clearance space beneath your appliances and select storage solutions accordingly. Install rolling carts or slide-in bins that fit comfortably without obstructing access. Regularly remove and clean out the bins to prevent dust buildup or mold. Reorganize seasonally or as your needs change to keep everything functional and tidy. Check for stability and safety periodically.
Decorate containers with labels, decals, or paint to match your decor. Use decorative baskets or fabric-lined bins for a softer look. Incorporate small hooks or clips on the sides for hanging cleaning tools or accessories. Keep frequently used items accessible for quick chores and seasonal items stored away.
Under-storage solutions make your laundry space more efficient and less cluttered, creating a more pleasant environment. They help you utilize every inch of your room smartly, making chores easier and faster. Once organized, you’ll appreciate the extra space and the tidy vibe that encourages regular maintenance and less stress.
Conclusion
From clever storage hacks to charming decor accents, these small laundry room makeover ideas showcase how you can create a space that’s both functional and stylish. Don’t hesitate to try out different concepts and tailor them to your home’s unique personality. With a little creativity and effort, your laundry room can become a brighter, more organized, and more enjoyable part of your daily routine. Start transforming your space today and enjoy the results of your inspiring makeover!